Overview
Attributes capture additional information at the asset level (e.g. AATD, Material, Serial#, VIN#, Detour length, Contractor, etc.). Any number of attributes can be created (Home 🢡 Attributes), tagged to different groups of assets, and used in risk and/or condition calculations.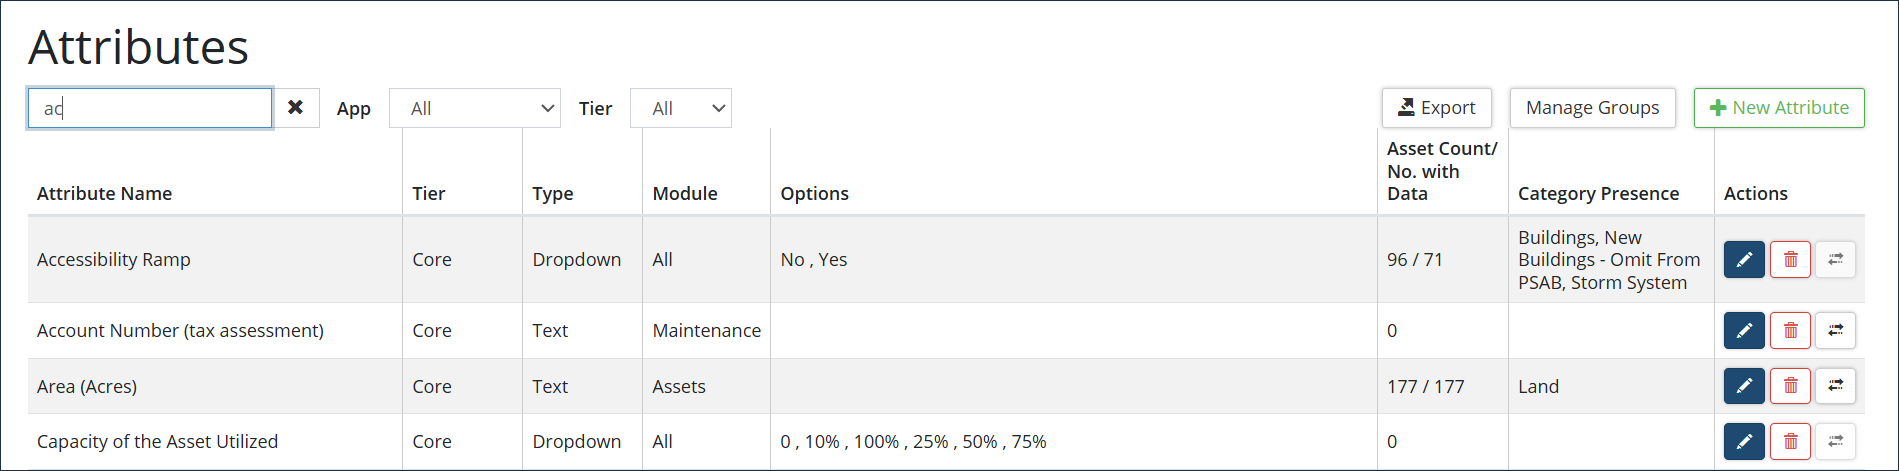
| Column | Description |
| Attribute Name |
Descriptive name (i.e., material, diameter, AADT, etc.) |
| Tier | Only visible on databases with Actionable GIS Attributes ❶ configured. Actionable GIS attributes link asset attributes to GIS attributes so that the values within these attributes populate nightly from the GIS dataset. |
| Type | Attributes can be setup as Text (alphanumeric values), Number (numeric values only), Dropdown list of values, Currency, Link, Date, Toggle (e.g., yes/no), Key-Value Pairs, Number (Allow Zero), or Time |
| Module | The module(s) using the attribute: Assets, Maintenance, or All. |
| Options | Lists the options available for selection on dropdown types of attributes. |
| Asset Count/No. with Data | Total number of assets with the attribute assigned/Number of assets with data in the attribute. |
| Category Presence | Lists the categories that have this attribute assigned to it. |
| Actions | Edit, Delete or Merge attributes. |
Add an Attribute
To create a new attribute:
- Click + New Attribute in the top right.
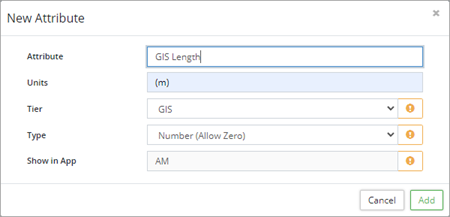
- Enter a Name and the Units of measurement (optional).
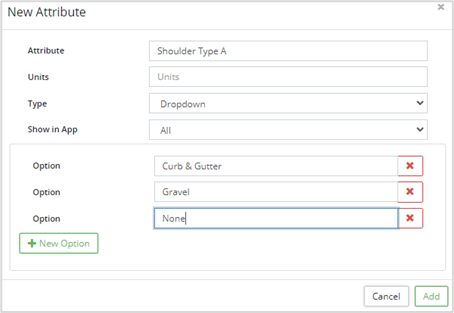
- Enter the Tier: Core or GIS. NOTE: This option cannot be changed once this record is saved.
- Select a Type (e.g., text, number, etc.) and set the module that the attribute will be available for use in the Show in App dropdown list.
- If creating a Dropdown type attribute, click +New Option and enter a value in the Option field. Repeat this process until all dropdown options have been added.
- Under Show in App, select the Module(s) in which this attribute will be available: All, Assets, or Maintenance.
- Click Add .
-
Attributes allow users to collect more detailed data about inventory assets and provide another set of criteria that can be reported on, as well as used in Risk and Condition calculations.
Manage Attributes
To edit attributes:
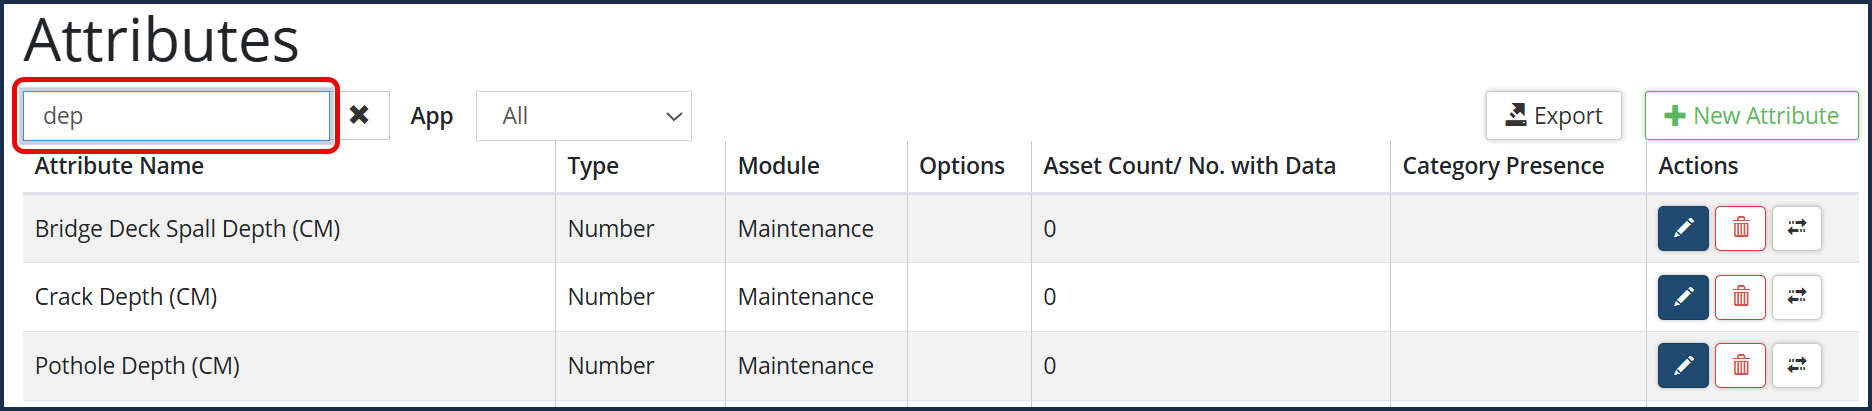
- Locate the attribute. Use the filter option in the top left to quickly filter the list of attributes:
- Click on the Edit icon
 of the attribute to be modified.
 - Edit the fields as needed.
- Click Save. If Type is changed additional options may display.
-
The system may generate an error when changing attribute type.
To delete an attribute:
- Locate the attribute, click
 icon.
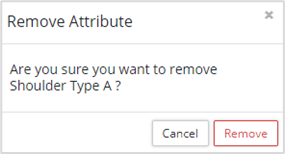
icon. - Review the prompt. Click Remove .
-
Attributes in use within risk frameworks cannot be deleted. To learn more about using attributes within asset profiles refer to our Asset Profiles article.
To merge attributes:
- Locate the attribute to be merged and click its merge
 icon .
 - Select the attribute to merge into.
- Click Merge.
-
Citywide may generate an error when attempting to merge attributes with differing types. Try editing the attribute type so that the attributes are matched prior to merging.
Actionable GIS Attributes
Clients who have GIS configured and integrated with Citywide may want to create specific asset attributes that populate with GIS data. Actionable attributes can be configured to link Asset attributes with GIS fields and have the information updated nightly. This is a custom configuration designed to copy GIS data into pre-defined Asset attributes. Several requirements must be met including:
- GIS setup within Citywide must be level 2 or higher
- Assets which can link to GIS
- Layer, feature, and field data available
- Linking fields on features with unique values
- Attribute Mapping turned on to map attributes
- Core Attribute Create to create GIS Attributes
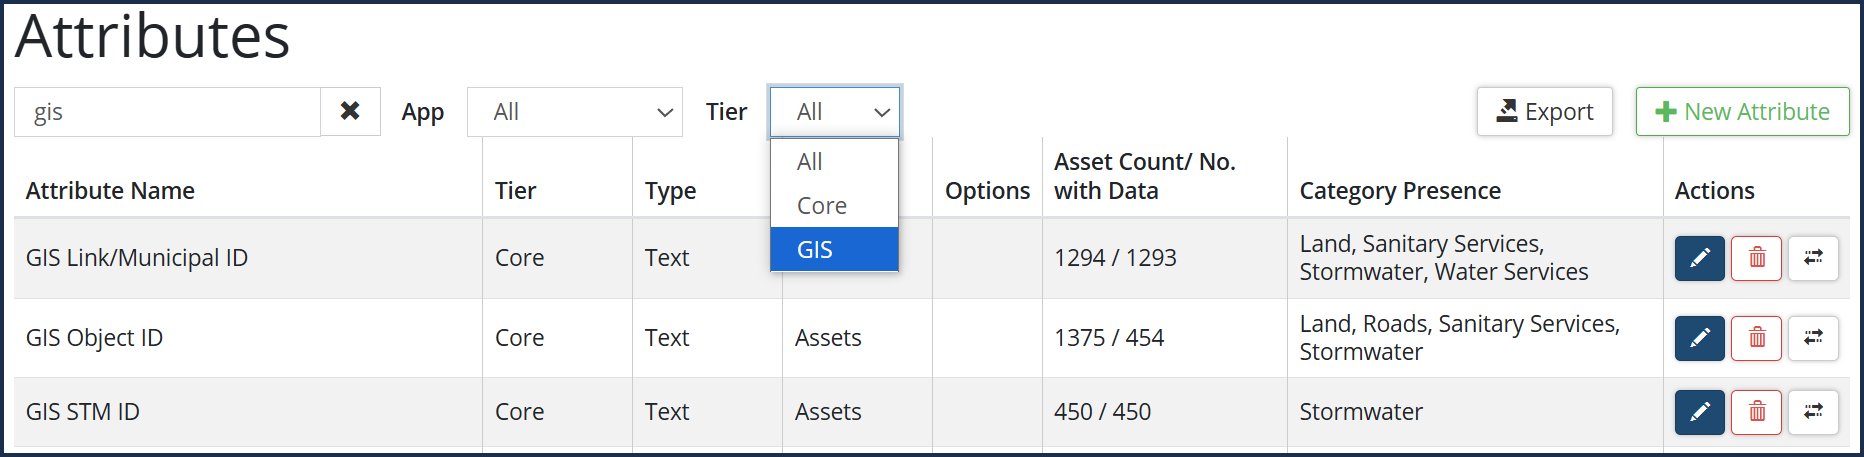
Attributes screen for databases configured with Actionable GIS Attributes: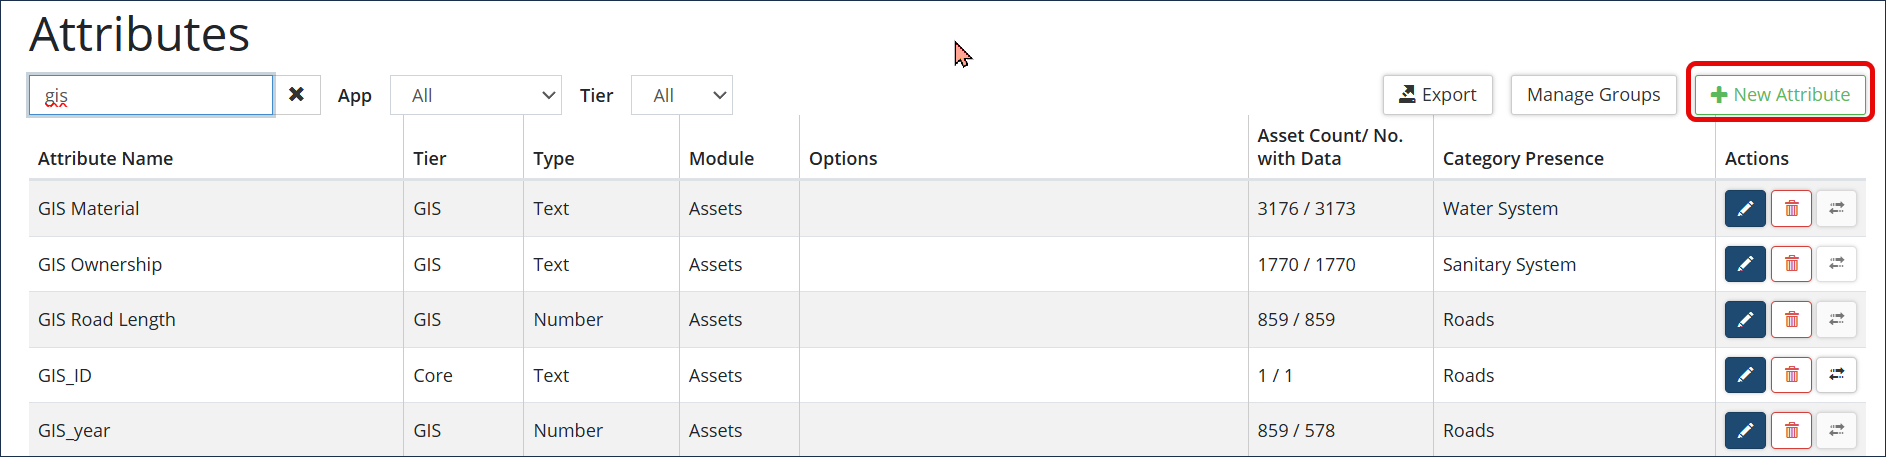
To create an actionable GIS attribute:
- Navigate to Home: Attributes.
- Click +New Attribute .
- Enter an Attribute name and the unit of measurement (optional).
- Select the GIS Tier. This will create a read-only attribute that will auto-populate nightly with data from GIS. Users will not be able to manually edit the attribute at the asset level.
- Select Core to create an attribute that users can manually enter data into at the asset level. Core attributes cannot be linked to GIS attributes; you can only map GIS Fields to GIS Attributes.
- Select an attribute type. Once the attribute is created, the type and tier cannot be changed. Type options include:
- Text: Use for alphanumeric values
- Number: Use for numeric values (does not accept zero)
- Currency: Use for dollar values
- Date: Use for dates
- Number (Allow Zero): Use for numeric values including zero
- Key Value Pairs: Use when a data point is represented by both a key and a value. Citywide will search by key and return the matching value (i.e., key is 001 and its matching value is 0-100 km)
- Time: Allows for time values only. Format is HH:MM if using 24h clock
- Show in App defaults to Assets (Maintenance attributes cannot be mapped to a GIS feature field).
- Click Add . Once created, GIS attributes cannot be edited.
- The next step involves mapping.
View Asset Attributes
At the asset level, Core tier asset attributes can be modified by users (with appropriate permissions) since they do not link to GIS fields. Whereas Actionable GIS Attributes (GIS tier) do link to GIS fields and are read-only. The values in these attributes are pulled from GIS nightly.

The above screenshot shows that Asset #562 has five attributes: Length (m), Pipe Diameter (mm), Pipe Material, GIS Material, and ZZ-GIS Length. The latter two are actionable GIS attributes and cannot be edited at the asset level.
Link Actionable GIS Attributes to GIS Fields
Users with the appropriate permission levels (GIS View and Assets Admin) can create a new field mapping layer within GIS.
To setup a new layer link in Field Mapper:
- Navigate to GIS 🢡 Field Mapper.
- Select New Link. Fill in the data, ensuring that the Linking Keys selected hold unique values among the Assets and Features you wish to link.
To map GIS fields to CW GIS Attributes:
- Navigate to GIS 🢡 Field Mapper.
- Expand the appropriate Layer ❶, click New Mapping ❷.
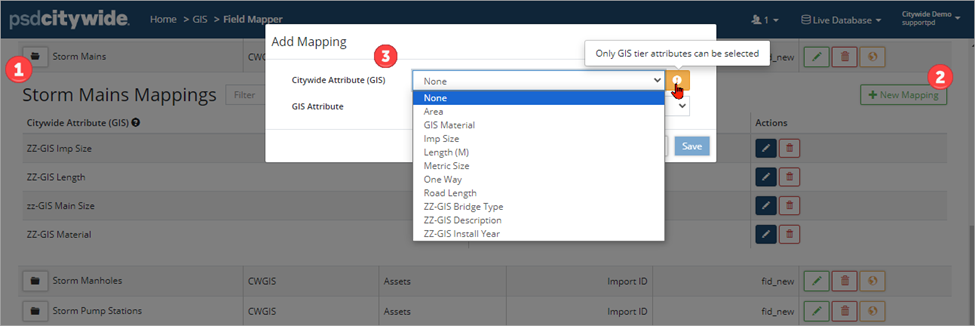
- Select a Citywide Attribute (GIS) ❸. Only GIS tier attributes are available for selection.
- Select a GIS Attribute. The list only shows GIS attributes that are not already linked.
- Click Save.
- Once set, the nightly script runs after 12:00am EST. The script will:
- Link Assets and Properties to GIS Features
- Write attribute values to Assets where appropriate
To edit:
- Navigate to GIS 🢡 Field Mapper.
- Expand the appropriate Layer and click on the right.
- Edit as needed. Click Save.
- If required, click
 to delete.
Attribute Groups are utilized in the Maintenance module to help organize attributes for Service Request and Work Order types in the Work Flow. 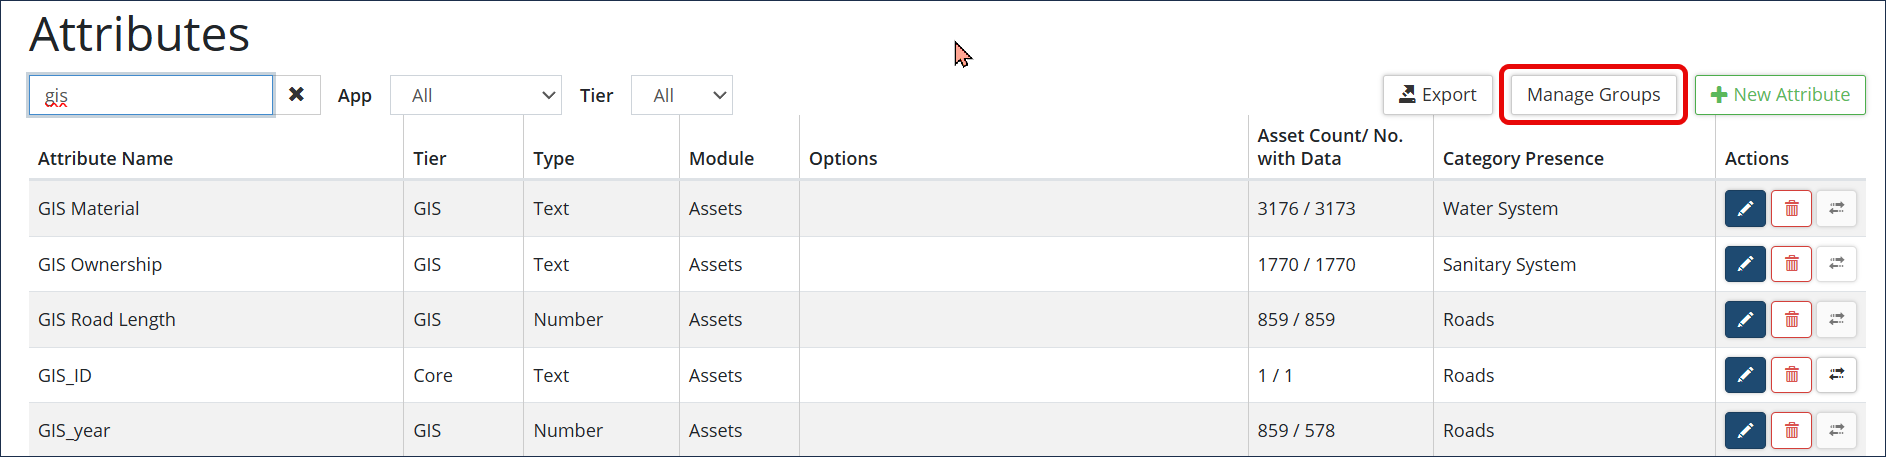 To create Attribute Group labels:
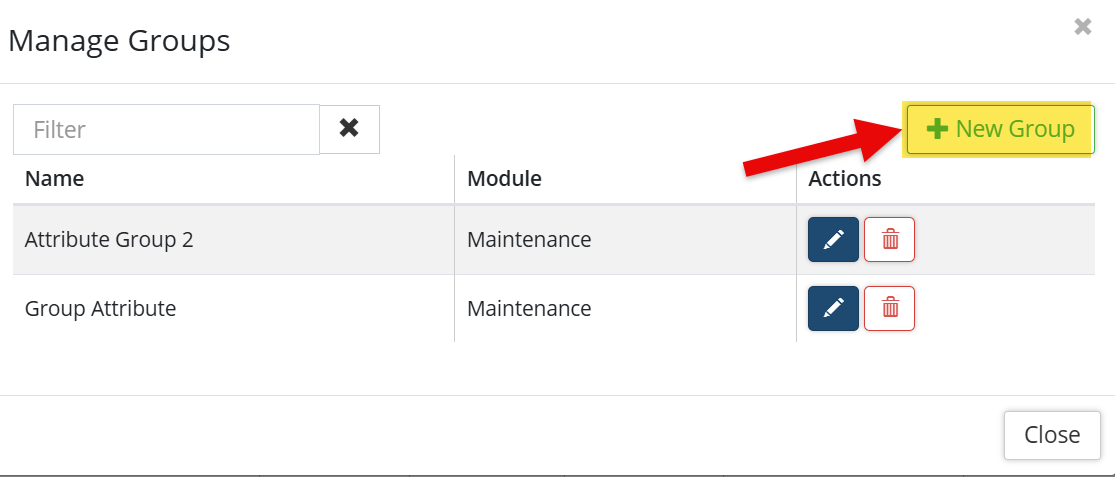
- Click Manage Groups
- Click + New Group
- Type the Attribute Group name
- Click Add
To create Attribute Groups:
- Navigate to Home 🢡 Attributes. The Attributes section allows you to create Attribute Group names.
- Click on Manage Groups and +New Group button to Add a new Name to the Manage Groups window.
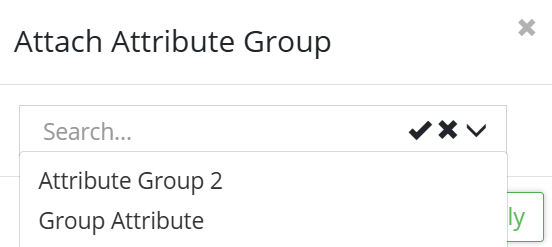
To add Attribute Groups:
When adding or editing Service Requests, Work Orders and Deficiency Codes in Maintenance, you are able to add new or attach attributes into a Group. Click on the Group button to bring in the Attribute Group name that you have created. You are then able to add or attach attributes to each Group.