
Overview
Create a Work Order when an asset requires maintenance or repair work. The type of work to be performed will be identified in the work order. There are several ways to create a work order:
- Work Order wizard
- From a Service Request
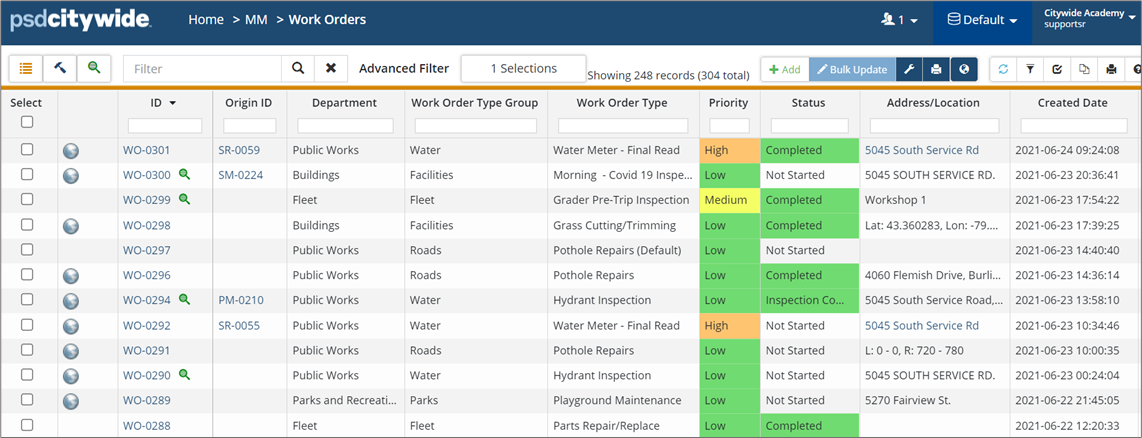
To view Work Orders, navigate to Home 🢡 Maintenance 🢡 Work Orders.
Work Order Wizard
Users with the appropriate permissions can create Work Orders from the WO grid.
- Click +Add to open the New Worker Order wizard.
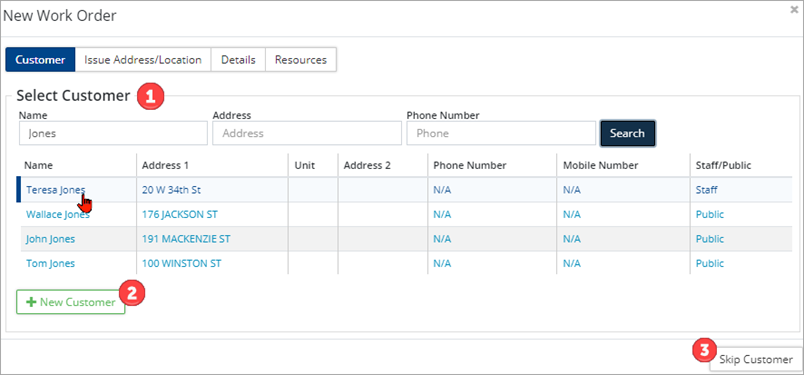
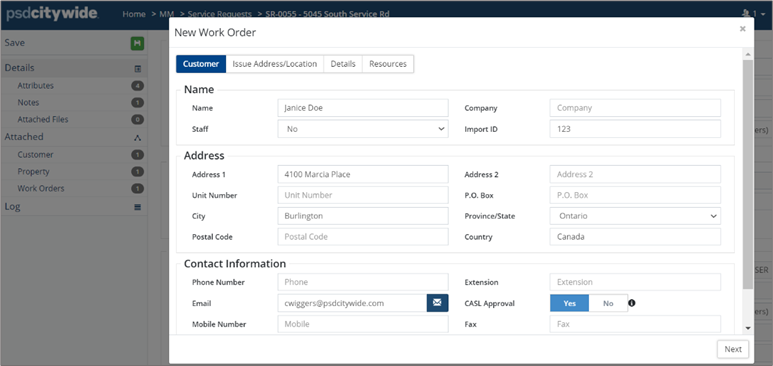
- Select a Customer. Three options are available when completing the customer section:
- Select an existing customer ❶: Enter a Name, Address and/or Phone Number then click Search. Select the appropriate contact from the resulting list of matches.
- Add a new customer ❷: Click + New Customer to open the New Customer window and enter new contact information.
- Skip Customer ❸: If customer information is not needed, click Skip Customer in the lower right corner.
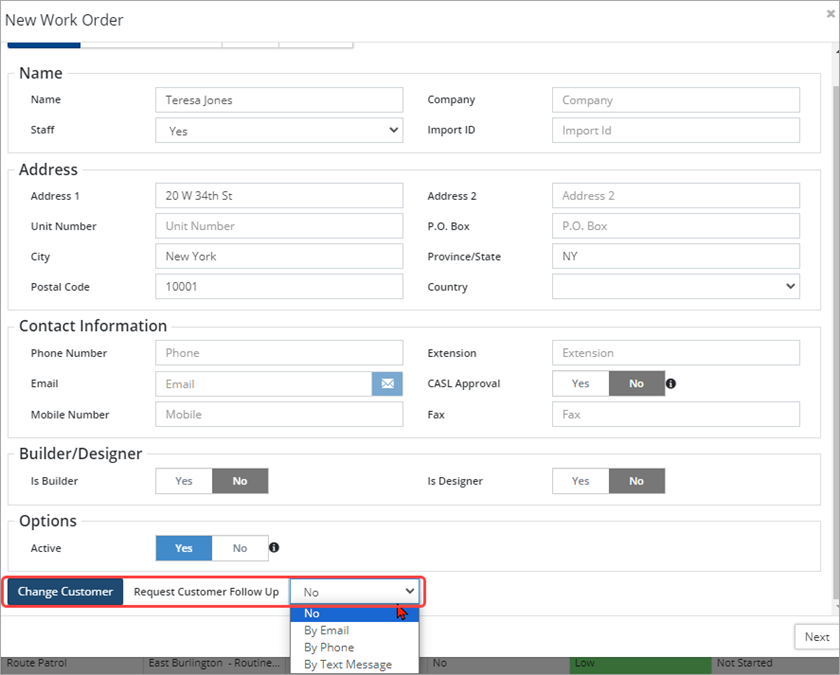
- Enter and/or review customer details. Use the Change Customer button in the lower left corner of the window to update information with a different customer.
- If the customer requires follow-up, click the Request Customer Follow Up dropdown at the bottom of the wizard and select the appropriate option from the drop-down list.
-
In accordance with Canada’s Anti-Spam Legislation (CASL), any customer that is set to receive system generated emails, must have the CASL Approval toggle set to Yes.
- Click Next.
- Select a work order Issue Address/Location (e., the location where work is required). Options include:
- Select Customer Property: Use this option when the work to be done is at a property owned by the customer. Click the linked property information displayed in the table.
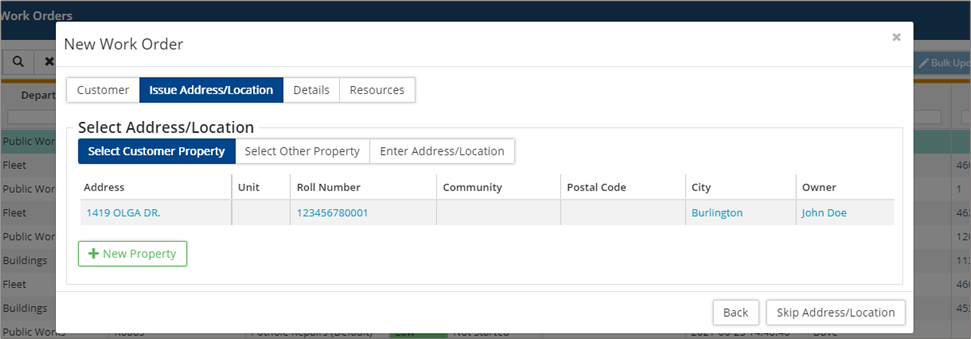
- Select Other Property: Use this option when the issue address is different from the Customer’s address. Search by Address, Unit, Postal Code, Roll Number or City.
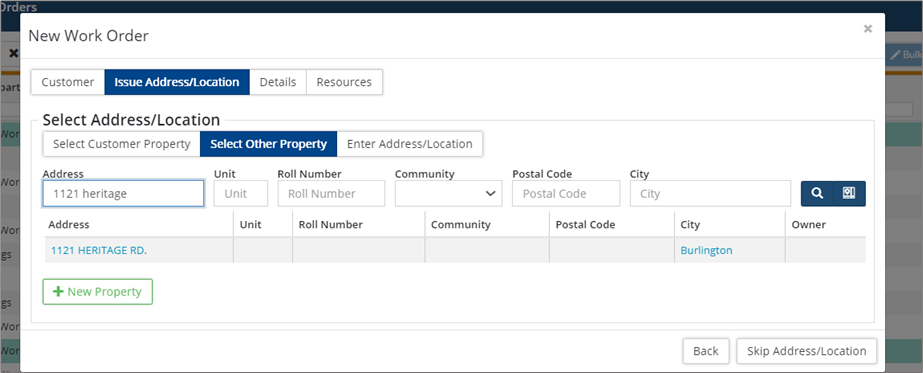
-
Use the Map Search button
 to select the issue address using a linked parcel layer in GIS.
 - If the property does not exist in the database, click +New Property and enter new property information. Click Add when done.
- Enter Address/Location: Use this option to manually add an address. Enter an address in the Address/Location field and then click
 to select a location on the GIS map.
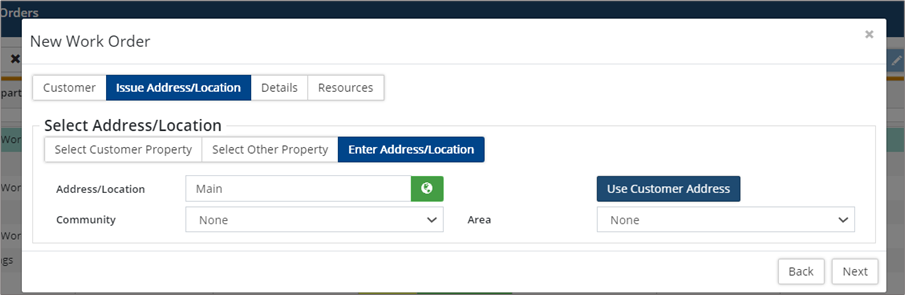
- Click on the desired location in the map view. A marker is placed on the closest property address (not the Property itself). To use with the exact coordinates of the marker then toggle Use Exact Location to Yes.
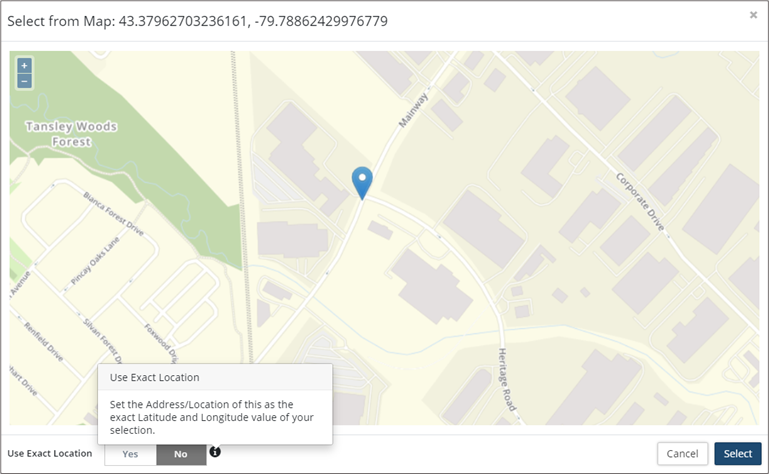
- Click Select to be taken back to the New Work Order The Address/Location field will populate with the address (or coordinates) selected in the map view.
- Click on the desired location in the map view. A marker is placed on the closest property address (not the Property itself). To use with the exact coordinates of the marker then toggle Use Exact Location to Yes.
- Once a property is selected, it can be removed by clicking the Change Property
- Select Customer Property: Use this option when the work to be done is at a property owned by the customer. Click the linked property information displayed in the table.
- Click Next.
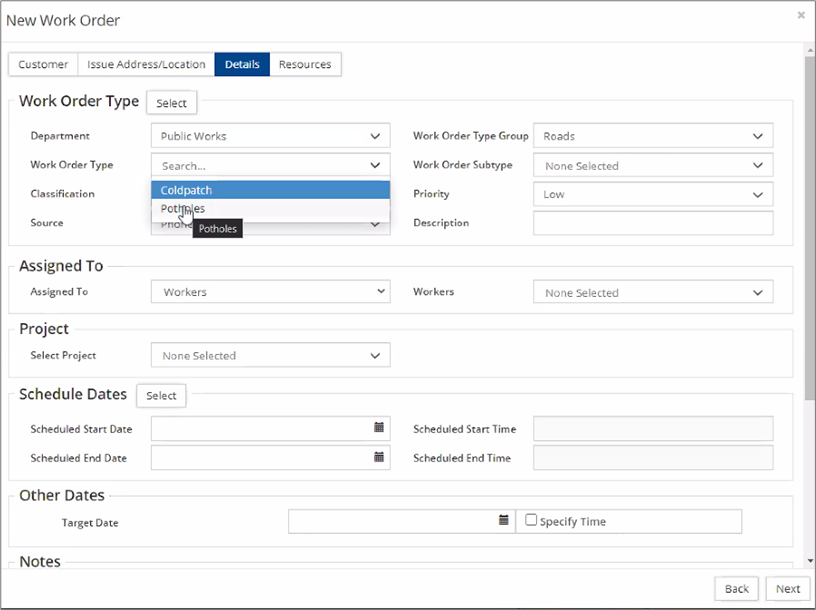
- Enter work order Details such as Department, Work Order Type (WOT), Priority, etc.
- Click the Select button to choose from a list of work order types. This method will auto-populate several of the fields in the Work Order Type section based on your selection.
- Alternatively, select a Department, Work Order Type Group, and Work Order Type. Be sure to select a department first as this will filter out the work order type fields.
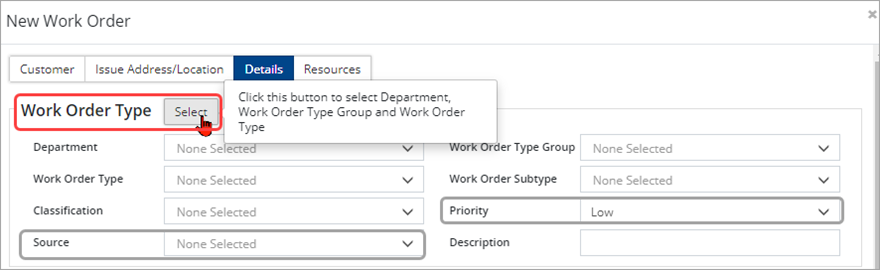
- Select a Source and set a Priority.
- Assign the work order to one or multiple Workers, a Crew or a Vendor/Contractor. To assign the work order to multiple workers, hold the Ctrl key and click on each name in the Workers drop-down list.

- Schedule Start and End Dates/Times where applicable. Use the Select button to set the dates/times from a calendar view.
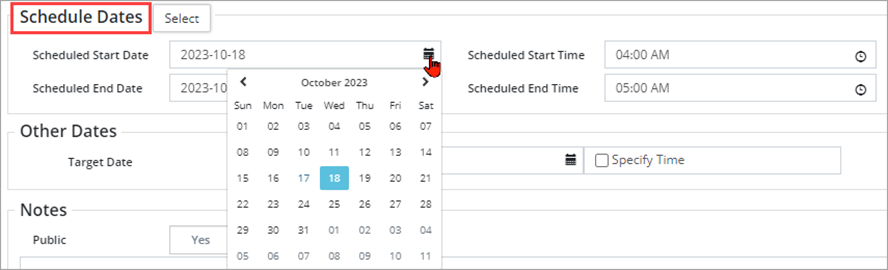
- Schedule Target Dates for reporting where applicable. Check þ Specify Time to set a scheduled time.

- Complete any Attributes that have been assigned at the WOT level. For example, in the screenshot below, the Pothole Lane Location and Pothole Type attributes are specific to the selected Work Order Type. Attributes can be set as optional or a required field that the user must complete. Required attributes will include a
 button.
- Additional Attributes can be added. Click the Attach drop down list and select one or more attributes (hold the Ctrl key to multi-select) and then click the Select Attributes The list of attributes will be limited to only those attributes that have been set up as All and/or Maintenance attributes on the home page. (Home 🢡 Attributes).
- You can also create a new attribute using the
 button.
-
Attributes can be setup as text, number, dropdown, currency, link, date, toggle, number (allow zero) or time so fill in the value(s) accordingly.
- Add Notes as needed. These are helpful instructions for the worker, as well as track the progress on the WO when added by the assigned worker or supervisor. Set the Public flag to Yes when notes should be made visible to anyone with access to the work order.
- Attach Files such as a reference document or picture of the asset/issue, by clicking +Select File(s).
- Click Next.
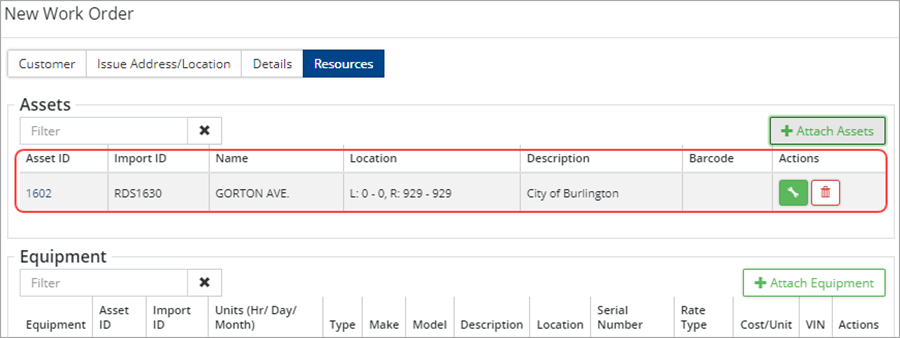
- Assign Resources such as Assets, Equipment and Parts/Material as needed.
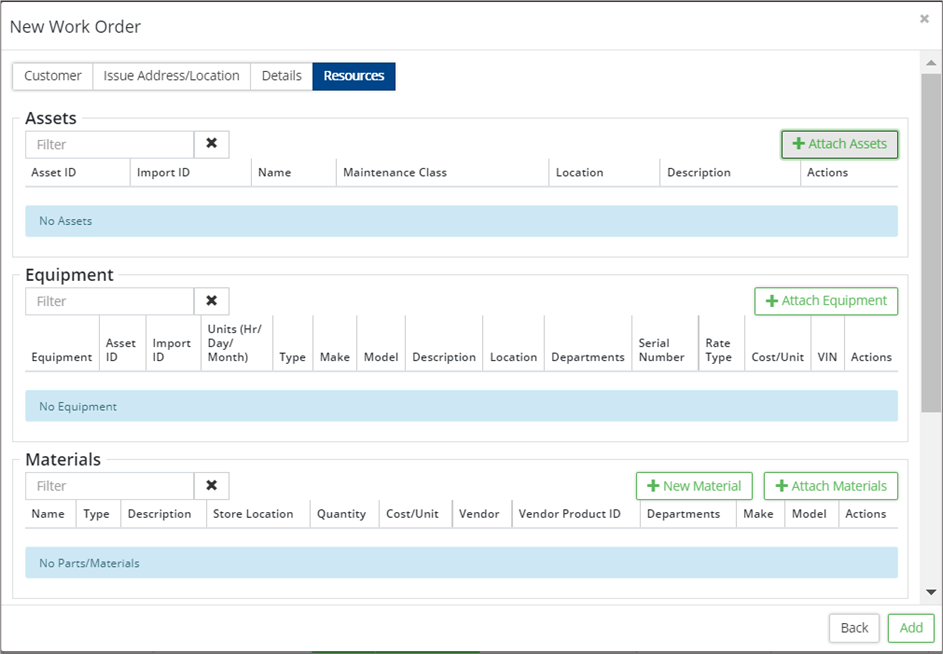
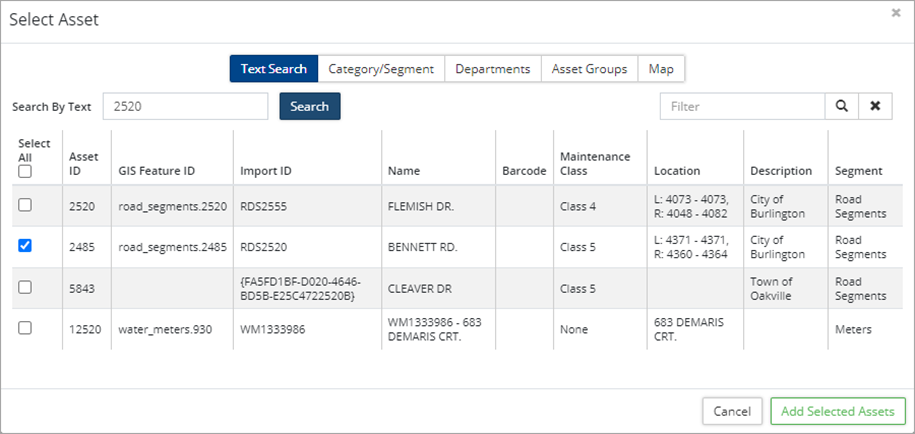
- Click +Attach Asset to link an asset(s) to the work order.
- Search by Text, Category/Segment, Department, Asset Group or GIS Map. Once the asset(s) has been located, check þ the asset(s) and then click Add Selected Assets.
- Indicate whether the asset should be taken out of service/downtime using the action button on the right of the attached asset.

- Search by Text, Category/Segment, Department, Asset Group or GIS Map. Once the asset(s) has been located, check þ the asset(s) and then click Add Selected Assets.
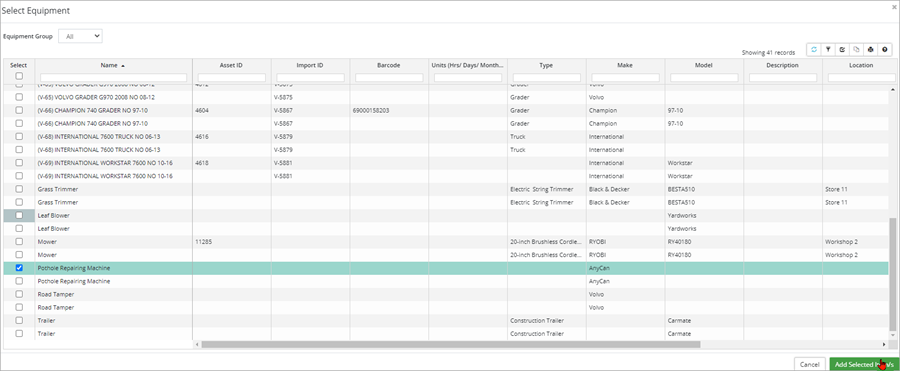
- Click +Attach Equipment to link one or multiple pieces of equipment to the work order and track costs as needed.

- Click +Attach Materials to add materials to the work order and track inventory as well as costs.

- The +New Material button is used to create new material to attach to the work order.
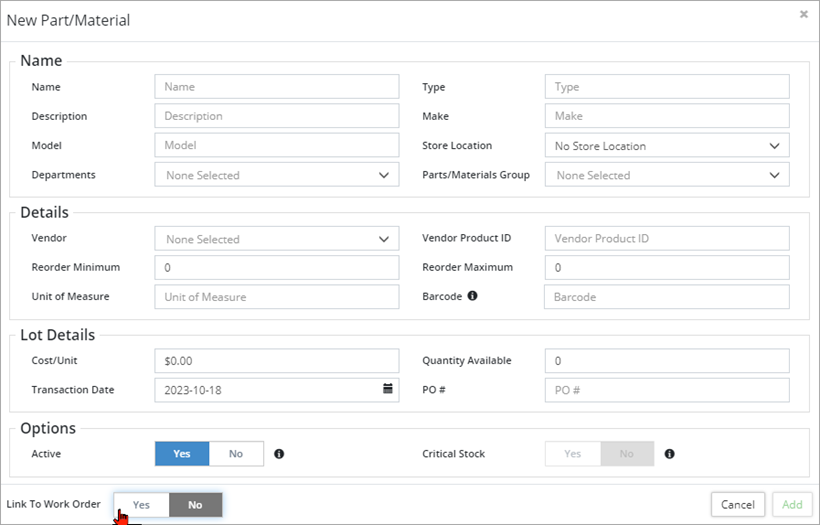
- The +New Material button is used to create new material to attach to the work order.
- Click +Attach Route to attach a route patrol to the work order.
- Processes can also be assigned and are used as a checklist outlining the individual steps required in completing the work order.
- Click +Attach Asset to link an asset(s) to the work order.
- Click Add. Once the new work order is added, a WO ID # is assigned and opens on screen. Review the WO and complete/update fields as work progresses.
Review and Complete the Work Order
Once the work order has been created it opens and displays on screen. The left navigation pane provides access to all details and linked elements such as files, assets, equipment, etc.
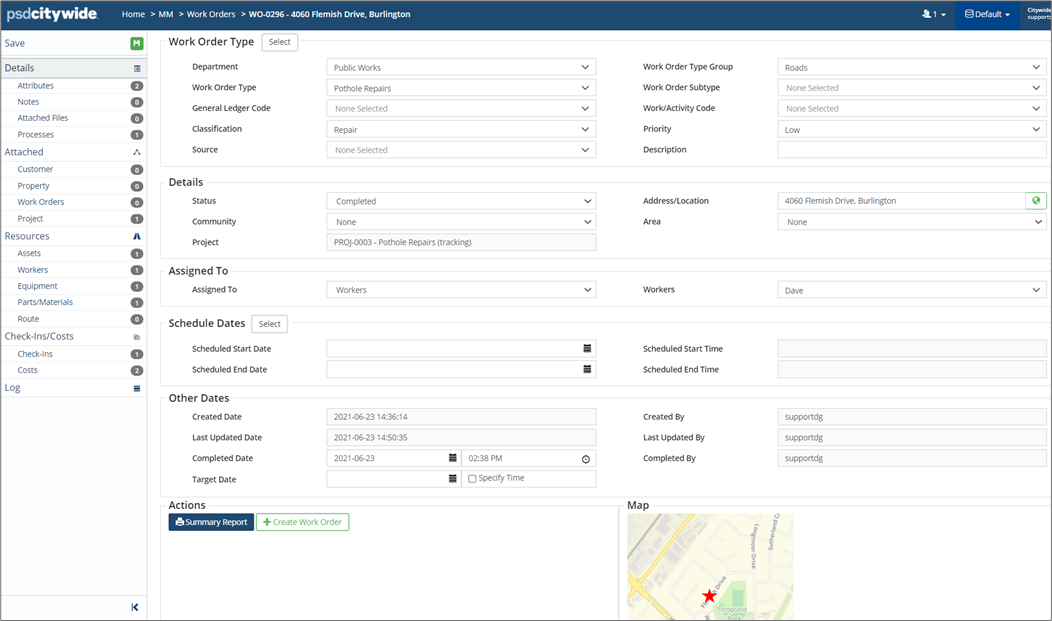
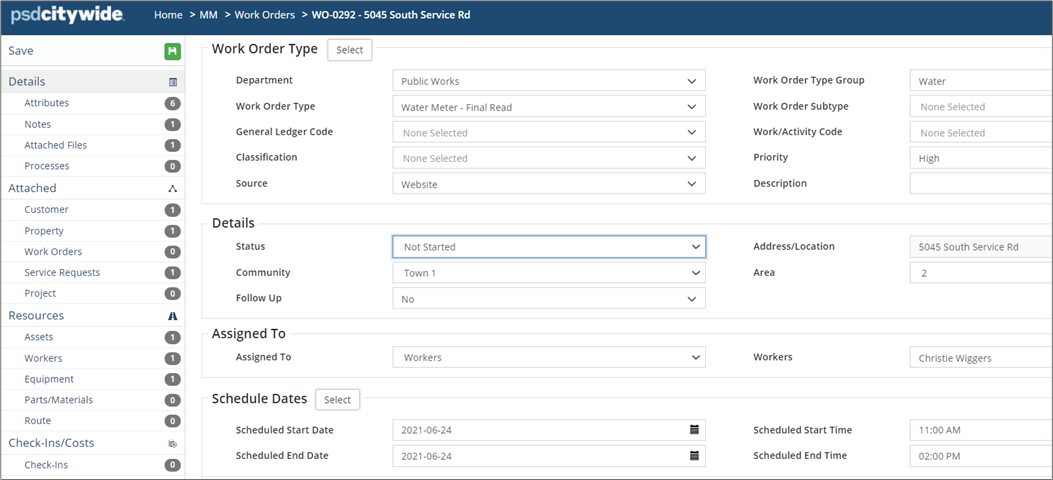
Details
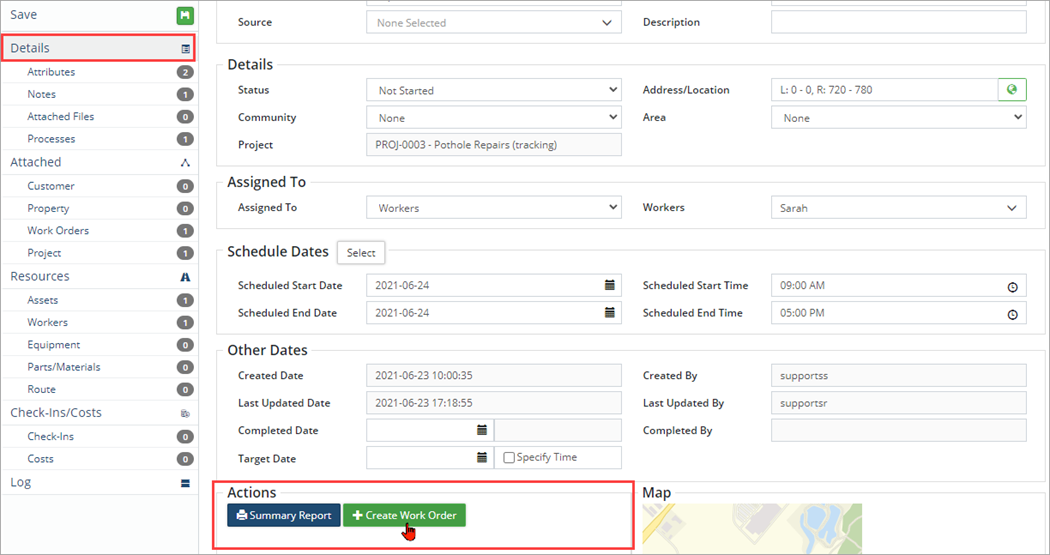
The WO Details page displays all relevant information about the work order. General information, such as Work Order Type, Details, Assigned To, Schedule Dates, etc., is captured on this page. Action buttons at the bottom of the screen include Print Summary Report * and +Create Work Order which is used to create a linked child WO.
*Optional: The Summary Report can include a digital user signature if desired. Refer to the User Preferences article for steps on how to set up a user signature in Citywide.
To modify any of the information:
- Click the field to update, and type/make your new selection(s).
- Click Save at the top of the navigation pane to submit your change(s).
Attributes
Additional information is captured with Attributes. To view or modify attributes, click Attributes in the navigation pane. Users with the appropriate permission levels can also add or remove attributes on this page.

-
To prevent users from editing attributes attached to a WO, set the Lock Attributes flag to Yes at the WOT level.
Attributes can be arranged in groups by clicking on Manage Groups, then adding a New Group within Attributes of the Core Administration.
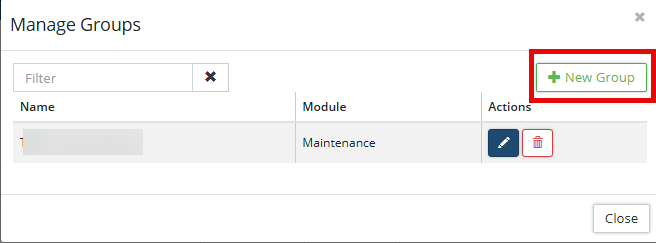
In the Work Order within Attributes, the Select Attribute Group button allows users to add a group attribute and attach from the dropdown a selection of multiple attributes.

GPS Coordinates can be added as an Attribute. Select Location within the Tier drop down and Edit GPS Coordinate using the map. 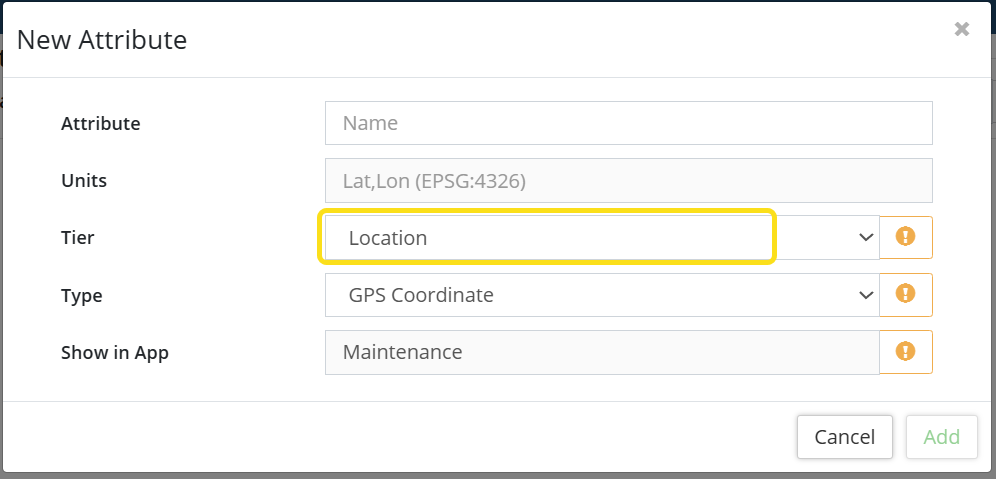

Notes
Notes provide a dated history of actions taken on the work order. Click Notes in the navigation pane to view all notes or add additional notes/comments for the Work Order.
Click +New Note to add a new note or ![]() /
/![]() o edit/delete a note.
o edit/delete a note.
Attached Files
Images and other digital documents can be uploaded and attached to work orders.

- Click +New File.
- Click Select File(s) and locate the file to upload or Drag & Drop a file onto the New File
- Enter a Description.
- Click Upload File.
- Click Save.
Processes
Processes are setup in the background and added to Work Order Types or Work Orders as needed. In the screenshot below, a Pothole Repair process has been attached to the WO via the WOT template. This process includes four individual tasks.
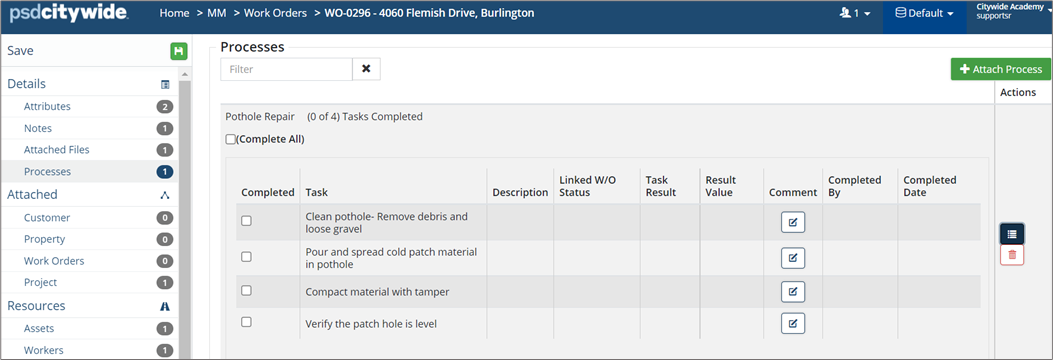
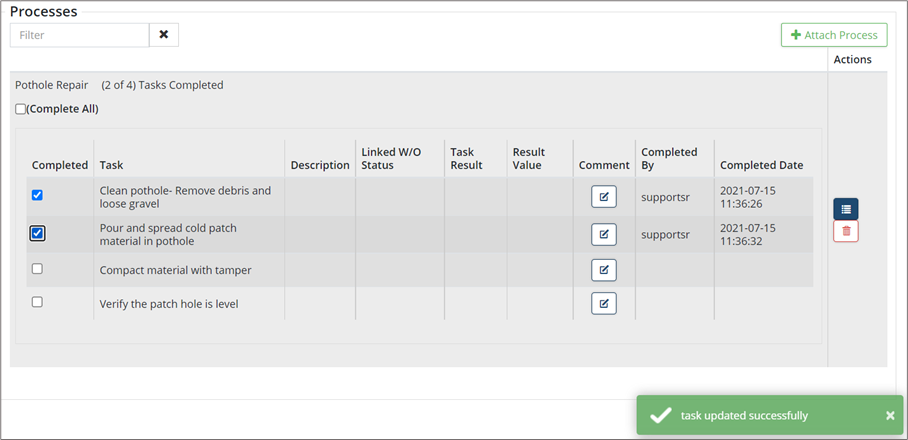
To mark process tasks as complete:
- Check ✅ each task once completed and add Comments as needed. The system will automatically record the date/time and username when a task is checked as complete.
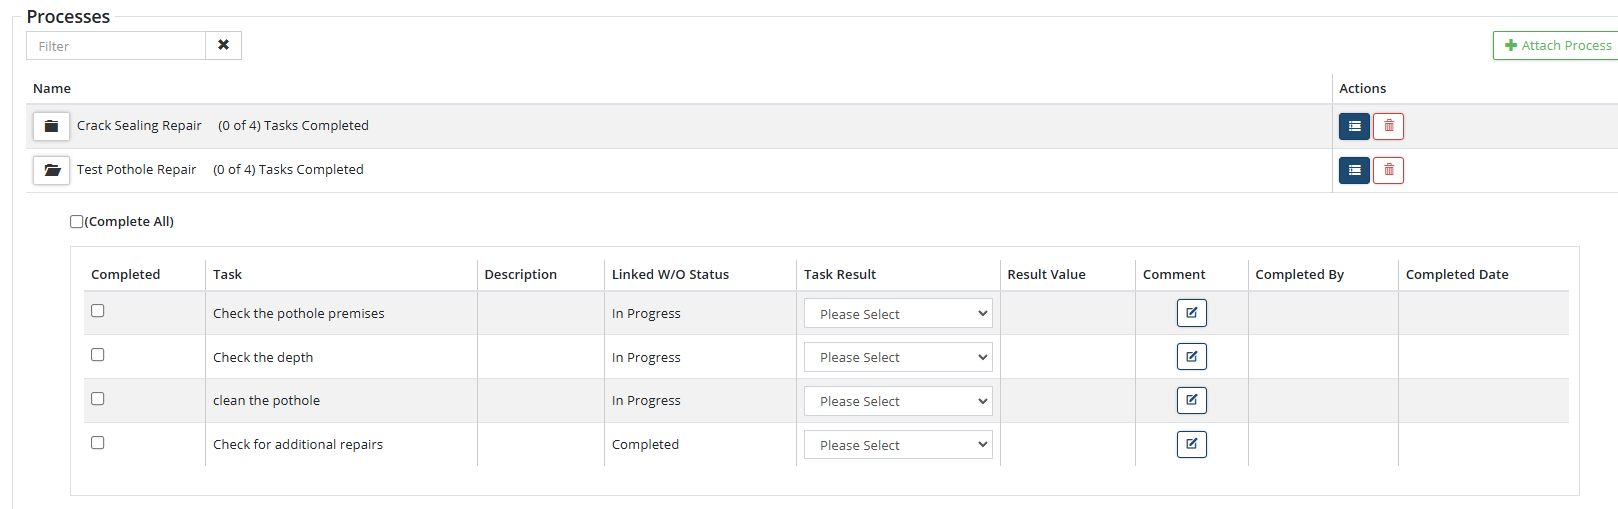
To add a process(es) to a work order:
- Click +Attach Process.
- Locate and check þ a process(es). Use the Filter to quicky filter through the processes list.
- Click Add Selected Item(s).
- Click Save.
Multiple Processes attached to a WO can be expanded/collapsed within both the web application and mobile app view.
Attached
In the Attached section of the navigation pane, general information related to any attached Customer, Property, Work Orders, Service Requests, etc. be accessed in this section.
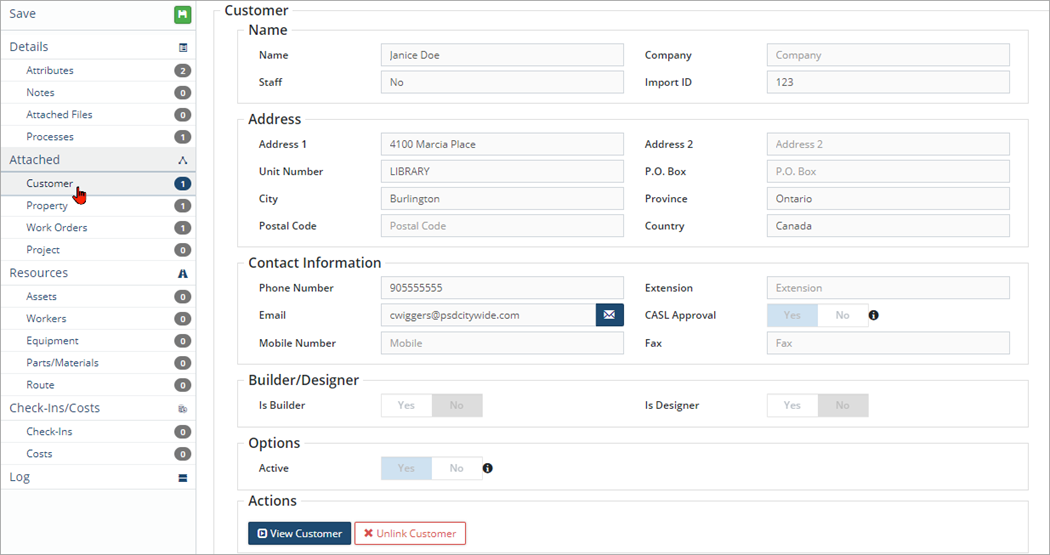
Customer
Customer details are stored on this page. Usually work orders are generated internally within municipal organizations and no customer information is attached. However, a service request linked-work order will have a customer copied over from the linked SR.
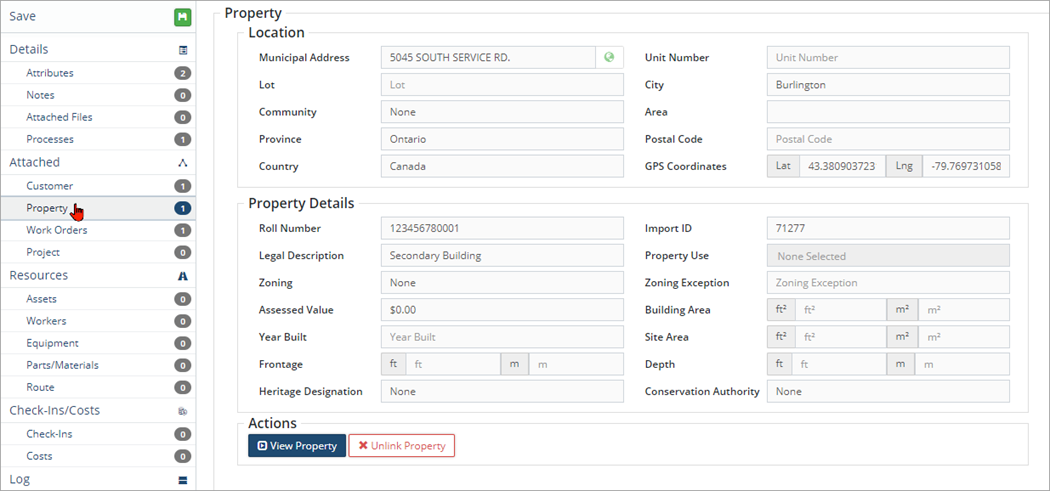
Property
Property details are stored on this page. Usually, when an Asset is attached to a work order as a Resource then the asset’s location will be copied into the work order. Properties can be linked or unlinked similar to property information within a service request.
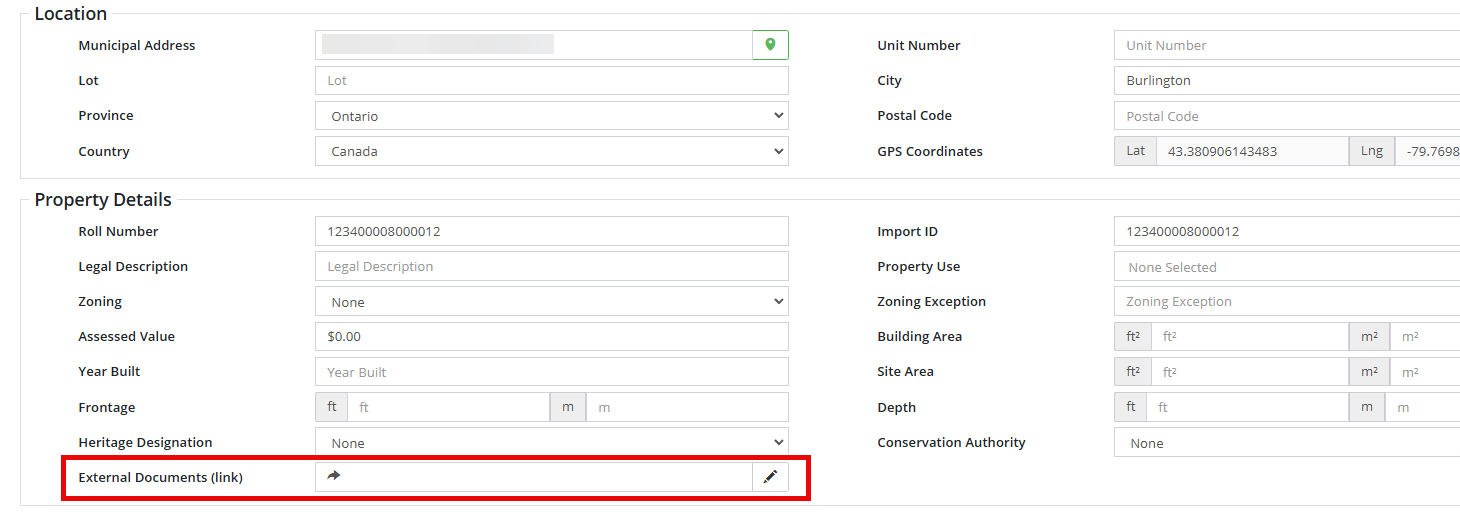
When viewing Property Details, the External Documents (link) field can be utilized by including a URL link for (eg.) a document management system to access historical data/files. A bulk upload of External Document (link) can be done using the Upload Center template for Properties.
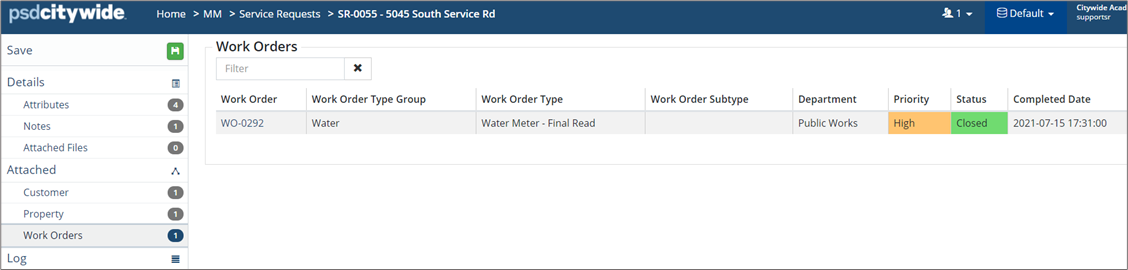
Work Orders
All Work Orders linked to the current work order can be viewed on the Work Orders page. This screen will show whether any child workorders were created. A child work order is created when additional work is needed to complete the initial work order. Click here for more information.

Service Requests
Any SRs linked to the current work order can be viewed on the Service Requests screen.
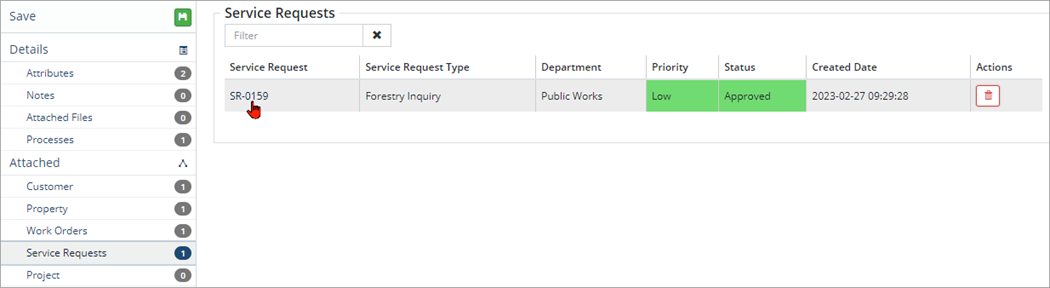
-
You can link service requests to work orders, but you cannot link from work orders to service requests.
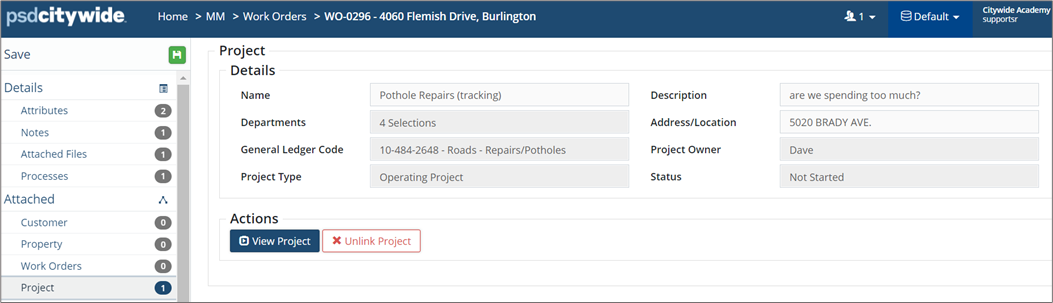
Project
Projects that have been assigned to work orders can be viewed on the Project screen. Project details such as project type, project owner, etc. are shown and users can navigate into the project using the View Project button located under the Actions heading.
Resources
In the Resources section of the navigation pane, general information related to attached Assets, Workers, Equipment and Parts/Material can be viewed.
Assets
Users with the appropriate permissions can link one or multiple Assets to a work order. Click the Asset ID# to view asset details.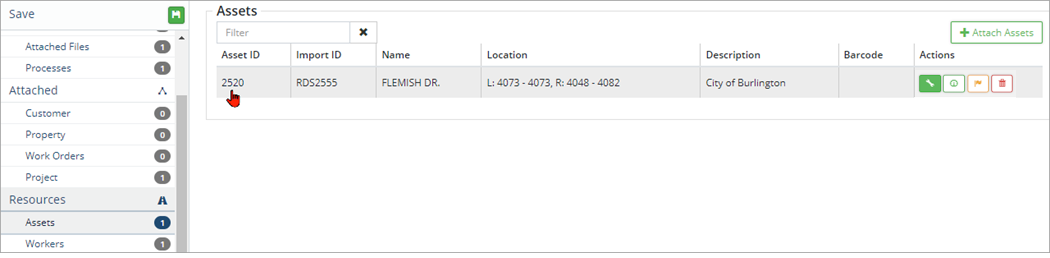
To select/modify asset selection:
- Click +Attach Assets.
- Search for asset(s) by Text, Category/Segment, Department, or Asset Groups, or directly from the Map.
- Once the asset(s) has been located click Add Select Assets.
- Click Save.
Workers
Users with the appropriate permissions can link one or multiple Workers, a Crew or a Vendor/Contractor to a work order. All attached workers are listed on the Workers screen.
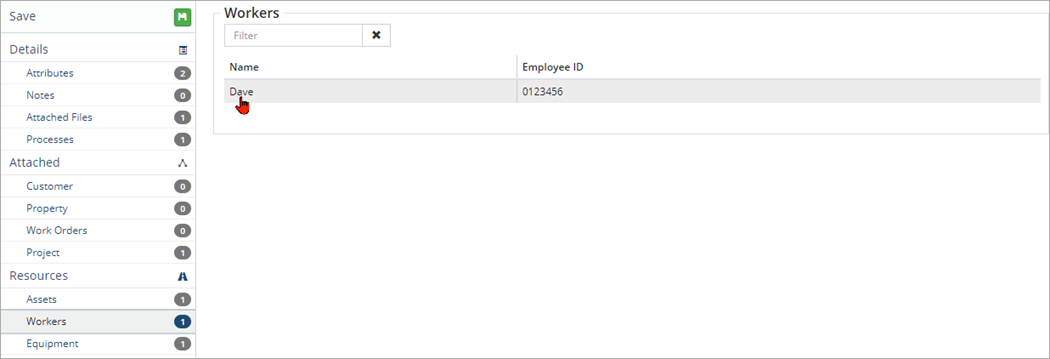
Depending on permission settings, worker details can be viewed from this page. Click the Worker’s name to view Worker details.
Equipment
Users with the appropriate permissions can link a work order to one or multiple pieces of equipment which then allows costs to be tracked. All attached equipment can be viewed on the Equipment screen. The name and Asset ID# are linked.

Depending on permission settings, user can view asset details by clicking the equipment name or Asset ID#. Users can also add usage to the equipment using the Action buttons on the right.
To add usage:
- Click Add Usage on the right.
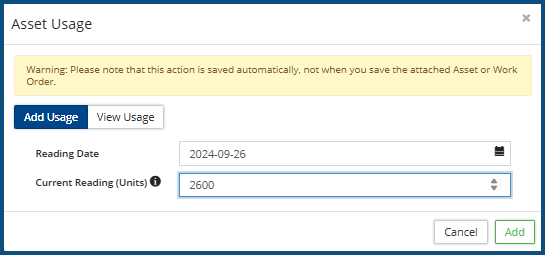
- In the Asset Usage window update the Reading Date if needed and enter a usage amount in the Current Reading (Units)
- Click the View Usage tab to view previously recorded usage amounts.
- Click Add.
To edit units and rate type:
- Click Edit on the right.
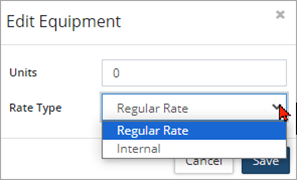
- In the Edit Equipment window change the number of Units of the equipment and the applicable Rate Type.
- Click Save.
To select/modify equipment selection:
- Click +Attach Equipment.
- In the Select column check þ all required equipment.
- Click Add Selected Item(s).
- Click Save.
Parts/Materials
Users with the appropriate permissions can link a work order to Parts and Material which then allows costs and inventory to be tracked. All linked parts and material can be viewed on the Parts/Materials screen. Click the Name to view item details.
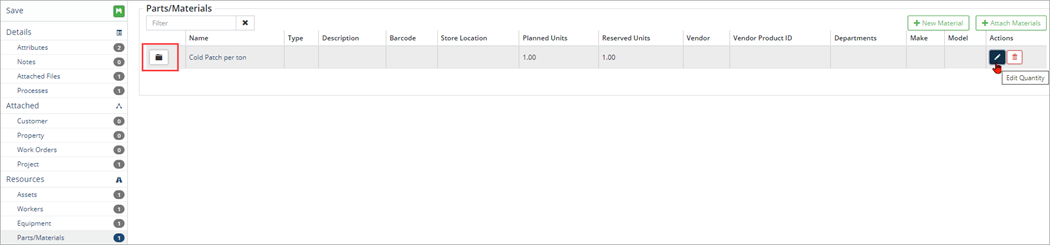
To view cost/unit and work order units assigned:
- Click to the left of the name column.

- The record will expand to show Cost/Unit, WO Unit Assigned, etc.
To edit quantity:
- Click Edit on the right.
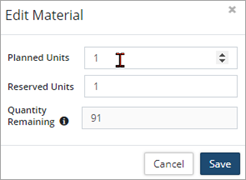
- Enter Planned Units and Reserved Units as needed.
To select/modify material selection:
- Click the +Attach Material. Use the Material Groups drop-down to filter the list if needed.
- In the Select column check þ all required parts/material.
- Click Add Selected Item(s).
- Click Save.
-
Click New Material to create a new item to attach to the work order.
Route
If the work order was created during a Patrol, that Route Patrol is linked on the Route page.
Check-Ins
Check Ins are used by assigned workers to record time spent on completing work related to the work order.
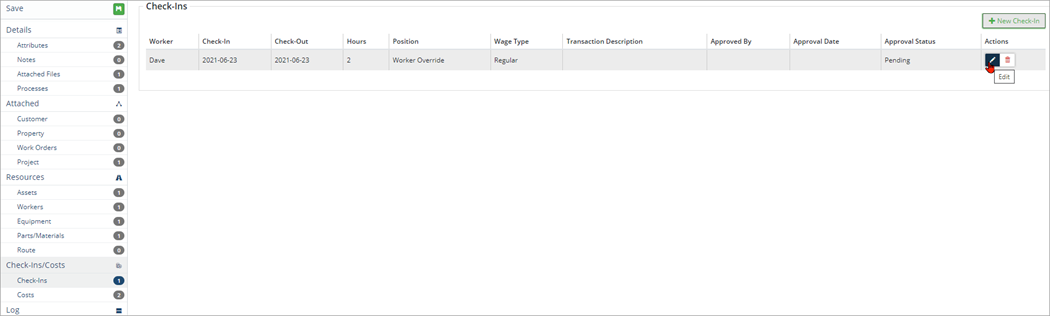
To add a new Check-In:
- Click +New Check-In.
- Select a Worker, Position, and Wage Type.
- Select a Method, verify the Start/End Date, and enter Hours.
- Set Cost Attached Equipment and Order Complete to Yes when appropriate.
- Click Add.
- Repeat steps 1-5 to record additional time entries.
- Click Save.
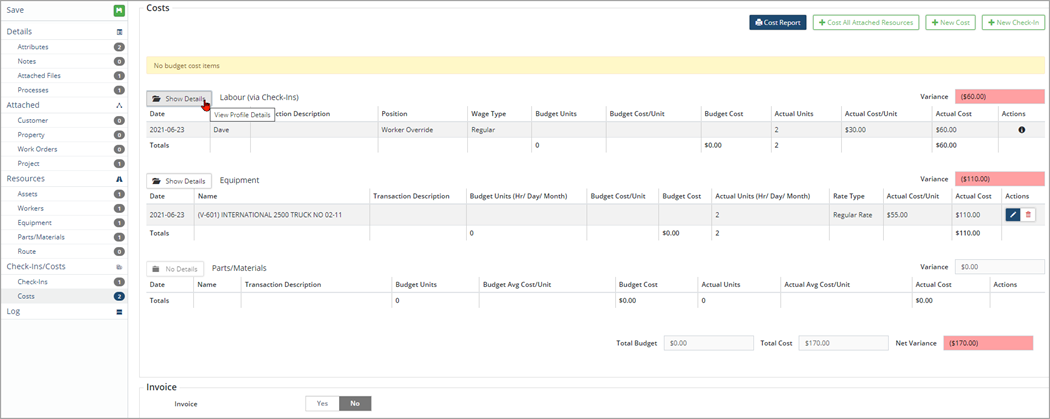
Costs
Check-In information is used to calculate labour costs. All attached resources and associated costing information can be viewed on the Cost screen. Costing information includes:
- Attached Labour costs based on check-in entries
- Attached Equipment costing based on equipment rates assigned
- Attached Parts/Materials costing based on number of units used in completing the work order
- Invoice Number can be entered here when applicable
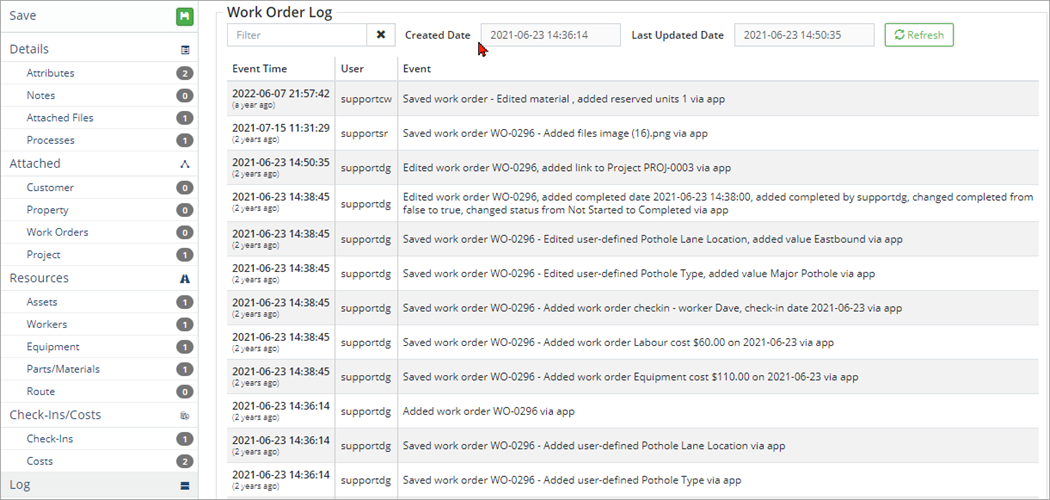
Log
Citywide automatically logs every change made to the database. All event data related to the current work order can be viewed on the Log screen. Use the Filter bar to quickly locate event activity by a keyword search, creation date, or last updated date.
Create a Service Request linked-Work Order
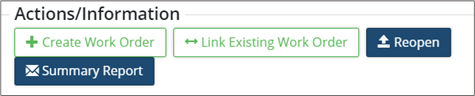
Note: Alternatively, the SR can be linked to an existing work order in place for the same issue by clicking Link Existing Work Order. The SR may be closed or dismissed, and a Summary report* may be generated and printed.
*Optional: The Summary Report can include a digital user signature if desired. Refer to the User Preferences article for steps on how to set up a user signature in Citywide.
- Navigate to Home 🢡 Maintenance 🢡 Service Requests.
- Locate and open a service request (e., click the SR-ID).
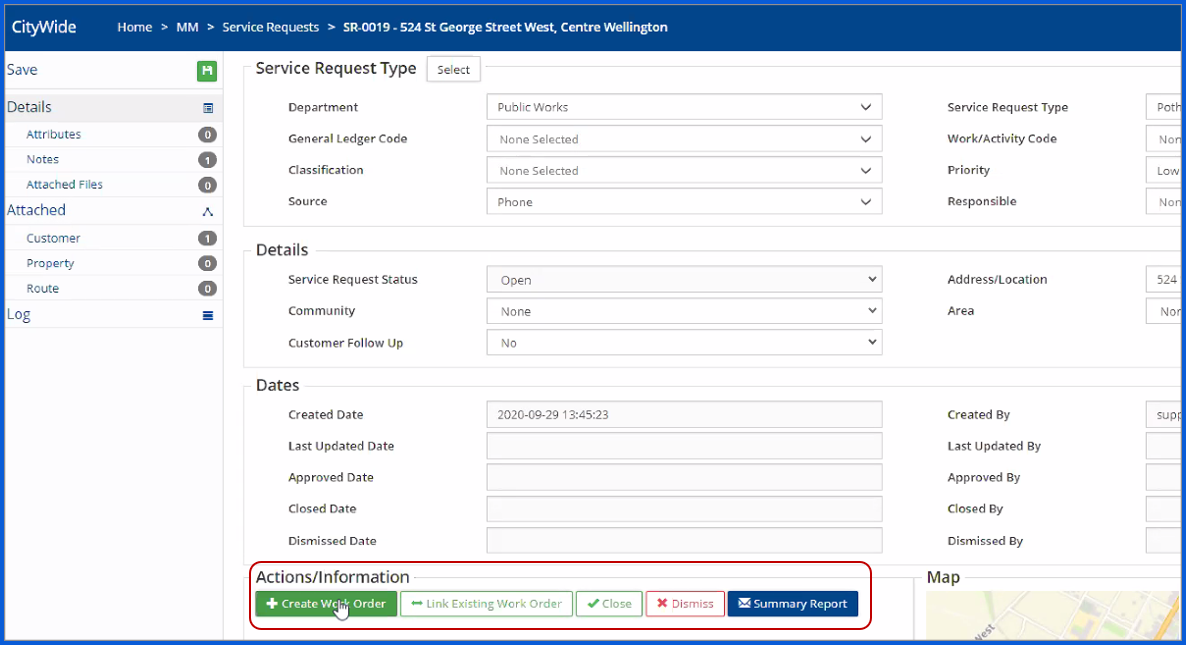
- On the Details screen click +Create New Work Order. The New Work Order wizard opens.
-
Alternatively, the SR can be linked to an existing work order created for the same issue by clicking Link Existing Work Order. Close or dismiss the SR, and generate and print a summary report as needed.
- The Customer and Issue Address/Location details are pre-filled based on the information from the linked-service request. Click Next twice.
- In the Details screen select the appropriate Department, Work Order Type Group and Work Order Type, Classification, and enter a Description as needed.
- Set the Priority, and Source of the work order.
- Alternatively, click Select to see a list of WO types by department.
- Set the Assigned To field as Workers or Crew and assign as needed.
- Click Next.
- In the Resources screen the water meter asset may be attached as an Asset to the work order.
- Click Add to create the Water Meter Repair WO
Complete the linked-Work Order
Once a linked WO is created, the status of the service request changes to Approved. After resolving the SR issue by completing the WO, the service request can be closed by clicking Close in the Action buttons.
To compete a linked work order:
- Review work order details and update the status as action is taken on it.
- Additional Notes may be added at this point to update the progress.

- Update Attribute information as needed. Any attributes attached to the service request will be copied to the linked-WO.

- Update the WO Status by selecting Completed from the dropdown list.
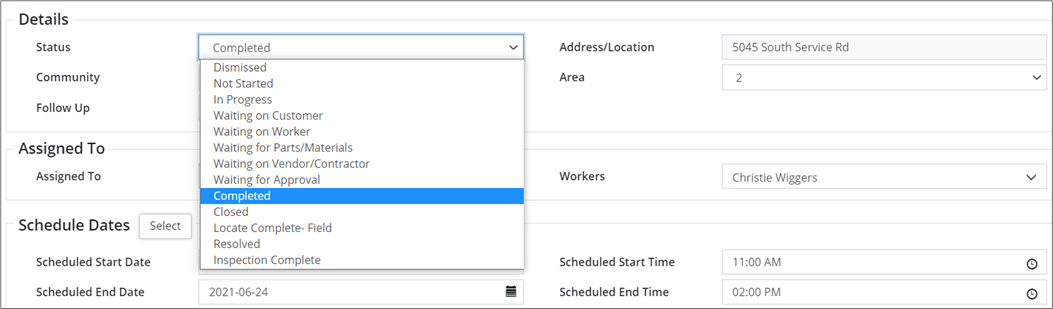
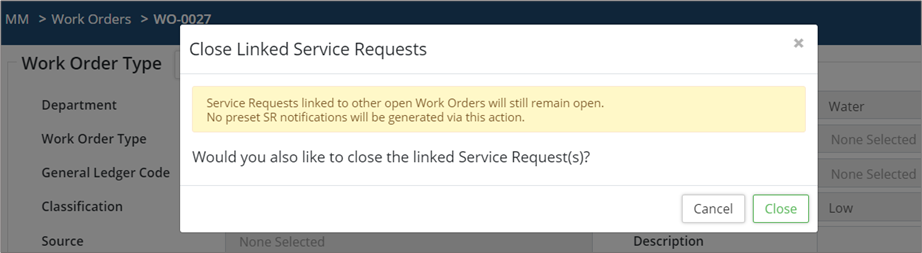
- Updating the work order status to Completed will close the work order as well as prompt the user to Close the linked Service Request.
- Click Close.
- A closed service request stays in the records and can be re-opened if needed.
- A linked work order can be seen on the Service Request with an updated status.
Create a Child Work Order
Child work orders are created when additional work is required to complete the initial work order. An existing work order can be linked to another work order as a child WO or a completely new WO can be created and then linked as a child WO.
To create and attach a new child work order:
- Open a work order and click +Create Work Order on the Details screen.
- Select the properties to copy from the existing work order into the new child work order. The number of property flags shown depends on what items have been attached to the existing work order (i.e., assets, property, processes, etc.).
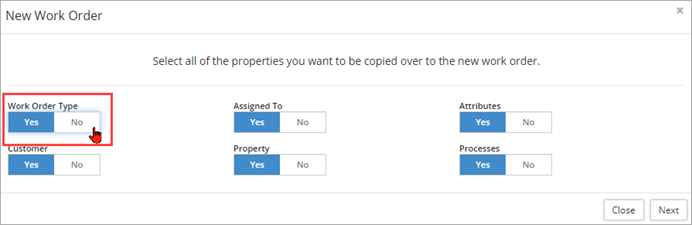
- If the child work order type will be different than the existing work order, be sure to toggle the Work Order Type flag to No. When the WO Type flag is set to No, the Assigned To flag toggles to No and is no longer available for selection.
- Click Next.
- The selected properties information is copied into the New Worker Order window.
- Complete the New Work Order wizard adding Customer, Property, Details, and Resources as needed.
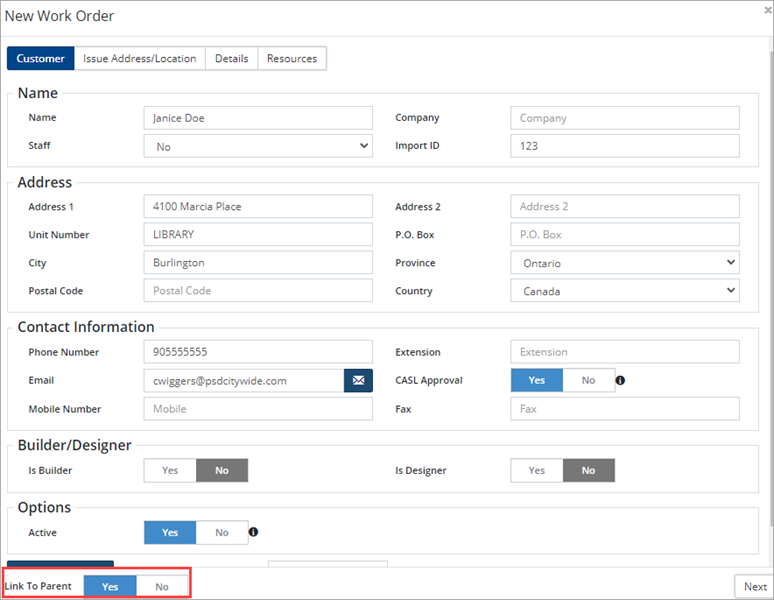
- Set the Link to Parent flag to Yes to create and attach a child work order.
- Click Add when done.

-
Child WO can remain open when the status of the Parent WO is marked as complete.
To link existing work orders to the current work order as a child WO:
- Open a work order.
- Click Work Orders in the navigation pane on the left.
- Click +Link Child Work Orders.

- Search for the work order to be linked by work order ID, departments, groups, etc.
- Select a WO from the list returned in the search.

Additional Tools on the Work Orders Grid
Bulk Update
Citywide Maintenance Admins or any user with the appropriate permission level can bulk update WOs. To bulk update WOs:
- Use the Select column to check each WO to be updated. Or filter the grid and click the Select All checkbox in the column header.
- Click
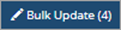 in the top right. The button displays the total number of records selected in brackets (eg. (4)).
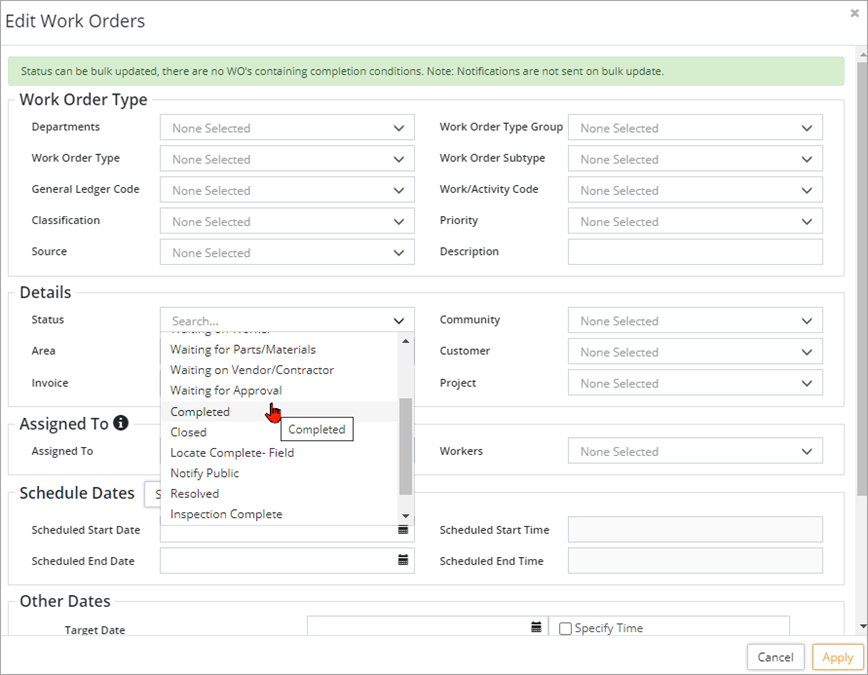
- Select the fields to update in the Edit Work Order window. The Status field can be bulk updated if no completion conditions exist on the WO.
- Click Apply once all necessary updates have been made.
- Click Apply when prompted to confirm the changes.
Bulk Reassignment
Citywide Maintenance Admins or any user with the appropriate permission level can bulk reassign WOs to Workers, Crew, or Vendor/Contractor. To bulk reassign WOs:
- Use the Select column to check ✅ each WO to include in the bulk reassignment. Or filter the grid and click the Select All checkbox in the column header.
- Click
 in the top right.
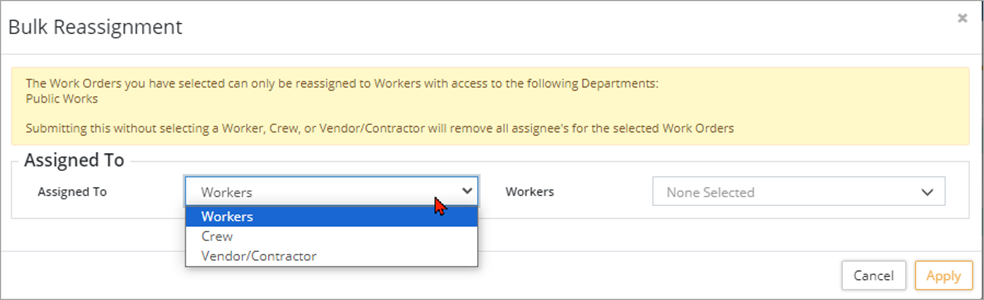
- In the Bulk Reassignment window, read the information contained within the yellow box and then make your selection in the Assigned To and Workers dropdown lists.
- Click Apply.
- Click Apply when prompted to confirm the changes.
Default Attributes
Defaults are applied to the attributes of Service Requests currently showing in the grid. A combination of filters and searches can be used to target specific WOs.
To bulk update Attribute information:
- Filter the WO grid to show only those WOs to update.
- Click Default Attributes
 in the top right corner.
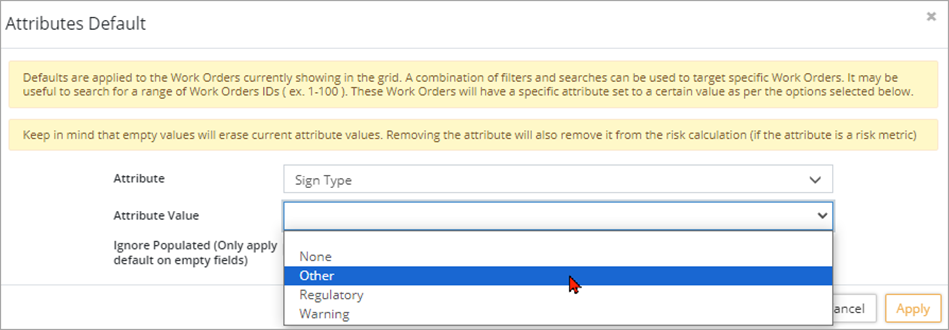
- In the Attributes Default window, read the information displayed in the yellow box and then select an option from the Attributes
- In the Attribute Value field, enter a new value or select from a dropdown list (the option given is determined by the attribute type of the selected attribute).
- Check ☑ Only apply default on empty fields to have the system only update WOs where the selected attribute is blank.
- Click Apply to update.
- Click Apply when prompted to confirm the changes.
Print a Range of Work Order Summaries
This can be used to bulk-print work order summary reports. Grid filters may be used to select up to 50 records to generate these reports, which may then be previewed and emailed, printed or saved as PDF after clicking the button below.
To print work order summaries:
- Filter the Work Order grid to show only those WOs to print.
- Click
 at the top. In the Print Work Order Summaries window, click on Review Order Summaries.
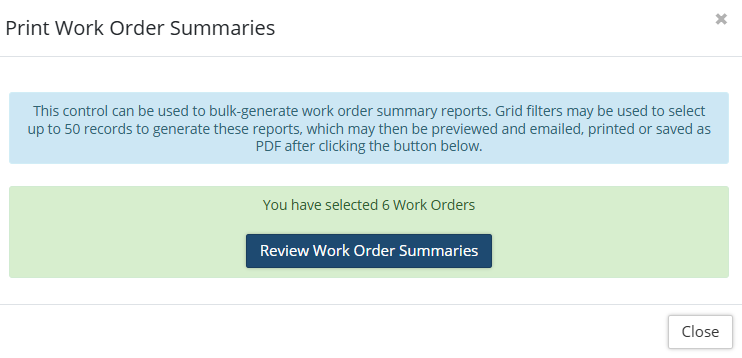
- The Work Order Summaries page will allow you to either print, email or print as PDF. This page lists the entire list of selected Work Orders to be printed. Each WO has a settings button to allow you to View/Hide Selections before printing.
View Data in GIS
To view Work Orders in GIS:
- Filter the Work Order grid to show only those WOs to view in GIS.
- Click
 at the top. It will open up Maintenance>GIS and the view of the selected Work Orders.


