
Overview
Projects is used to track the progress and costs of capital or operational infrastructure projects. Users with the appropriate permission levels can create new projects.
To create a project:
- Navigate to Home 🢡 Maintenance 🢡 Projects.

- Click +Add Project .
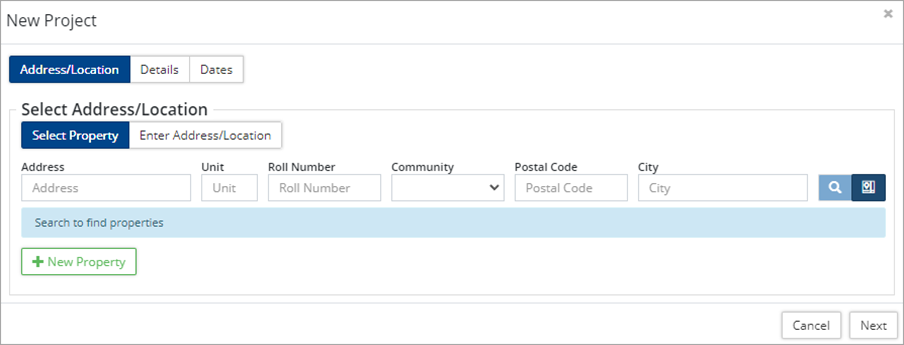
- Select a project Address/Location (i.e., the location of the project office). Options include:
- Select Property: Use this option to search by Address, Unit, Roll Number, etc. Once the search results are returned, select a property from the table of properties matching the search criteria.
- Enter Address/Location: Use this option to manually add an address. Enter a street name in the Address/Location field and then click
 to select a location on the GIS map.
- Click on the desired location in the map view. A marker is placed on the closest property address (not the Property itself). To use the exact coordinates of the marker then toggle Use Exact Location to Yes.
- Click Select to be taken back to the New Project
- If the property does not exist in the database, click +New Property and enter new property information.
- Click Next.
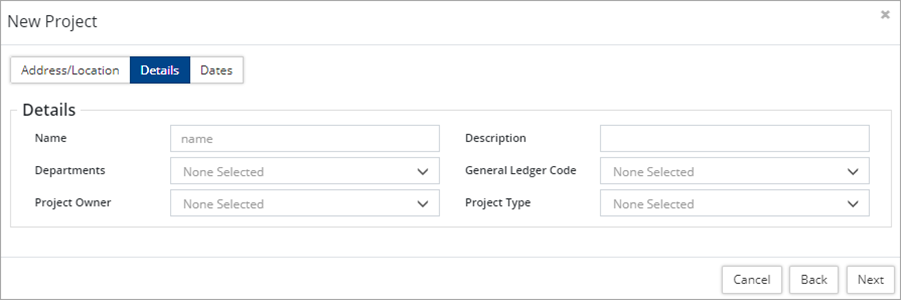
- Enter project Details such as Name and Description. Select a Department, a Project Owner, and Project Type (Capital or Operating). Assign General Ledger Codes as needed.
-
Multiple departments can be selected (hold Ctrl and click each department). The departments listed are determined by the WOs assigned to the Project.
- Click Next.
- Enter project Start/End Dates.
- Click Add to create the Project.
Add Work Orders to Projects
There are several ways to attach work orders to projects. These include:
- Attaching an existing work order at the project level
- Creating a new work order at the project level
- Adding a project at the work order level
To add WOs at the project level:
- Open a project and click Work Orders on the left. All WOs attached to the project are shown on this screen.
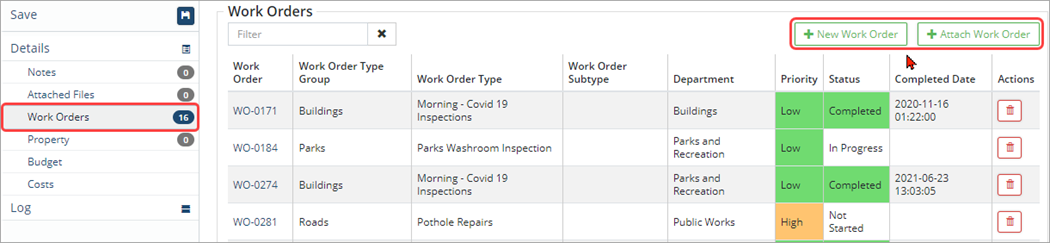
- To add a new WO, click +Add New Work Order . Enter in all the necessary information for the new work order and then click Add.
- To attach an existing WO, +Attach Work Order . Select one or multiple WO in the Work Order grid and then click Add Selected Item/s.
- Click Save.
To add a project at the WO level:
- Open a work order and click Project on the left.
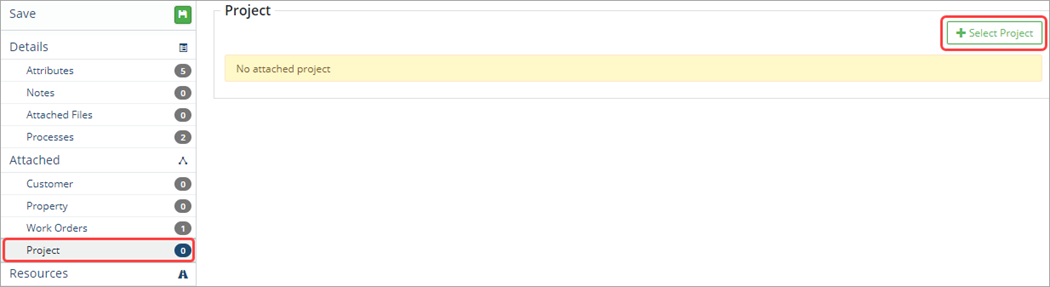
- Click +Select Project in the upper right and select the appropriate project in the Select Projects The project will attach to the work order and project details display on the Project screen.
- Click Save.

- Click View Project to navigate into the project and view all project information. Add the WO to a Project by clicking +Select Project .
- Click X Unlink Project to remove the project from the WO Click Save.
Create a Project Budget
This is an opportunity to compare Project actuals (total WO costs) with the estimated Project Budget.
To create a project budget:
- Open a project and click Budget on the left.
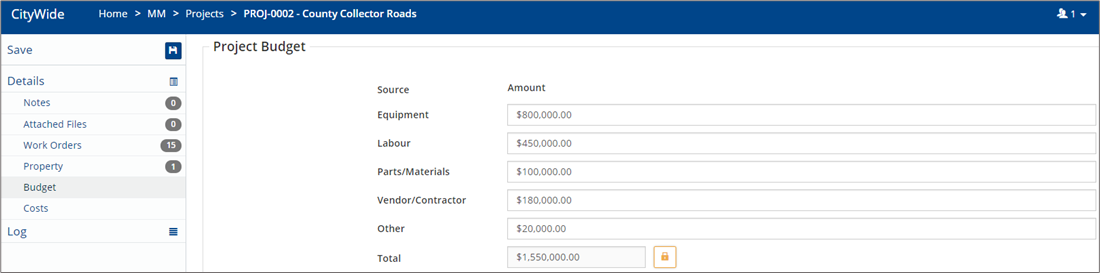
- Enter a budget amount for each item in the Project Budget Citywide will calculate the total budget amount. Click
 /
/  to calculate/override the project budget.
 - Click Work Orders on the left to view all WOs attached to the project. Open a Work Order and enter actual Resource costs (Labour, Equipment and Parts/Materials).
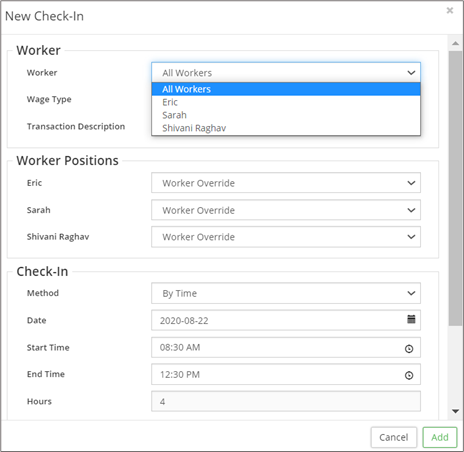
- Enter labour costs through Check-Ins at the WO level.

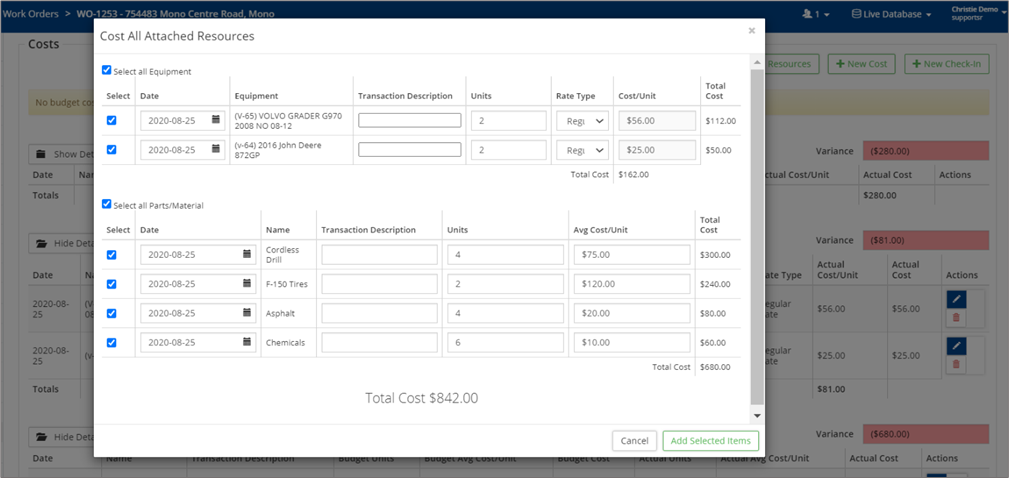
- See attached Resources and update the units of attached Equipment and Parts/Materials used.
- Enter labour costs through Check-Ins at the WO level.
- Click on Cost All Attached Resources to ascertain Work Order costs.
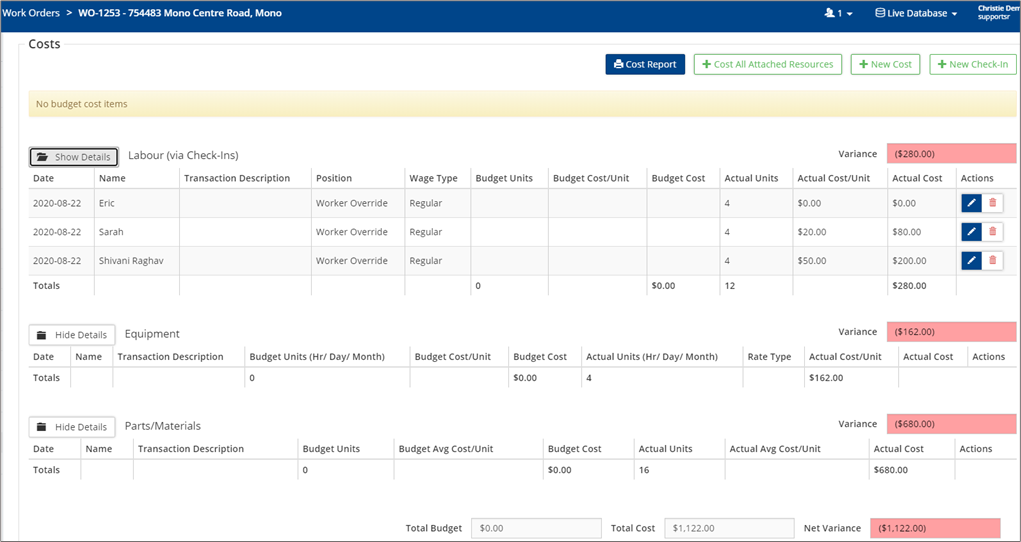
Compare Budget vs. Actual Cost
Budgets can be created at the WO level as well as at the Project level.
Variance between Project Budget and Actuals can be seen and reported on at any stage of the project.
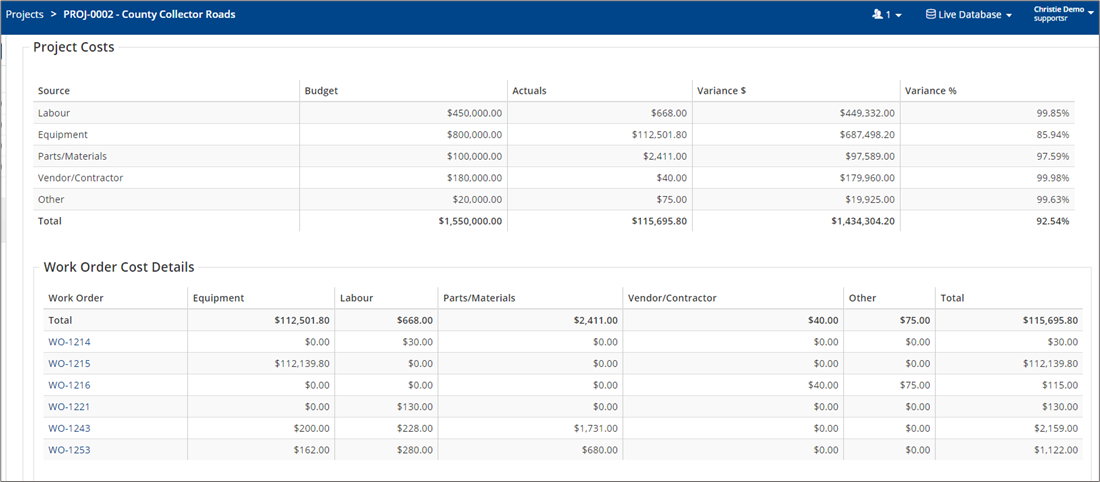
The sum of actual costs of all WO within the given project will give Project Totals.


