
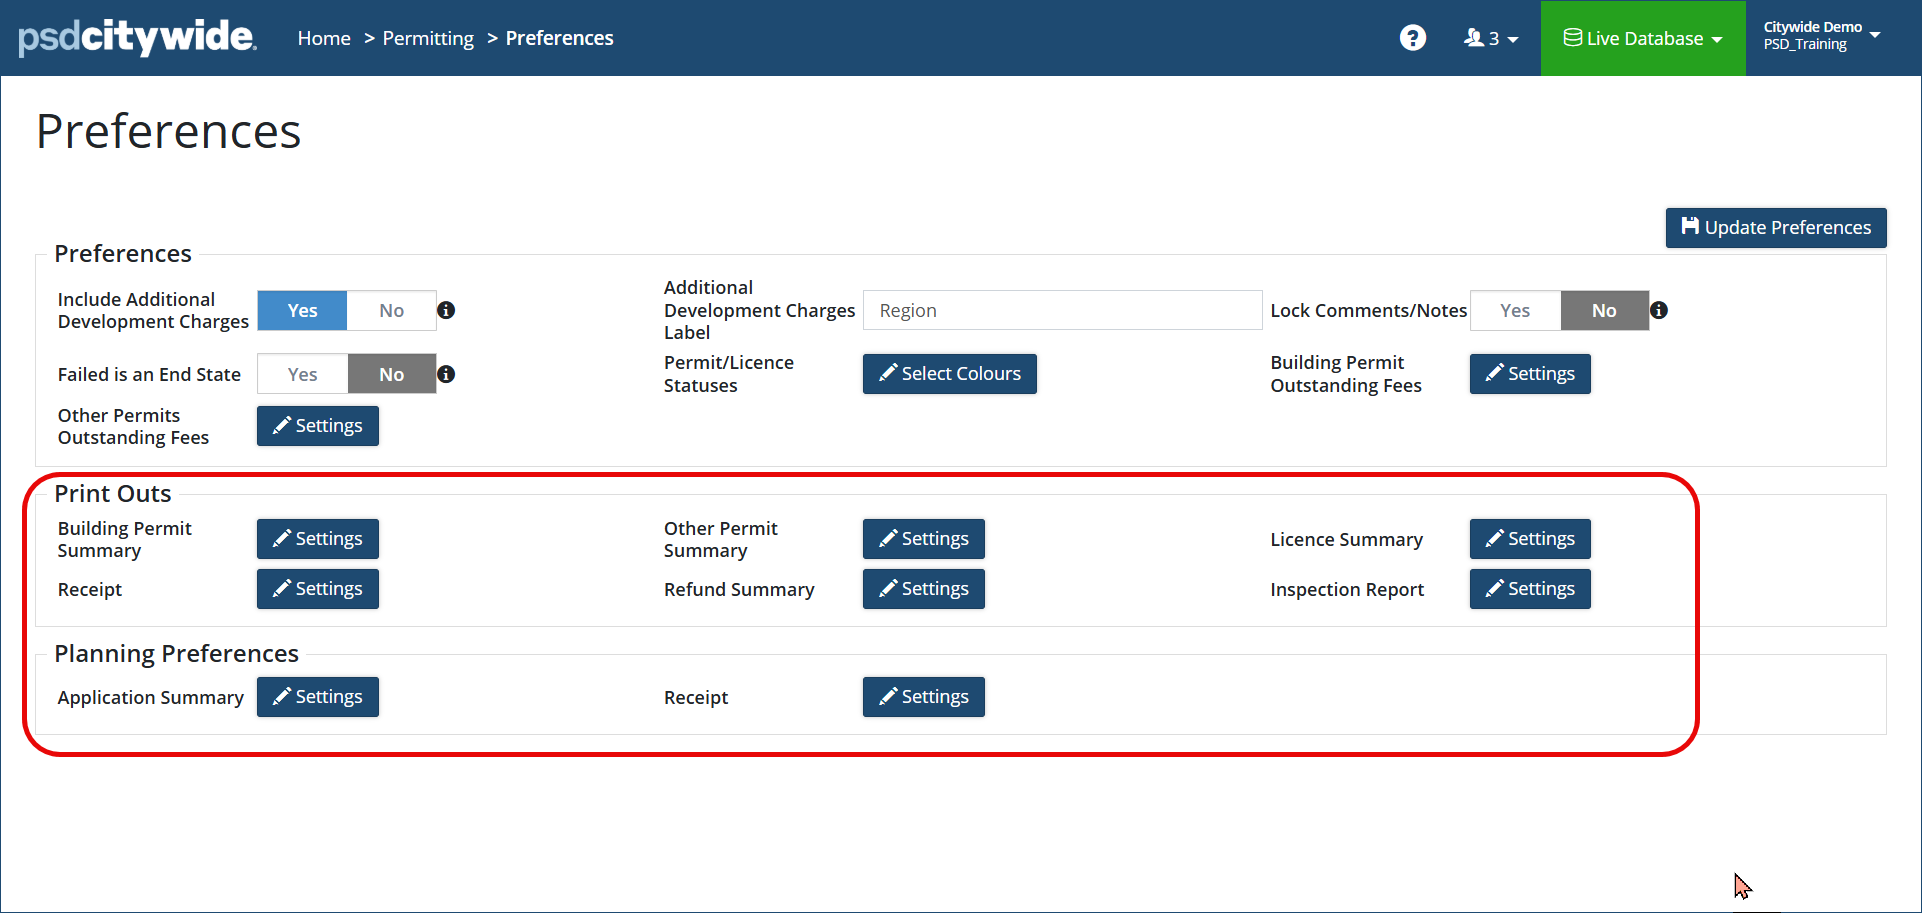
Within Permitting Preferences, a Citywide Administrator with the proper access can customize and set the summary report and receipt fields that Citywide Portal users can print/view or email. Once building or other permits and licences are issued, the Summary report (internal) is available to municipal staff for printing or emailing to the applicant. Citywide Portal users can also access the Summary report (external) by logging into their portal account. Likewise, once planning permits are submitted via the Citywide Portal, the summary report becomes available to print/email.
To Set/customize the Summary Report fields:
- Navigate to Home > Permitting > Preferences
- In the Print Outs and Planning Preferences section, click the Settings
 button for the applicable summary report or receipt you want to configure.
- Select Internal (visible to only Citywide Users) or External (visible to external users via Citywide Portal).
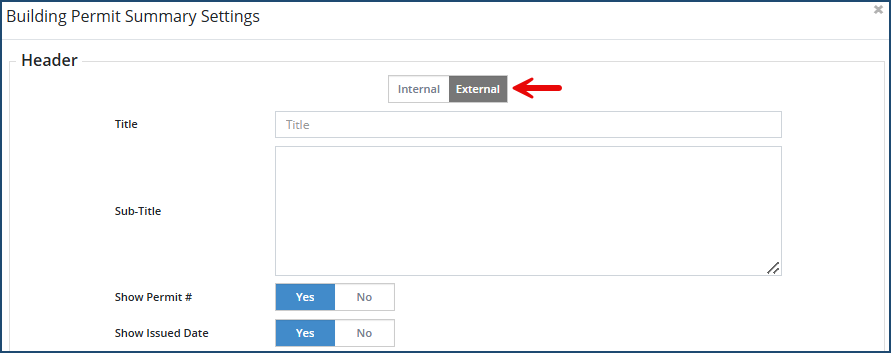
- Toggle desired Fields and View Options to Yes or No which will be visible in Citywide Portal (by default, most are set to Yes)
- Click Edit.
- Click Update Preferences
 button at the top right corner to save your settings.
Optional: Repeat steps 2. to 6. above and select other desired types of summary report(s) to configure.
To Set/customize Receipt Settings:
- Navigate to Home > Permitting > Preferences
- In the Print Outs and Planning Preferences section, click the Settings button for the receipt settings you want to configure.
- Edit the desired receipt fields.
- Enter and standard verbiage text for the Footer or Email Body Text for when receipts are emailed to applicants from Citywide.
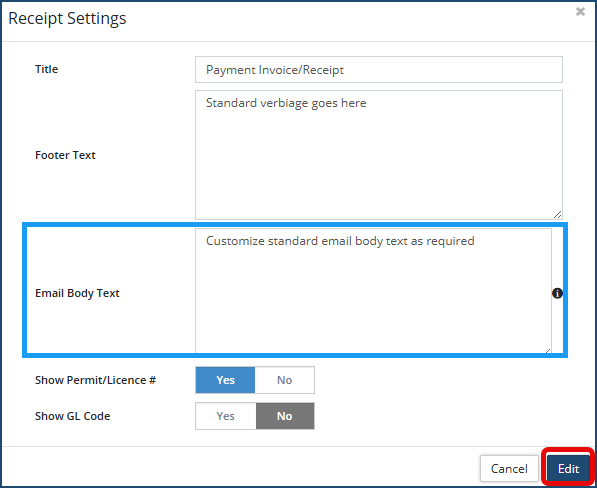
- Toggle any remaining fields to Yes or No.
- Click Edit.
- Click Update Preferences button at the top right corner to save your settings.
Optional: Repeat steps 2. to 6. above and select other desired types of receipt settings to configure.


