
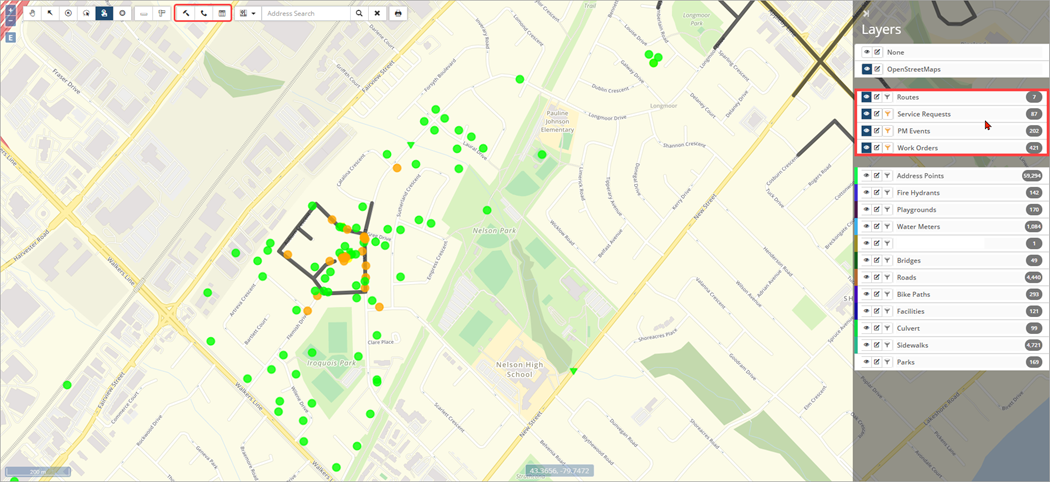
Maintenance-GIS allows users to view, create, and print Service Requests (SR), Work Orders (WO) and Maintenance Schedules from the map window. Route Patrol Routes are also available as a feature layer that can be viewed in conjunction with asset layers ❶. Note that each layer has an advanced filter ![]() applied to hide records after 1 month. Additional filters can be set to view records in a specific period or assigned to a specific worker or filter based on Type or status, etc. Navigate to Home 🢡 Maintenance 🢡 GIS.
applied to hide records after 1 month. Additional filters can be set to view records in a specific period or assigned to a specific worker or filter based on Type or status, etc. Navigate to Home 🢡 Maintenance 🢡 GIS.
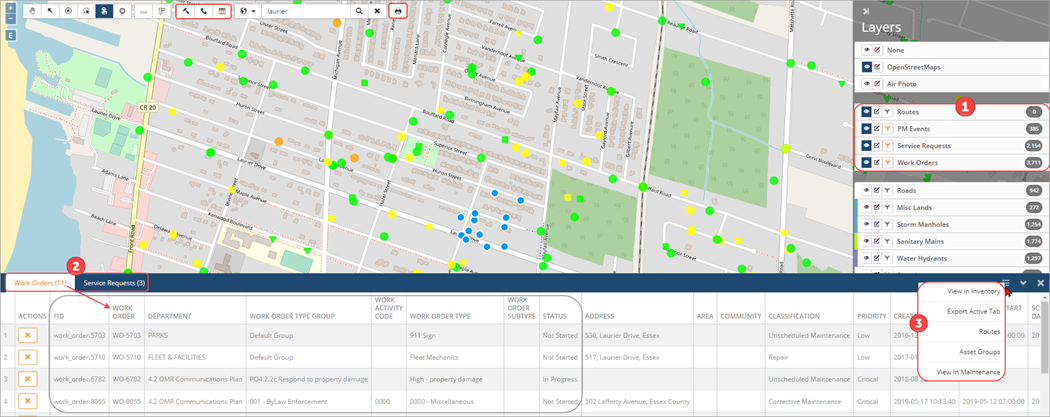
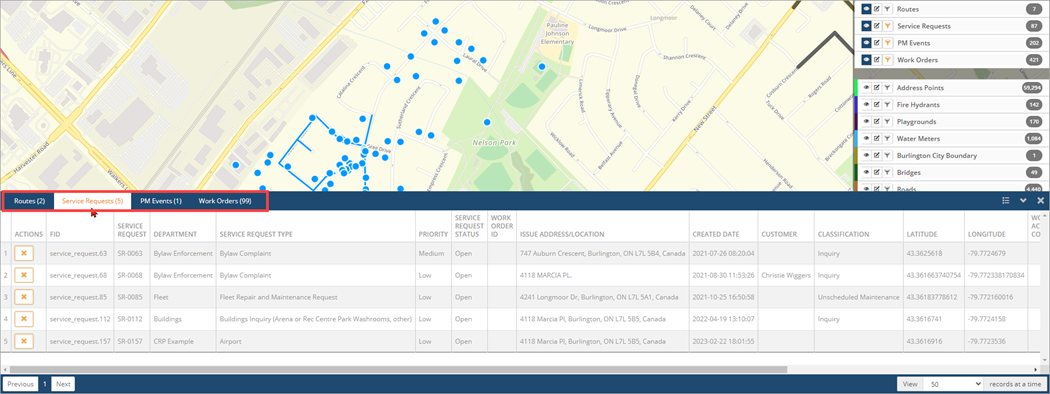
Select SR or WO features to view high-level information in the attribute table as well as access the detailed record in Maintenance ❷. The SR ID or WO ID is linked allowing users to seamlessly navigate into the Maintenance module to view/manage the record details. The table’s context menu also provides options to export or view all selected features in Maintenance ❸.
The GIS toolbar also includes options specific to the Maintenance module.
| Create new work orders |
 |
| Create new service requests |
 |
| Create new maintenance schedules |
 |
The features within each Maintenance layer are represented by a colour-coded symbol on the map. The colour provides priority information on the WO, SR, etc. When a GIS Maintenance map is printed, the output includes a legend.
|
☐ Service Requests Work Orders ▽ PM Events n Assigned/Dismissed SRs l Completed/Dismissed WOs ▼ Approved/Dismissed PM Events
|
— Routes — Low Priority — Medium Priority — High Priority — Critical Priority |
View Work Orders, Service Requests, Events or Routes
WOs, SRs, PM Events and Routes can be viewed in the GIS viewer. New WOs, SRs and Maintenance Schedules can also be created.
- Navigate to Home 🢡 Maintenance 🢡 GIS.
- Use the Layers pane to toggle layers on/off.
- Zoom into an area on the map and use a selection tool on the toolbar (i.e., box select) to select one or multiple items. The attributes table displays high-level information. For example, in the screenshot below the attributes table shows SR ID#, department, SR type, SR status, issue address/location, and customer for the 5 selected SRs in the map.
- Click Filter
 on the left of a layer to open the Advanced Filter Make your selections and click Apply. When a filter has been applied the button image will be yellow.
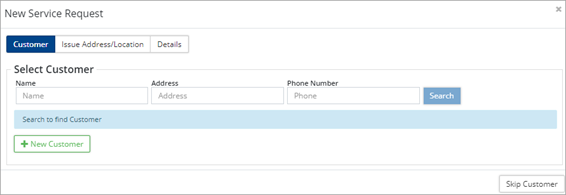
Create a Service Request from GIS
- Click
 on the GIS toolbar.
 - Navigate to the issue location on the map and click. The New Service Request wizard will open and the point coordinates will be entered as the location for the Service Request issue.
- Click Next.
- Enter Customer and Detail
- Click Add when done.
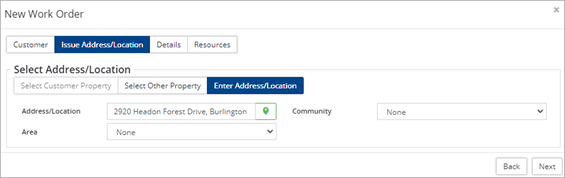
Create a Work Order from GIS
- Click
 on the GIS toolbar.
 - Navigate to the location on the map and click. The New Work Order wizard opens and the location is set to the property address closest to the point clicked on the map.
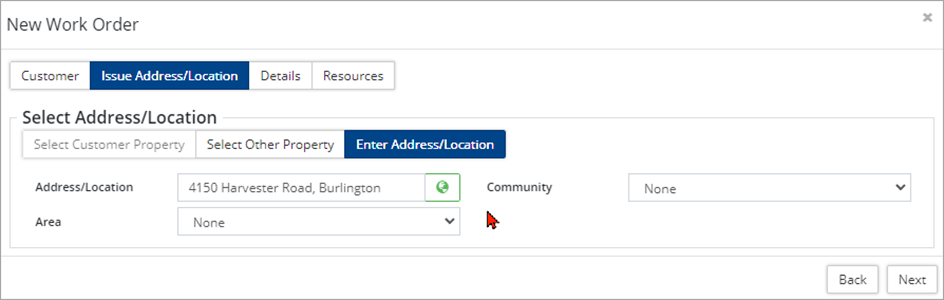
- Click Next.
- Enter Detail and Resource
- Click Add when done.
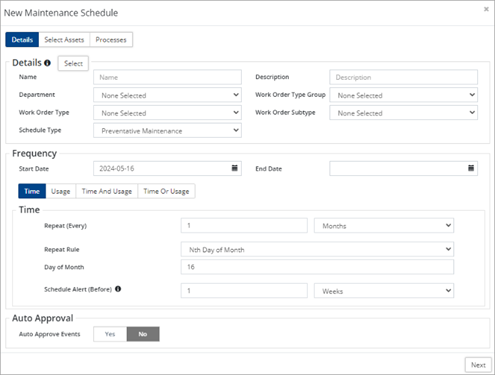
Attach a work order or a maintenance schedule to an asset
Assets that are visible in GIS can have work orders and maintenance schedules created and attached.
- Display asset layers on the map that includes the asset(s) that requires a work order or maintenance schedule.
- Click
 to create a work order or
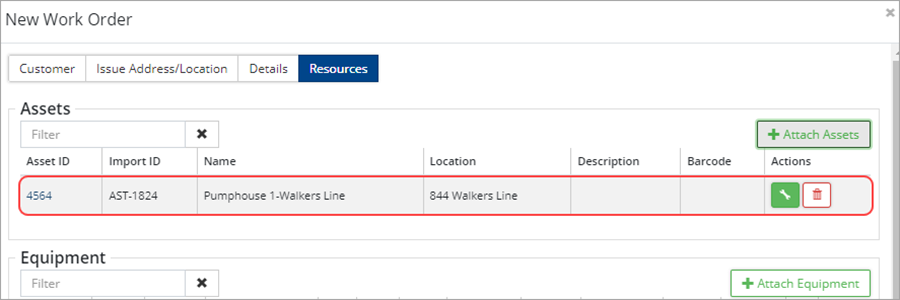
  to create a maintenance schedule and then click on the asset.
 - A New Work Order/Maintenance Schedule window opens and is attached to the asset.
- Complete the work order or maintenance schedule as needed.
- Click Add.


