
Classifications organize the data within Citywide by grouping similar assets together for labeling, filtering and reporting purposes. In the Classifications section, you can view, add, edit or delete classifications. In Citywide, there are several predetermined Classifications created based on the universal standard for TCA reporting.
The tables below show some of the classifications in use within Citywide. The naming conventions within each classification are specific to each client.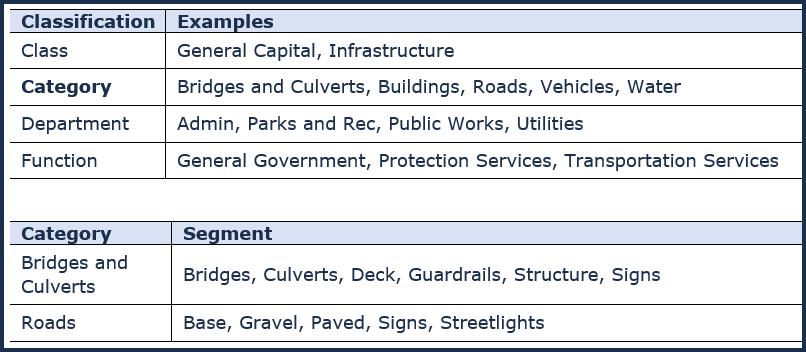
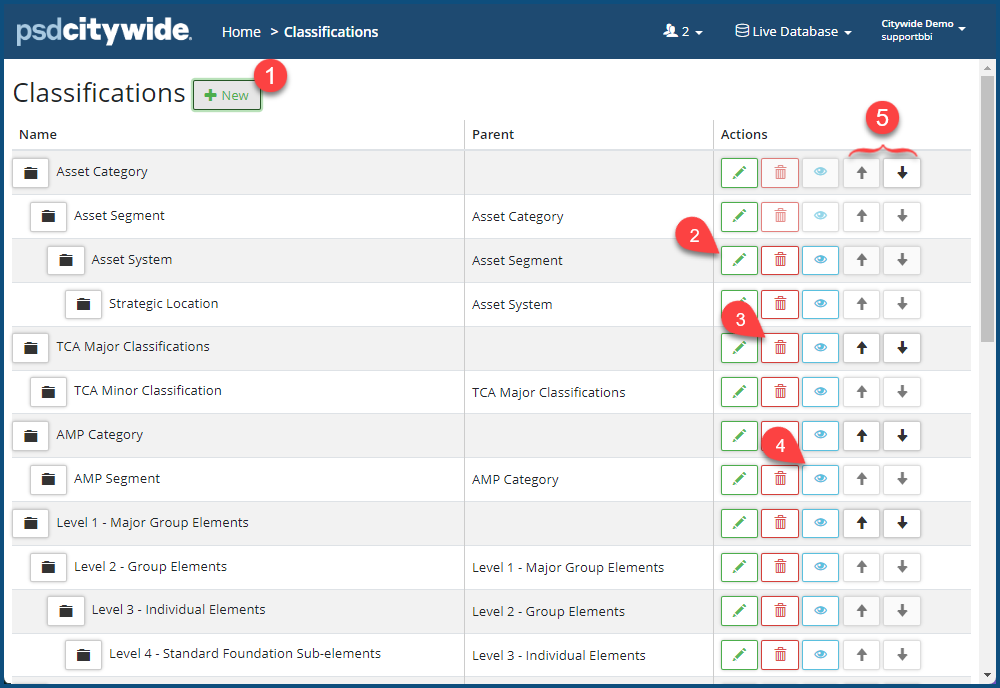
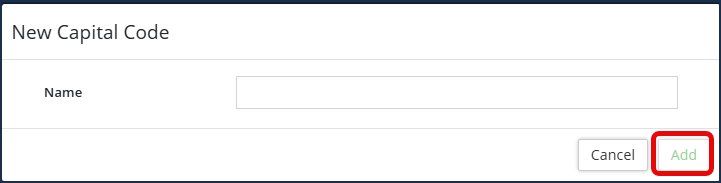
- To add a classification, click on + New ❶. The New Classification dialog box appears:
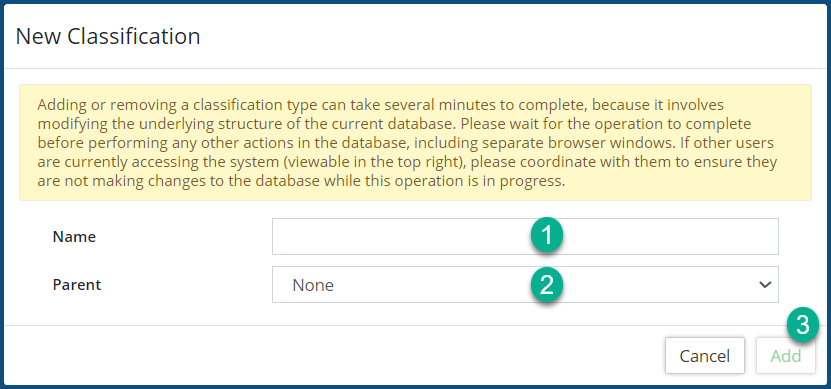
- Provide the classification with a Name ❶.
- Select the Parent ❷ that the classification will fall under.
- Click Add ❸.
-
Users with the appropriate permissions (admin access) can create additional Parent-Child relationships and build a hierarchy at the classification level.
Also, note that both the addition of new classifications and the deletion of existing ones may involve significant amount of time during which no other operations on the database should take place. The duration depends on the size of your existing database. See the messages in each of the dialog boxes—New and Delete—for more information.
- To rename a classification, click on the Edit/pencil icon
 ❷.
❷. - To remove a classification, click on the Delete/trashcan icon
 ❸.
❸. - To control visibility (this will make a Classification show up only for certain assets), click on the Visibility/eye icon ❹. The Visibility dialog box appears indicating the name of the classification and its level ❶.
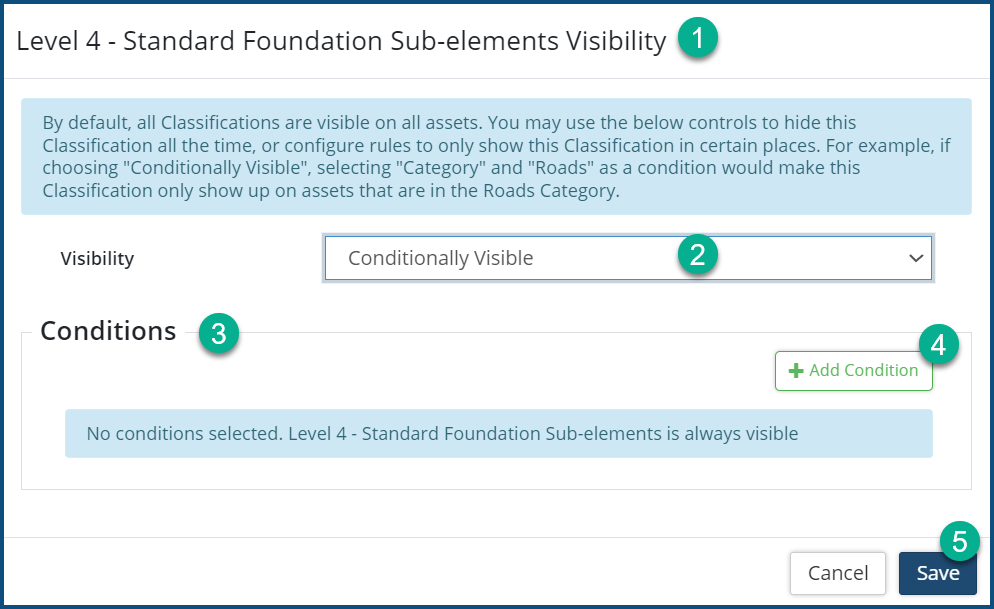
Your options are:- Always Visible, Always Hidden, and Conditionally Visible.
- Selecting the Conditionally Visible option will expand the dialog box with the Conditions ❸ subsection.
- Click + Add Condition ❹. The Add Condition dialog box appears:
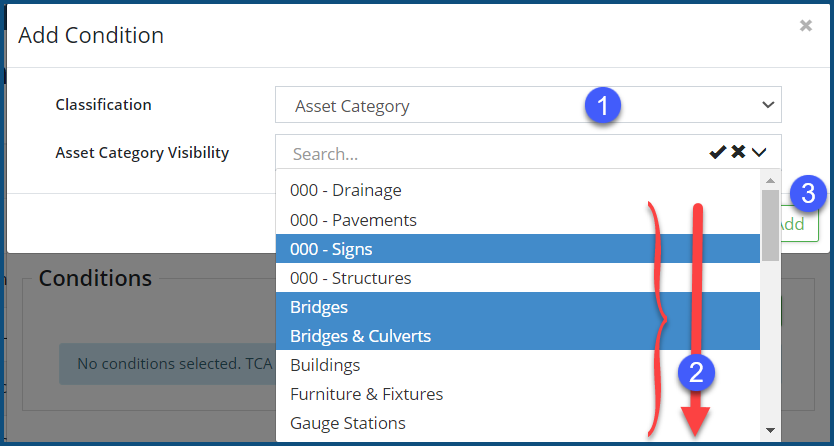
- Select the appropriate Classification ❶ and Class Whitelist item(s) ❷. To select multiple Whitelist items, hold down the Ctrl key and click on the item. Selected items will appear with a blue background, unselected ones with remain with a white background.
- Click Add ❸.
- Repeat the above step if required.
- Click Save ❺.
- Always Visible, Always Hidden, and Conditionally Visible.
- To reorganize the classification listing, click on the Move Up and Move Down icons
 ❺ to the right of the Name.
Merging Classification Instances
Classification instances that have been duplicated can be merged together using the Merge function. To merge two classifications into one:
- Click on the classification file icon
 ❶ next to the Classification that contains duplicated instances to be merged.
 - Click the Merge icon ❷ of the classification instance of the instance to be merged into another instance. The Merge dialog box appears, displaying the selected instance name in the upper field ❸:
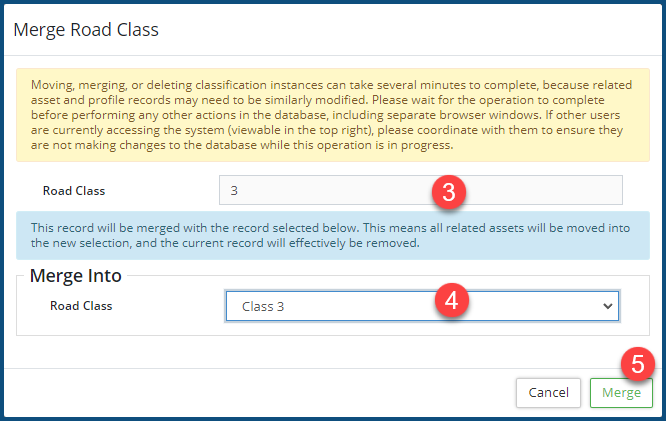
- From the Merge Into drop-down ❹, select the classification instance that you want select instance ❸ merged into.
- Click the Merge button to combine the two classifications into one. All assets that were in the classification instance that you chose to merge will be reclassified into the classification instance you chose from the drop-down menu.
Merging classifications could impact PSAB reporting if two classifications are merged together that should not have been merged, so please ensure to read all warnings before proceeding.
Additional Classifications
In addition to creating your own classifications to organize your data and assets in Citywide, there are also several predetermined Classifications should clients decide to use them. Classifications such as Department, Function, Sub-function, Capital Code, Amort. Expense Code, etc.
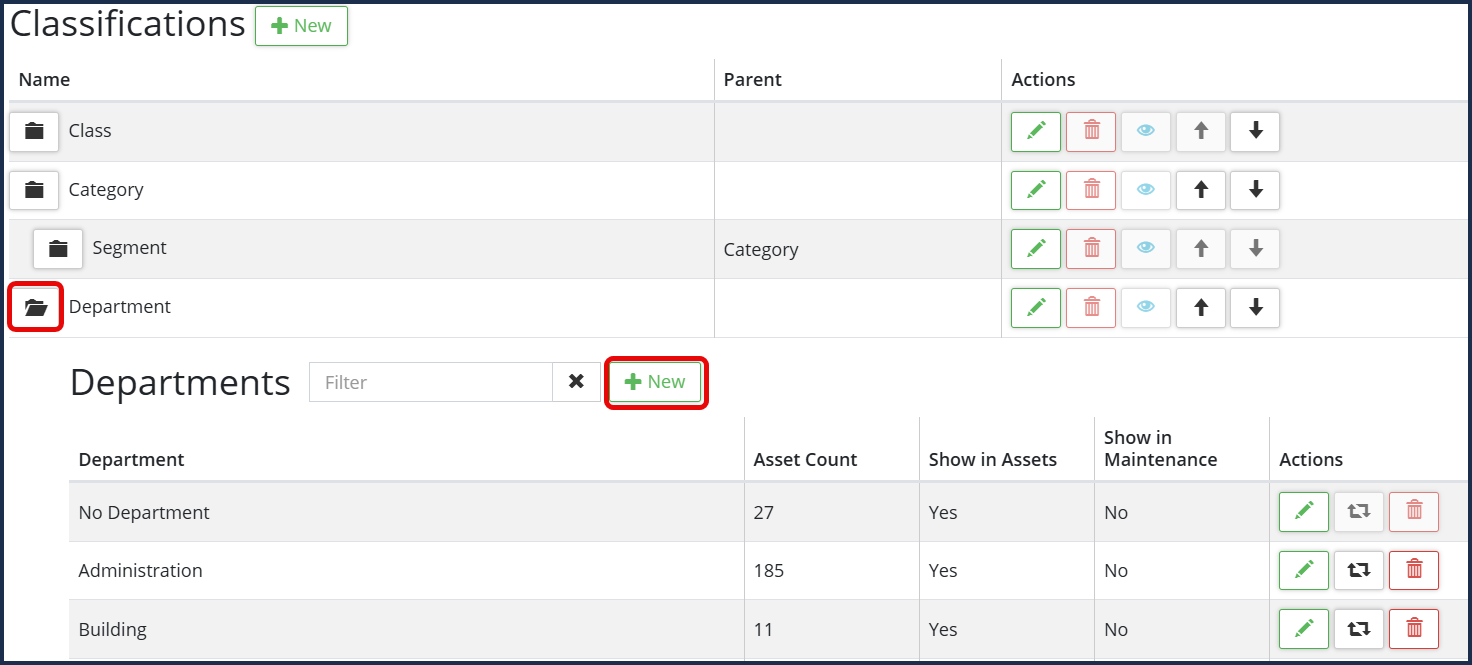
Create/add department classifications to indicate what department assets belong to. This allows users to filter assets by department on the grid as well as on reports within Citywide.
To Add a Department:
- On the Classifications page, click to expand the Department folder and click +New
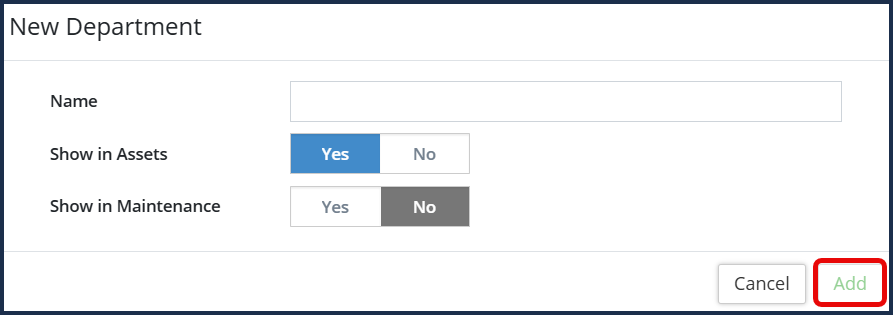
- Enter the Department name
- Toggle Yes or No to which module this Department should show in (Assets and/or Maintenance)
- Click Add.
To Define other predetermined Classifications in Citywide:
- On the Classifications page, click to expand the desired Classification folder and click +New

- Enter the text/numbers to name or identify your classification
- Click Add.
How to Set Threshold/Year-End Lock Date
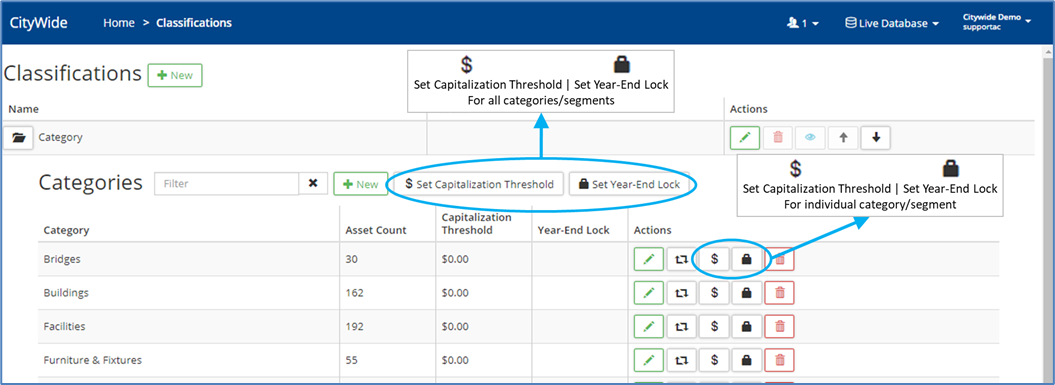
Capitalization Thresholds can be set at the category or segment level. Once set, any assets that fall below these capitalization thresholds will not be included in any Citywide report. This may not be ideal if you want assets in CityWide for lifecycle reporting purposes but not for TCA purposes. In this case, it would be more ideal to flag the assets individually.
Year-End Locks can also be set at the category or segment level. Once set, assets cannot be created or modified prior to or on the set year, to preserve your PSAB reports.
To set a capitalization threshold or a year-end lock:
- To set for all categories/segments, click Set Capitalization Threshold or Set Year-End Lock in the upper right corner. Enter a value/year in the popup and click the Set button.
- To set individually, click the $/Lock symbol to the right of each category/segment. Enter a value/year in the popup and click the Set button.
To remove a threshold/lock year:
- Click Set Capitalization Threshold/$ symbol or Set Year-End Lock/Lock symbol and remove the value in the popup.
- Click the Set button.


