
Overview
Accessibility to various functions and operations within Citywide is controlled through roles that are assigned to individual user accounts. Each role has a set of permissions associated with it. Permissions are associated with various functions and operations, each of which can be enabled or disabled within a role. Thus, a user will be able to access the individual set of functions and operations that are enabled in each of the roles that are assigned to their account. As such, user accessibility to various features and functions can only be had through the assignment of roles. Individual permissions cannot be set up at the user level. If a user requires an individual permission (or must be denied an existing permission) within an existing role, then an additional role will need to be defined and assigned to that user. This can be accomplished by copying an existing role into the new role and then making the appropriate changes. (See Users for a detailed discussion on setting up user accounts.)
There are two broad, pre-defined all-or-nothing roles in the system: the Admin role, in which all the permissions—system-wide—are enabled, and the No Access role, in which no permissions are enabled. All other roles must be created and defined.
Create a New Role
Creating a new role may involve copying an existing role to a newly-named role and then making changes to its set of permissions, or it can involve an entirely new role created from scratch.
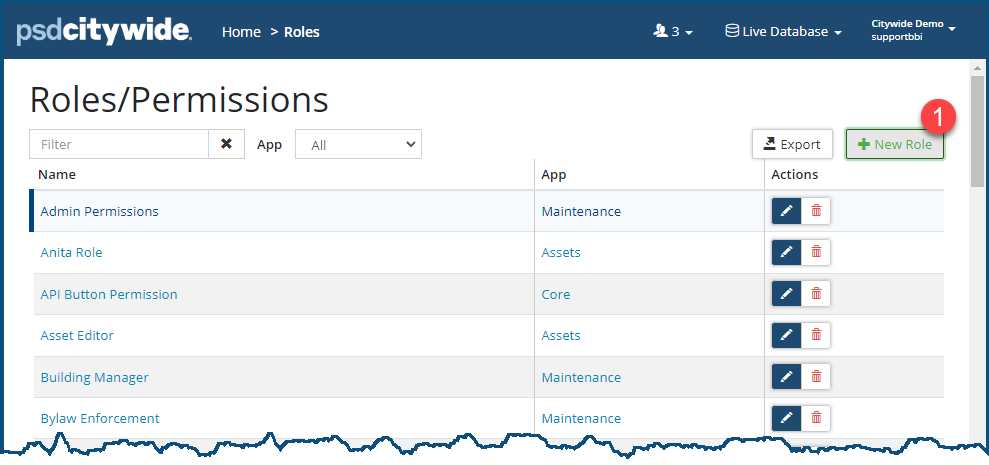
- Click on the + New Role ❶.
- Select the module that this role will apply to ❷.
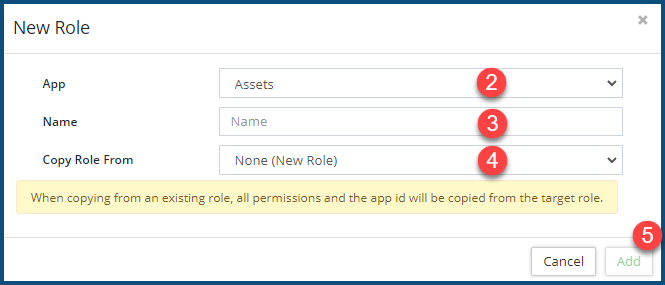
- Enter a Name for this role ❸.
- Select an existing role from Copy Role From ❹ if you wish to create your new role on the basis of an existing role; otherwise, leave it on "None (New Role)."
- Click Add ❺.
Set Permissions for a Role
- Click on the name ❶ of the role whose permissions you wish to set.
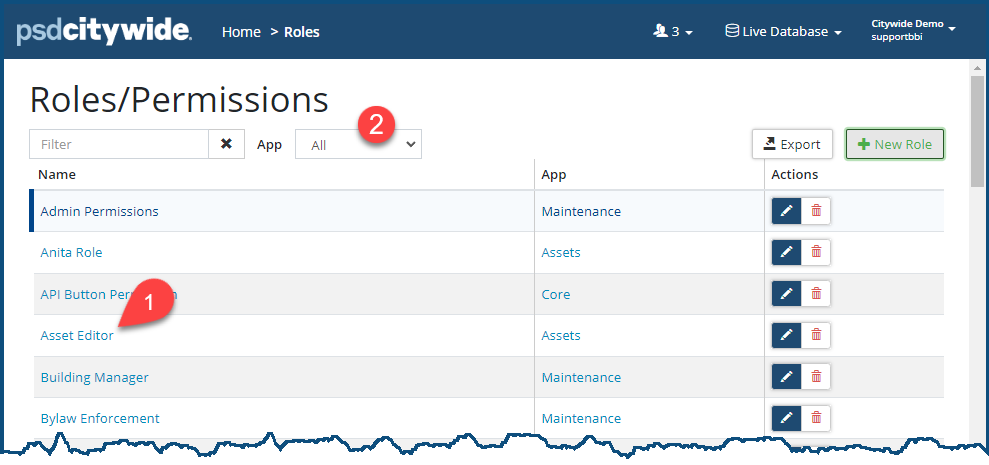
You can limit the list of permissions by selecting the App ❷. Leave it on "All" to see all the permissions across all the apps.
The Permissions dialog box appears, displaying the name of the selected Role ❸:
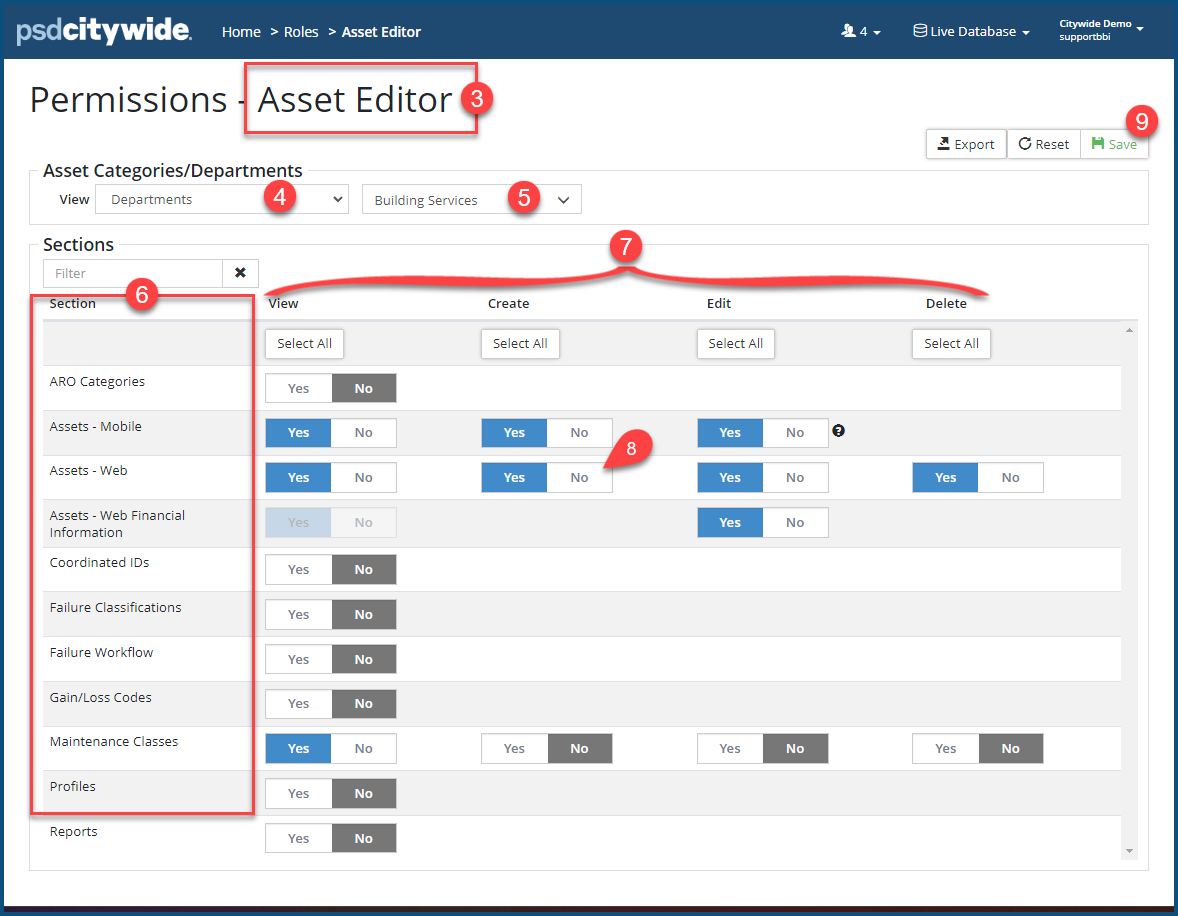
- From the View ❹ pull-down, select the scope to which this role will be applied. The options here are not fixed and hard-coded in the system, but determined by their entry in your Classifications table. A pull-down ❺ containing a list that corresponds to the View you've chosen will appear in an unlabelled pull-down next to it from which you can select one or more options. In the above screenshot, the View scope was limited to Departments ❹ from which a single department—Building Services— was selected ❺. To select more than a single option, hold down the Ctrl key and click on additional options.
- Each of the Permissions is set up in a Section ❻ row, and each row contains Yes / No options for each of the functions and operations (View, Create, Edit, and Delete) ❼. Click Yes to enable the function or operation; click No to disable it ❽.
- Click Save ❾.


