
Objective
This is the second step in setting up the CW failure tracking system. The first step (see Failure Classifications) involved entering the raw component data (or variables) from which the failure types are created. This is where you take the raw component data and organize it into the various fault types. See Failure Tracking and Reporting for a complete overview.
Layout of the Failure Workflow Screen
This is part of a sample Failure Workflow screen.
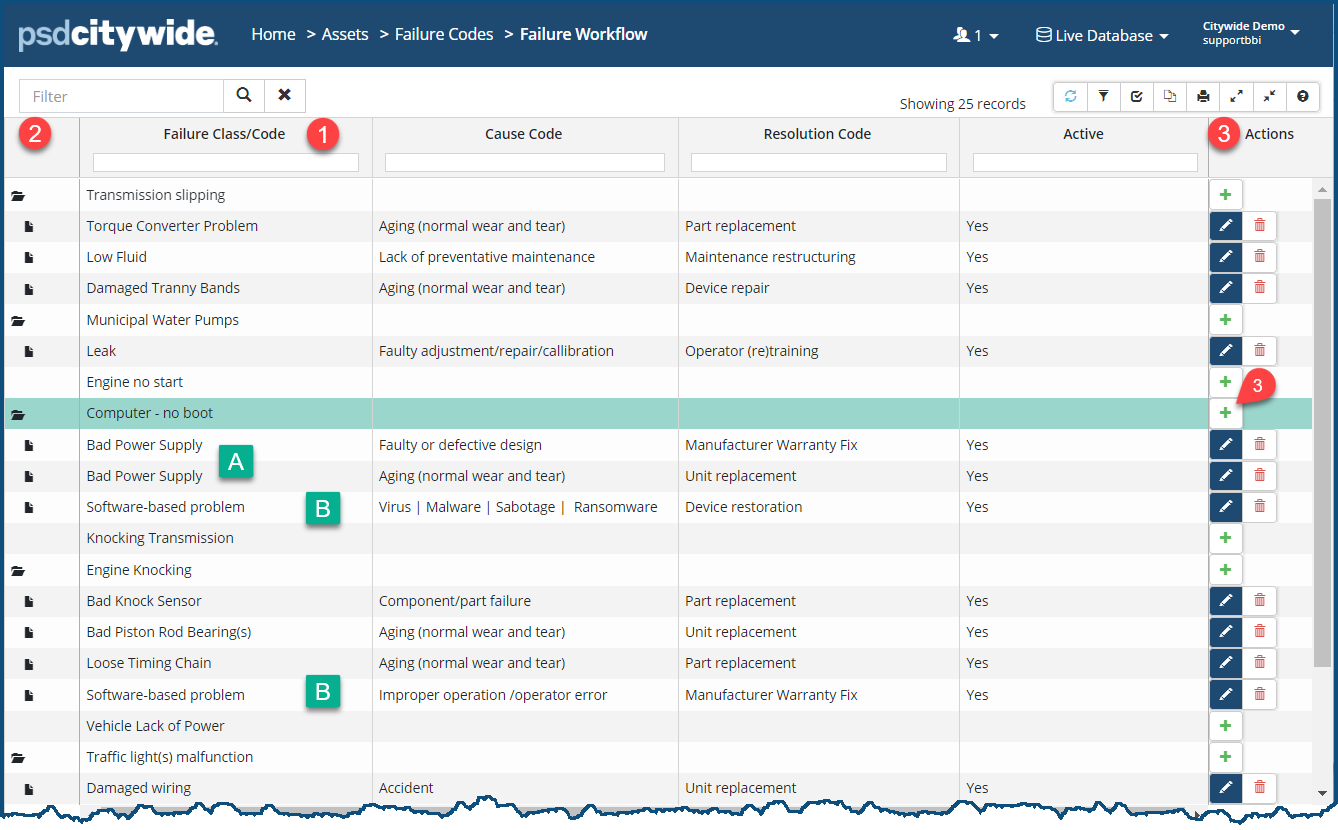
The second (Failure Class/Code) column ❶ shows first the Failure Class and then the Failure Code(s) beneath each of the classes. Class rows are distinguished by two screen elements: the folder icon  ❷ in the first column and the plus sign
  ❸ in the last (Actions) column. Code rows have a file icon
  ❶ in the first column, indicating that they belong to the class above them, and they have the Edit and Delete icons in the Actions column.
Once you have created your raw component data in Failure Classifications and you turn to working on this screen, you will see only the Failure Classes you created with the plus sign ❸ in each of their Action columns. From that point on, you'll be creating the hierarchical (folder/files) structure involving the various codes.
Add a New Failure Code
- Click on the plus sign ❸ of the Class to which the fault codes will be added. The New Workflow dialog box appears:
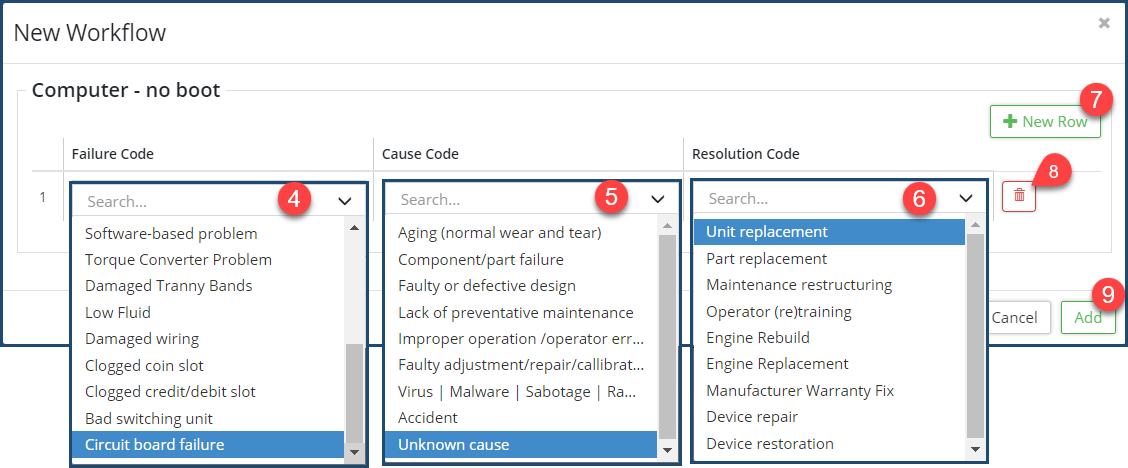
- Select a Failure Code ❹ from its pull-down.
- Select a Cause Code ❺ from its pull-down.
- Select a Resolution Code ❻ from its pull-down.
- Click on + New Row ❼ to add a new row of codes for this Class.
- Repeat steps 2 - 6 to add additional rows.
- Click on the Delete icon
 ❽ to delete a row.
 - Click Add ❾ when finished with the present Class.
- Repeat steps 1 - 6 to add a new (set of) code(s) to a different Class.
Notes Concerning the Failure Workflow
You can have numerous identical failure codes associated with a single class. In the above example, the "Computer - No boot" class has two instances of the "Bad Power Supply" 🅰 failure code beneath it. The two, however, are distinguished by their respective causes and resolutions. Obviously, there can be a multitude of different causes and resolutions for a bad power supply.
Also, the same Failure Code can be applied to a variety of different Classes, as in the above example where the "Software-based problem" failure code is being applied to two distinct classes: the "Computer - No boot" class 🅱 and the "Engine Knocking" class 🅱. Both devices can fail in different ways based on software. The computer in this case is failing because its operating system boot strap has been infected with a virus, and the automobile engine is knocking because its computer was improperly programmed by the manufacturer.


