GIS - Create Asset Group in GIS

Sep 15, 2025
Overview
The purpose of asset groups is to gather related assets into a group so that matters concerning them can be addressed at the same time. There are a variety of places in Citywide in which Asset Groups can be created and referenced. (See Asset Groups for a full discussion on this matter.) This article refers to one of the ways of creating Asset Groups—within the GIS Viewer.
Creating an Asset Group from within the GIS module
- Go to Home 🢡 GIS 🢡 GIS Viewer:
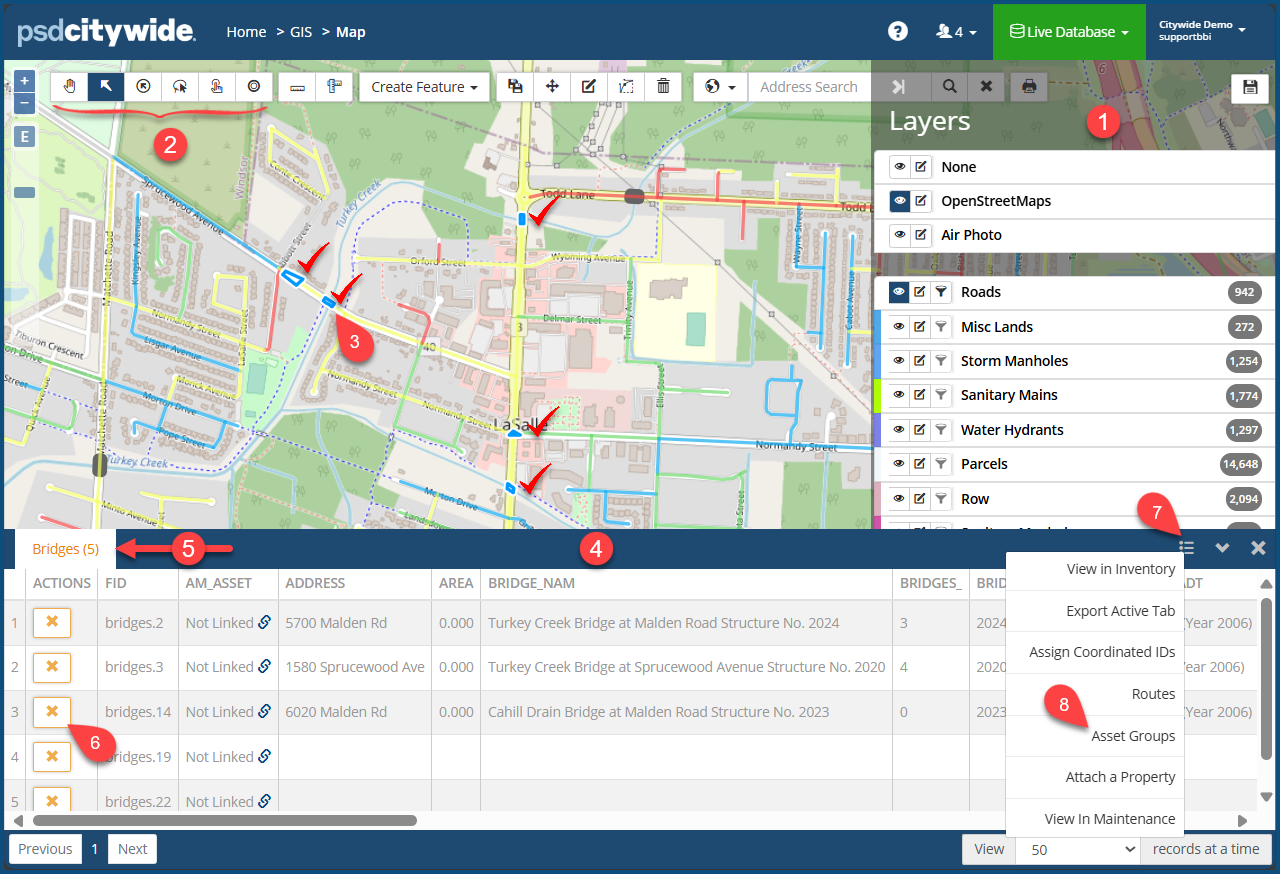
- Click on the Layer option ❶ to select the Asset type you would like to appear on the map. The assets will be highlighted on the map. (The "Bridges" layer was selected in the following example.)
- Click on the Selection Tool ❷ you wish to use to select the assets to be included in the group.
- Select the assets you would like to include in the Asset Group. The bridges on the map (indicated with the red checkmarks
 ) were selected on this map.) They are highlighted in the GIS Viewer in blue ❸ and produce a table ❹ consisting of the assets. Dissimilar assets will appear in separate tabs ❺ according to their asset type. (In this case, only bridges were selected for the current asset group, resulting in a single tab.)
 - Click on the
 icon ❻ on any row to remove it.
 - Click on the menu icon
 ❼ in the table header. A menu appears.
 - Click on Asset Groups ❽. The Add to Asset Group dialog box appears:
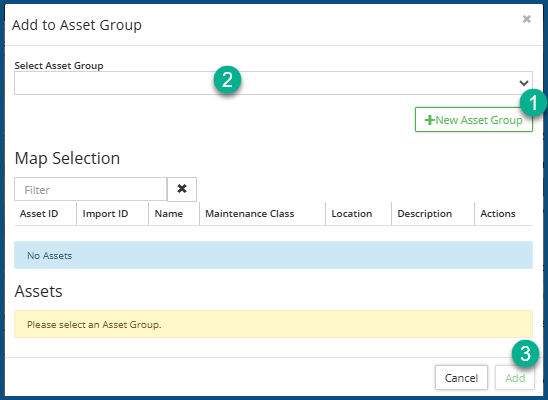
- Click + New Asset Group ❶ to name and create a new asset group.
- Click Select Asset Group ❷ to add the selected assets to an existing group.
- Click Add ❸.


