
Overview
Maintenance Schedules are a key feature that allows work orders to be generated based on user-generated definitions set out in the Preventive or Scheduled Maintenance Schedules. The maintenance schedules are set to display a notification x days before the scheduled date, thereby providing greater control over work order generation and schedules.
Maintenance Schedules define the frequency on the basis of which work orders should be generated for specific assets, as well as the procedures and tasks to be performed on each one of those scheduled dates. The Maintenance Schedule, or the procedure with which it is associated, can also define default settings for the generated work orders and set forth which documents need to be attached. Additionally, it may set out the estimated labor, materials, and other costs associated with the work orders, as well as automatic labor assignments.
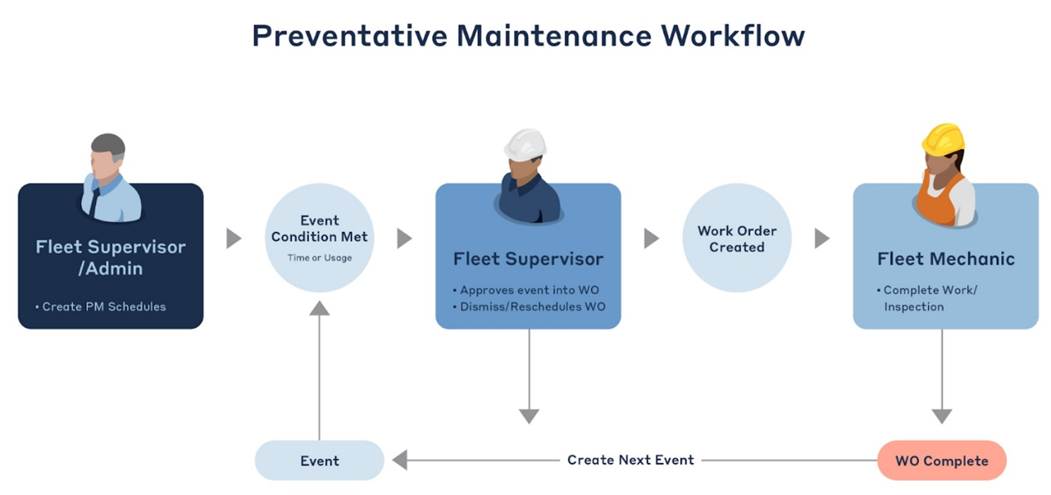
The graphic below provides an example of Preventative Maintenance Process for a Fleet Workflow:
Create a Maintenance Schedule
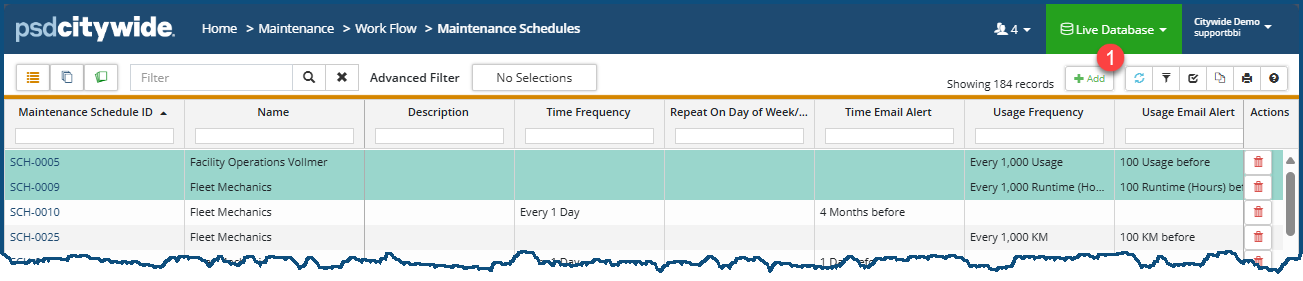
- Home 🢡 Maintenance 🢡 Work Flow 🢡 Maintenance Schedules.
- Click Add ❶.
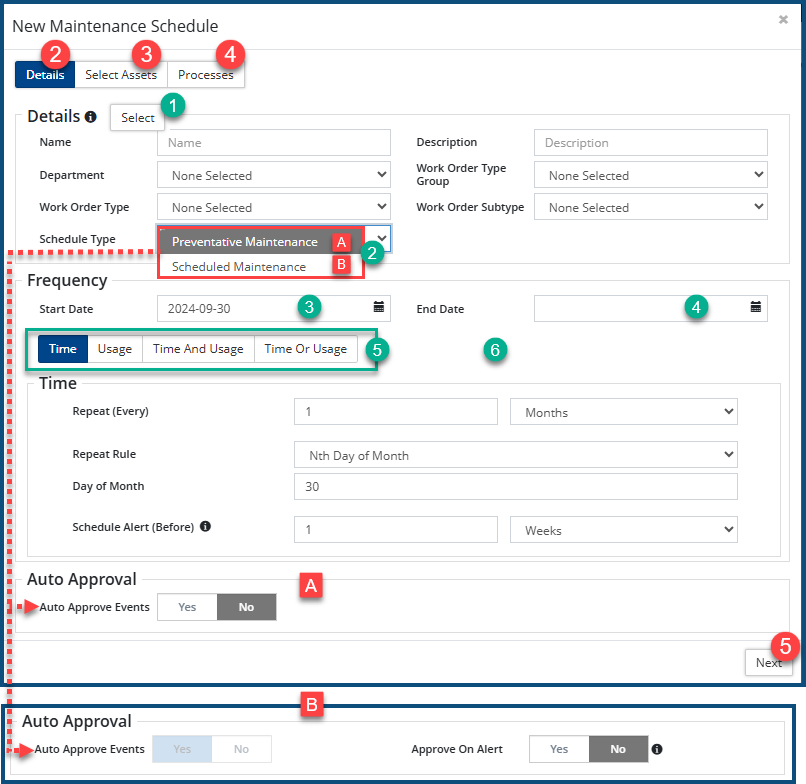
The New Maintenance Schedule dialog box appears, defaulted on the Details tab ❷. - Click Select ❶ to select a Department, Work Order Type Group, and Work Order type, or.
- Enter a Name and Description for the new schedule. Select a Department, Work Order Type, Subtype, and Group as needed.
-
Before creating a maintenance schedule, please ensure Work Order Types have been configured.
- Select a Schedule Type ❷. Hover over
 in the Details section for additional information.
- Preventative Maintenance (PM) schedules, unlike Scheduled Maintenance (SM)schedules, do not have Auto-Approval 🅰 turned on and require each PM Event or collectively all PM Events be approved before work orders can be created for them.
- Scheduled Maintenance (SM) has Auto-Approval turned on 🅱 by default, resulting in work orders being created as soon as an SM Scheduled Event is triggered.
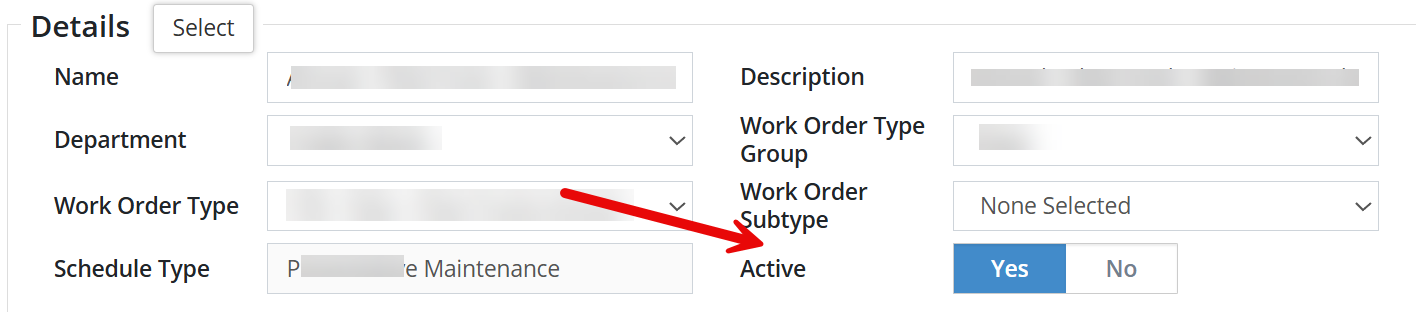
- You can mark schedules Active or Inactive by using the Active Toggle. Select No to mark it Inactive, by default the Toggle is set to Yes. This can be applied to seasonal schedules, for example, that only need to be active for certain months of the year and temporarily inactive for other months. The schedule can be set to active again once it is required to resume.
- Enter Start ❸ and End Dates ❹ for the Schedule.
- Set the Frequency, selecting from the Time and Usage options ❹.
- Time: based solely on time intervals - x number of times per day/week/month/year 🢡 on a particular day or date within the interval 🢡 with a scheduled email notification x days/weeks/months/years prior to the scheduled date. E.g. test fire safety equipment every six months on or around the first day of the month..
- Usage: base solely on usage intervals - x number of kilometres or miles/runtime hours/runtime usage 🢡 with a scheduled email notification x days/weeks/months/years prior to the scheduled date. E.g. oil changes on fleet gas-powered vehicles every 8,000 kilometres/5,00 miles.
- Time and Usage: based on both of the above criteria. E.g. change the furnace filter only if both the 6 month time interval has been satisfied and the furnace has been operational (used) for more that 900 hours.
- TIme or Usage: based on one or the other criterion (either time or usage). E.g. oil change once a year or if and when 8,000 kilometres/5,00 miles has been exceeded.
- Click on the Select Assets ❸ tab.
- Click the Select By ❶ pull-down to either select an entire Asset Group or to select individual assets.
- If you selected Asset Group from the pull-down:
- Select the Asset Group from the Asset Group ❷ pull-down .
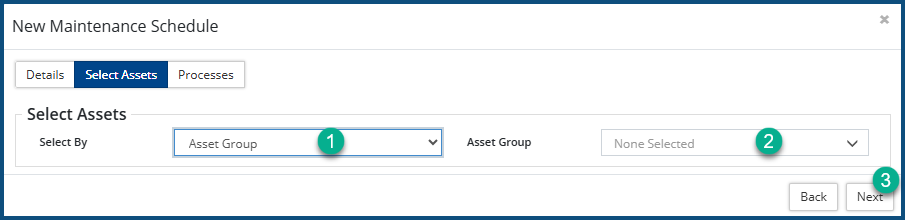
- Click Next ❸.
- Select the Asset Group from the Asset Group ❷ pull-down .
- If you selected Select Assets from the pull-down, the New Maintenance Schedule dialog box expands:
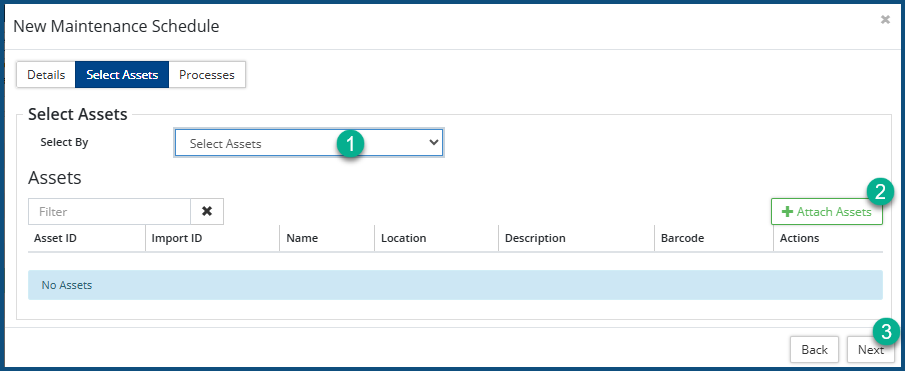
- Click on + Attach Assets ❷. The Select Asset dialog box appears:
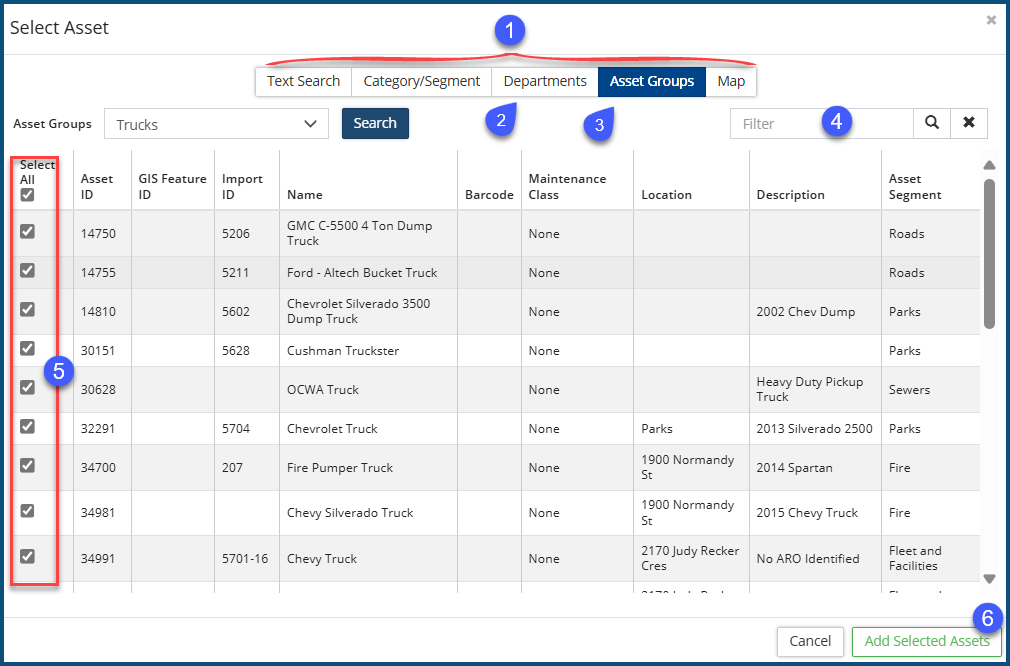
- Select the assets by applying one or more filters using the criteria accessible from the tabs ❶. If you apply more than one filter, the resultant list of assets will be the product of all the all the applied filters (compound filtering). In the following example, two filtering criteria were used: Departments = Roads ❷ .AND. Asset Groups = Trucks ❸.
- You can further whittle down the list by applying a further text-based filter ❹ to the filtered list.
- Check ✅ / uncheck ☐ ❺ the assets to be included in the new asset group.
- Click Add Selected Assets ❻.
- Click on + Attach Assets ❷. The Select Asset dialog box appears:
- Click Next ❸.
- If you selected Asset Group from the pull-down:
- Click the Processes ❹ tab.
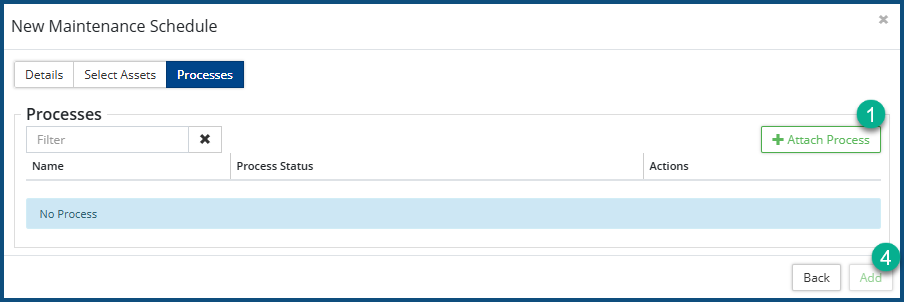
- Click + Attach Process ❶. The Select Process dialog box appears:
- Check ✅ ❷ all the maintenance process to be added.
- Click Add Selected Item/s ❸.
- Click Add ❹.
A PM or SM Event (depending on the schedule type) is created for each asset included for the scheduled date. A PM event will require approval into a work order before the scheduled start date, while an SM event will not require approval at any time, as the work order will be generated along with the Event for the next scheduled date as soon as the previous work order is completed.
An approved event cannot be rescheduled; hence SM events cannot be rescheduled.

Preventative Maintenance Events can be viewed at Home 🢡 Maintenance 🢡 Sections 🢡 Events.
Scheduled Maintenance Events can be viewed at Home 🢡 Maintenance 🢡 Sections 🢡 Events.


