
Overview
Service Request Types act as templates where users set default values and work flow activities. Service request types can be very general such as a Bylaw complaint service request type but once approved as a work order, an inspector or supervisor can select a more specific WO type such as Noise Inspection or Property Standards Investigation.
To create a new service request type template:
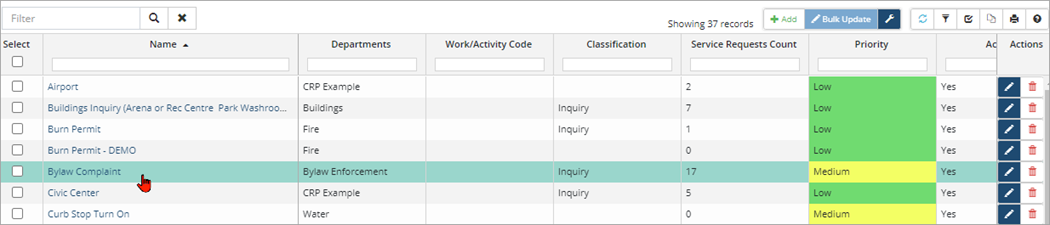
- Navigate to Home 🢡 Maintenance 🢡 Work Flow 🢡 Service Request Types and click +Add.
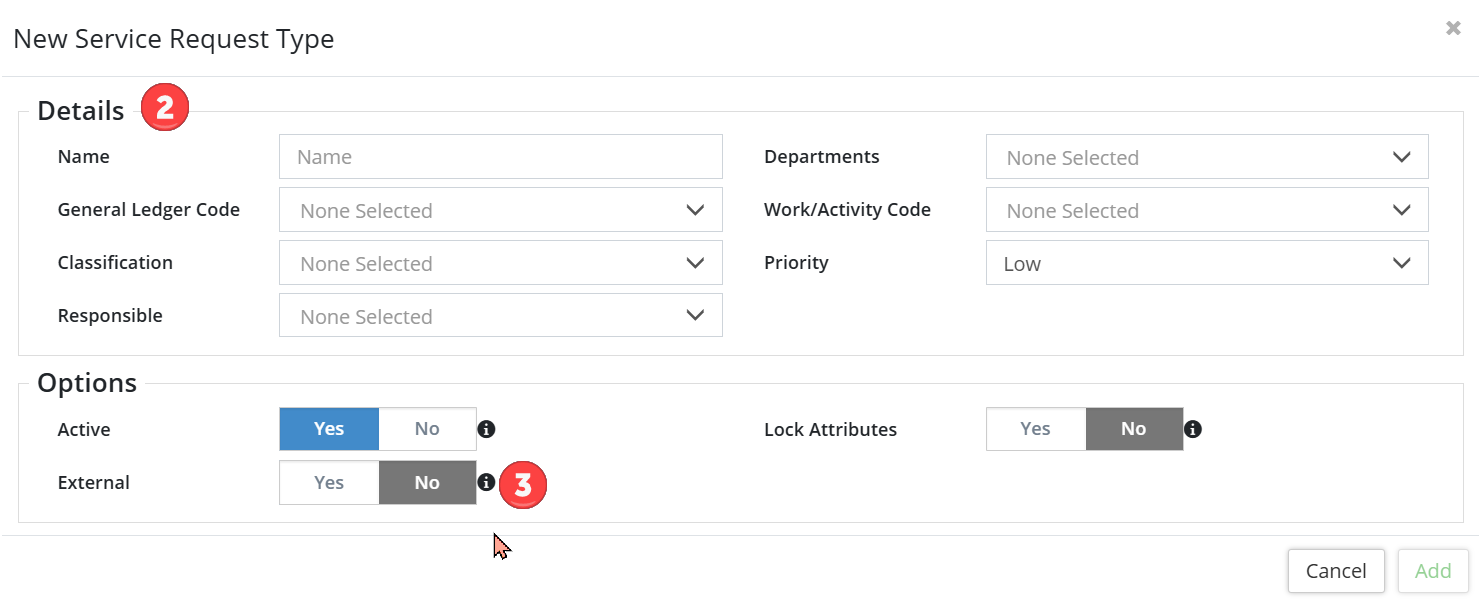
- Details: Enter a Name and select a Department, General Ledger Code, Work/Activity Code, Priority, etc.
- Options: Determine whether this service request type will be for External use only and whether to Lock Attributes (prevents users from deleting and/or adding additional attributes when completing the service request) by using the Yes or No toggles.
- Click Add.
Details
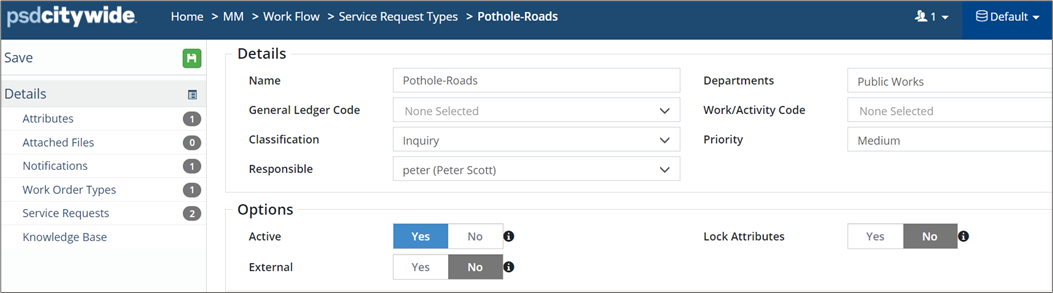
Once a new service request type has been created and added, it opens on screen. Edits can be made as needed. The Details screen will show general information related to the SRT, such Name, Department(s), General Ledger Code, Work/Activity Code, Classification, Priority and whether the service request type is 'External'. Selection of a user as Responsible for taking action on the service request is useful as notifications can be sent to the person assigned as Responsible.
Attributes
Attributes are used to collect additional information related to the service request and are set at the service request type level to ensure consistency. All Attributes saved to a specific Service Request Type are automatically appended when creating a New Service Request.
- To add an Attribute to the Service Request Type, click the Attach drop down and select one or more attributes (press Ctrl + click to multi-select). Click
 .
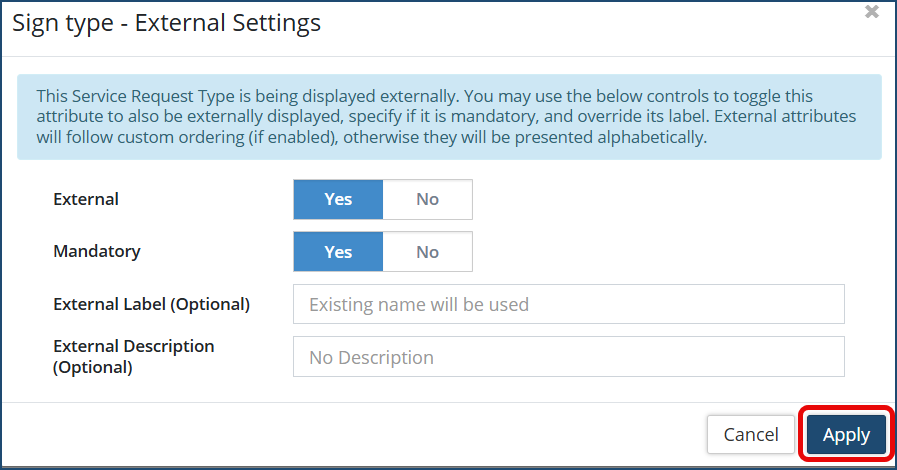
. - To enable External Settings, click the icon beside the attribute field. Select the applicable Yes or No toggles to make this attribute external, mandatory and any optional labels.
- To remove an Attribute, click the red X on the right of the field.
- If the attribute doesn’t exist in the list, click
 to create a new attribute. Enter a Name and select an Attribute Type, then click Add. Type options include:
- If the attribute doesn’t exist in the list, click
| Option | Description |
| Text | Allows for alphanumeric values |
| Number | Allows for numeric values only (does not accept zero) |
| Dropdown | Users select from a defined list of options |
| Currency | Allows for dollar values only |
| Link | Allows for links to a webpage, SharePoint document, etc. |
| Date | Allows for date values only |
| Toggle | Users select an on/off value (i.e., yes/no) |
| Number (Allow Zero) | Allows for numeric values including zero |
| Key Value Pairs | Use when a data point is represented by both a key and a value. Citywide will search by key and return the matching value (i.e., key is 001 and its matching value is 0-100 km) |
| Time | Allows for time values only. Format is HH:MM if using 24h clock |
- Attributes that are set as mandatory will be represented by a blue icon on the right of the field. Click Save.

- (Optional) Attributes can be arranged in groups by clicking on Manage Groups, then adding a New Group within Attributes of the Core Administration.
-
The Select Attribute Group button allows users to add a group attribute and attach from the dropdown a selection of multiple attributes.

- (Optional) Attributes can be arranged in groups by clicking on Manage Groups, then adding a New Group within Attributes of the Core Administration.

Attached Files
The Attached Files screen is used to upload and attach digital files to the Service Request Type. Users with applicable permissions can also delete attached files.

Notifications
Email notifications can be set up to generate automatically. The Notifications screen lists all notifications linked to the current Service Request Type.

To add a notification:
- Click Go To Notifications Page on the Notifications You’ll be navigated to Maintenance 🢡 Work Flow 🢡 Notifications.
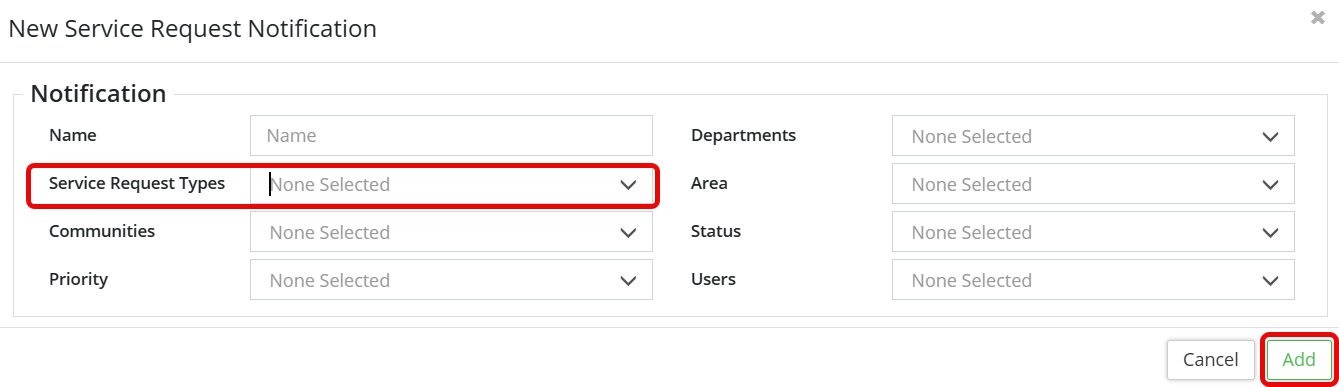
- To add a new service request notification, scroll down and click +Add Service Request Notification and complete all the Service Request Notification fields. Add the service request type to the existing selection in the Service Request Types field (be sure to Ctrl+click).
- Click Add.
Work Order Types
This section is used to link one or multiple Work Order Types to the Service Request Type. When a specific SR is approved into a WO, only assigned work order types are available for selection.

To attach work order types:
- Click +Attach Work Order Type on the Work Order Types
- Use the Select column to check þ one or more options and then click Add Select Item(s).
- Click Save.
Service Requests
The Service Requests screen provides a history of all service requests generated using the current Service Request Type. The priority and status are shown in the grid.

Knowledge Base
The Knowledge Base screen is used to include important information, instruction, or standard questions for staff to use when creating individual service requests based on the specific Service Request Type.

To create a Knowledge Base entry:
- Click +New Knowledge Base Entry. Enter a Note.
- Click Save.


