
Overview
Road assets stored in Citywide Assets need to have Maintenance Class assigned as the MMS are based on the asset’s class. Maintenance Class can be assigned in Assets or in Route Patrol.
-
The Maintenance Class field must be populated for all road segments according to the road class of the asset, so that the MMS compliance status for road patrol frequency and deficiency resolution can be tracked and reported upon.
If Maintenance Class was not assigned to road assets as part of the initial AM inventory upload, it can be done in the following ways.
- Click to Home 🢡 Maintenance 🢡 Route Patrol 🢡 Maintenance Class.
- Click + New Maintenance Class ❶. The Maintenance Classes dialog box appears:
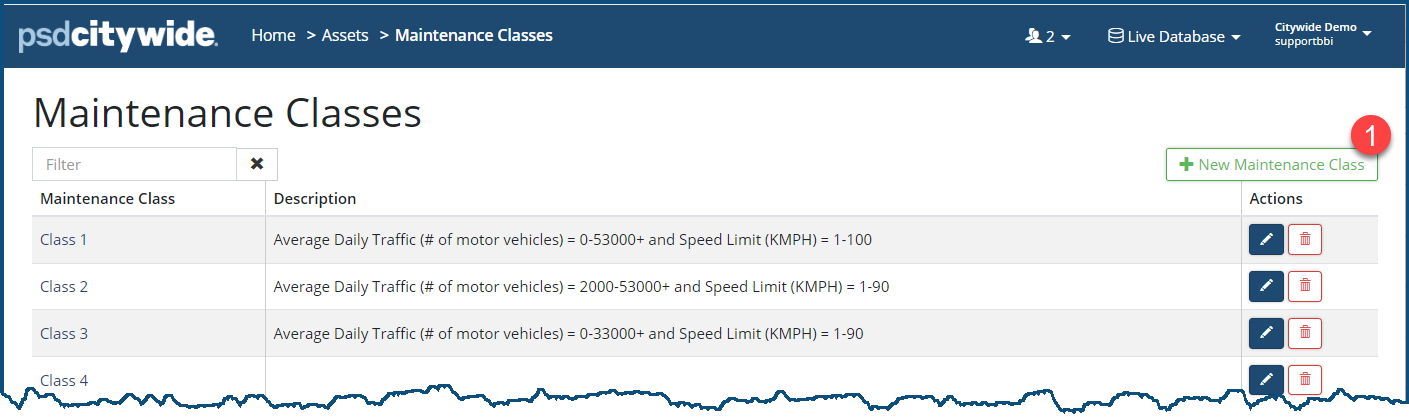
- Define Maintenance Classes in the system as Class 1 – Class 6 and set up the MMS patrolling frequency for each class.
MMS Patrol Frequency and Compliance Ranges
The frequency of patrolling municipal roadways to maintain a minimum standard of road maintenance is configured by the Maintenance Class of the road assets.
See below example for configuring MMS patrolling frequency and compliance range for Class 3 assets, based on the given table in Ontario Road MMS regulation which states the patrolling frequency for Classes 1-5 (for Ontario clients).
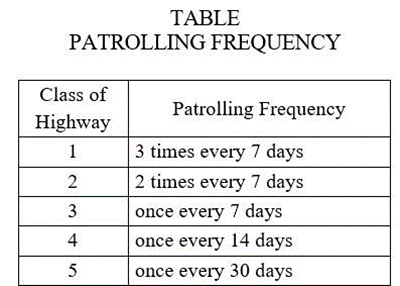
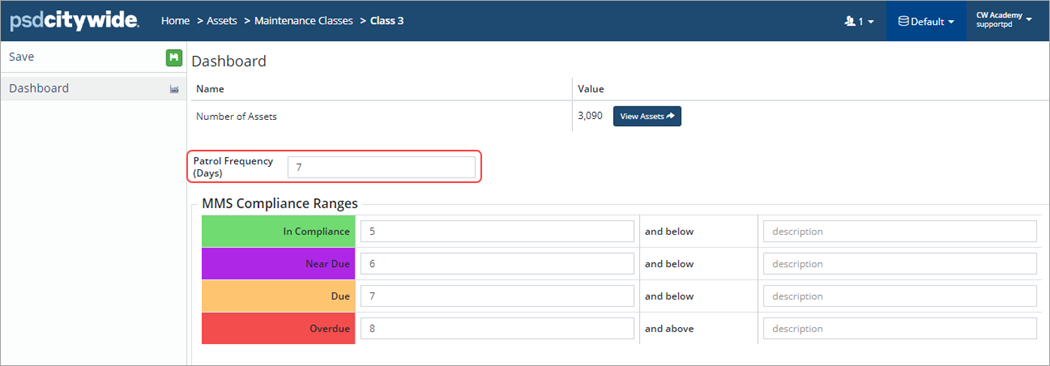
The MMS Compliance Range for all statuses other than Due, can be customized as per the organization’s preference. The patrol is due at the MMS required frequency or can be as per the Municipality’s local level of service.
Assign Maintenance Class to Assets
There are 3 ways to assign a Maintenance Class to road assets in Assets:
- Update asset details
- Bulk update using Default Values

- Asset Sync through the upload center in Citywide Assets
Update Asset Details
- Navigate to Home 🢡 Assets 🢡 Inventory.
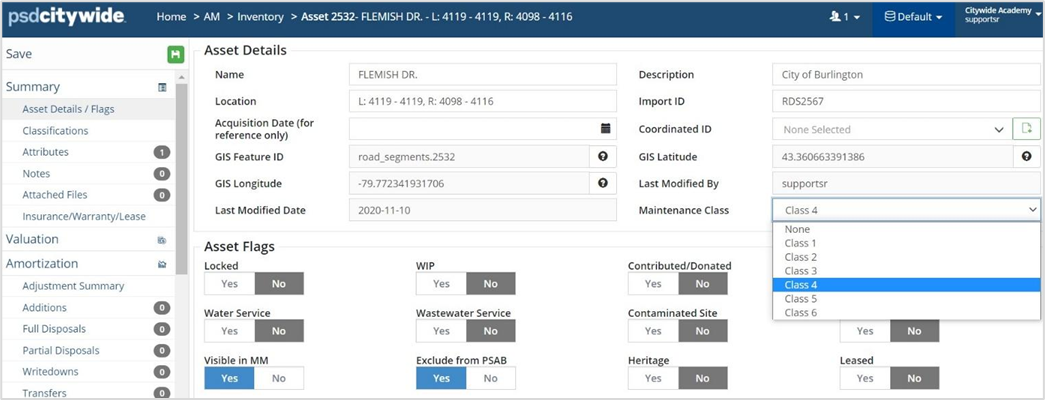
- Select the appropriate road asset from the Assets inventory and then click Asset Details/flags.
- Click the Maintenance Class drop-down and assign select the appropriate option.
- Click Save at the top of the Affiliate panel.
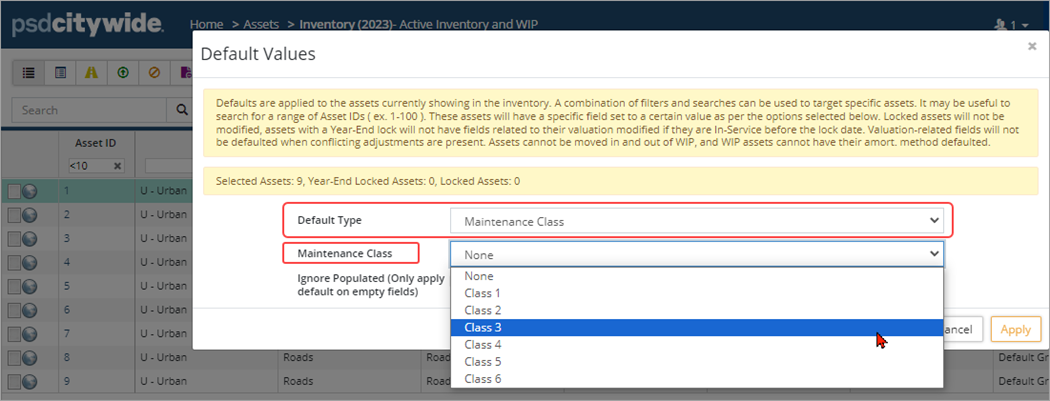
Bulk update using Default Values
- Navigate to Home 🢡 Assets 🢡 Inventory.
- Filter the inventory list to road assets of the same maintenance class.
- Click the Default Values button on the grid toolbar in the top right corner.

- Set the Default type to Maintenance Class.
- Select a class for the selected road assets from the Maintenance Class dropdown.
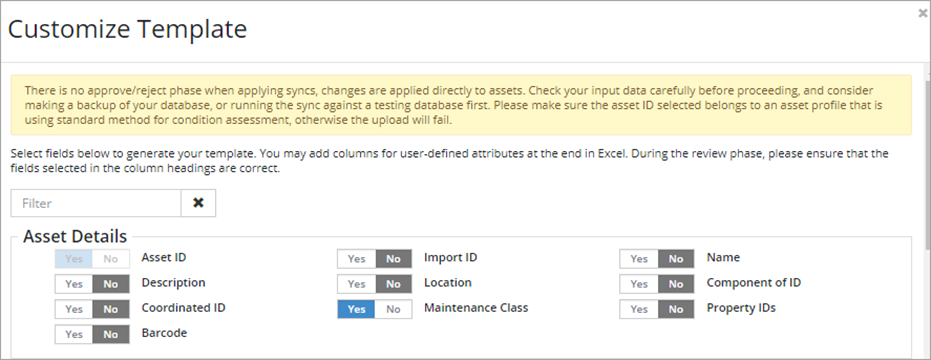
Asset Sync through the Assets Upload Center
- Navigate to Home 🢡 Assets 🢡 Upload Center
- Click the Upload Type dropdown and select the Asset Sync template.
- Select Click to Export. In the Customize Template window the Asset ID field is a required field and is set to yes. The Asset ID is used to sync the maintenance classes for road assets. Set the Maintenance Class flag to yes.
- Click Generate. A popup displays a string of text that is to be copied into Excel. Right click copy (or Ctrl+V), open Excel, and paste.
- Complete the Excel spreadsheet. Once maintenance class information has been entered for each Asset ID and reviewed, copy and paste the Excel spreadsheet back


