Customer Follow up Emails (Licences)

Sep 22, 2025
Overview
Customer Follow up Emails can be set up in Citywide to ensure email notifications are sent to the applicant and any contacts on the licence request. You can enable email notifications on various licence statuses or triggers and inspection results or statuses.
To activate applicant email notifications for Licence applications
- Navigate to Permitting > Licences > Customer Follow up Emails
- Select which notifications you want to enable: Licences or Inspections
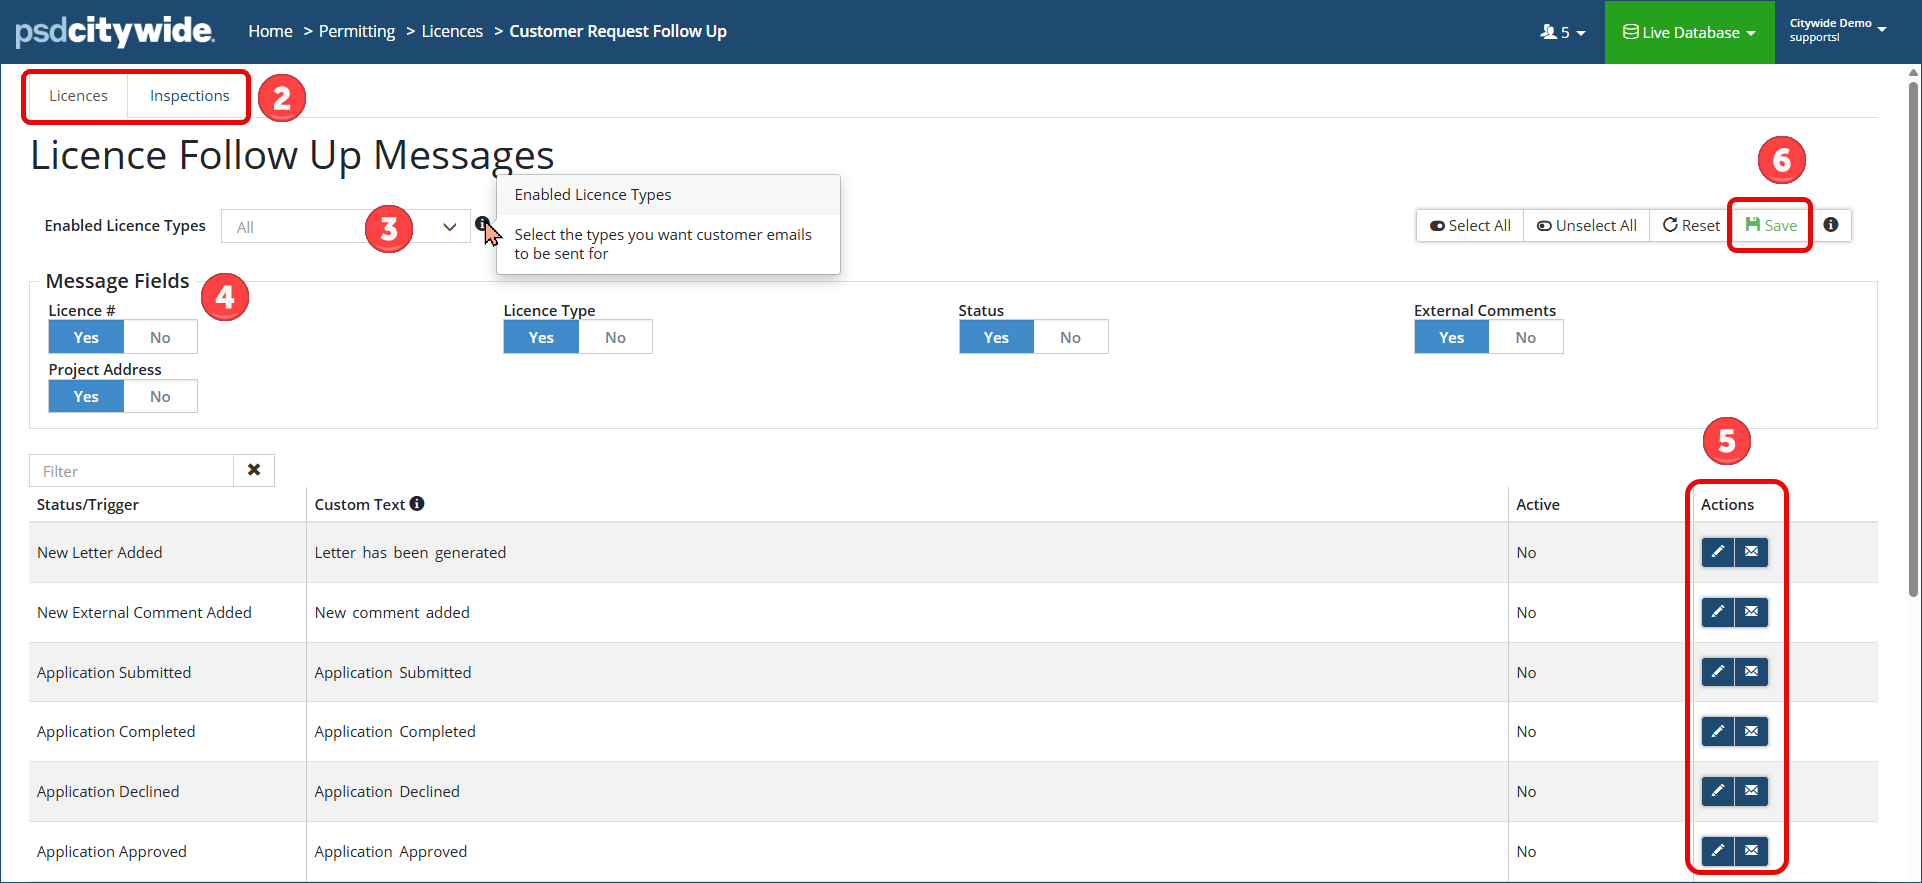
- Enable Licence Types : Select the Licence type(s) from the drop down list to enable customer emails to be sent for.
- For multiple selections, hold the Ctrl key down and select one or more licence types.
- Message Fields : Include what fields you want to include in the email. Select the toggle to Yes or No for:
- Licence #
- Licence Type
- Status
- External Comments
- Project Address
- Actions : Scroll down and click the pencil icon
 on the applicable status/trigger to activate the email notification.
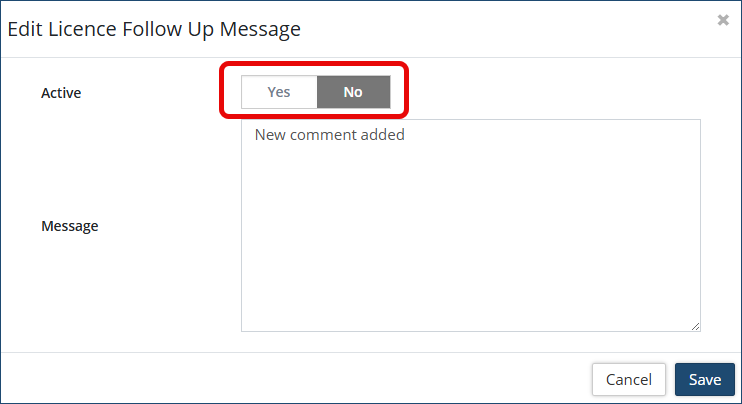
- Select the Active toggle to Yes or No
- Include any custom text you want to include in the message of the email
- Click Save
- Click the envelope icon
 to preview the email notification
- Click Save at the top right corner to save all changes

To activate applicant email notifications for Inspections
- Navigate to Permitting > Licences > Customer Follow up Emails
- Select which notifications you want to enable: Inspections
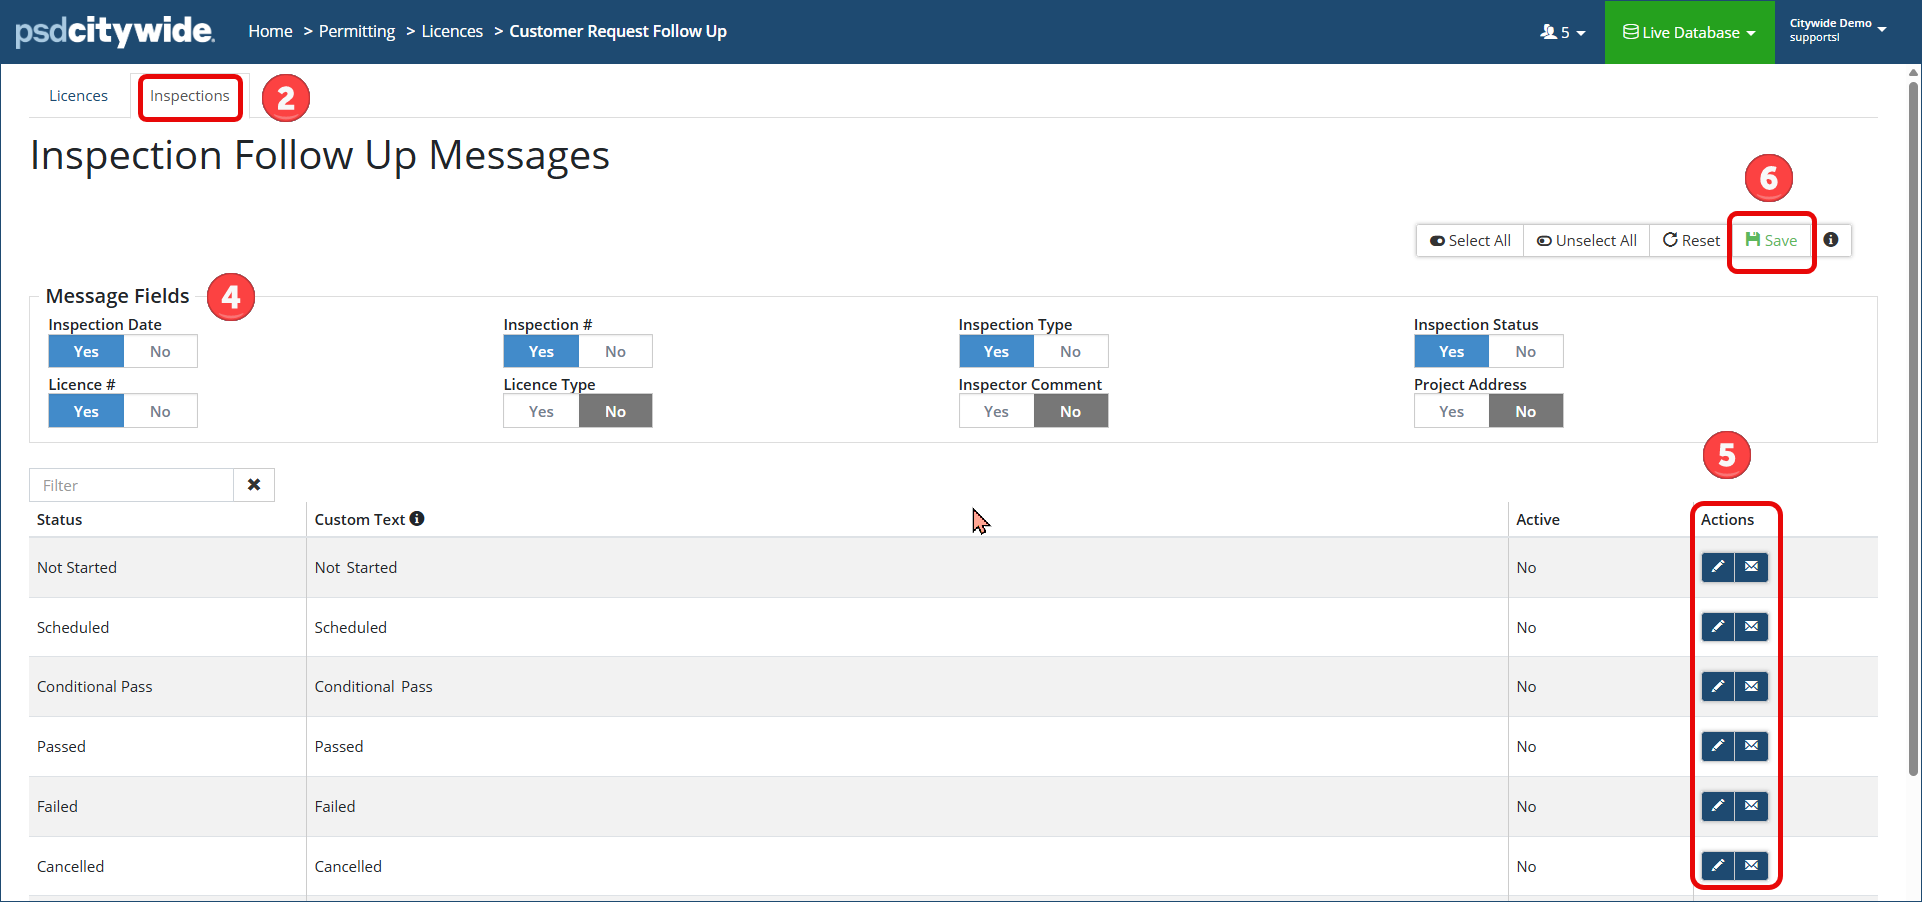
- Message Fields : Include what fields you want to include in the email. Select the toggle to Yes or No for:
- Inspection Date
- Inspection #
- Inspection Type
- Inspection Status
- Licence #
- Licence Type
- Inspector Comment
- Project Address
- Actions : Scroll down and click the pencil icon on the applicable status to activate the email notification.

- Select the Active toggle to Yes or No
- Include any custom text you want to include in the message of the email
- Click Save
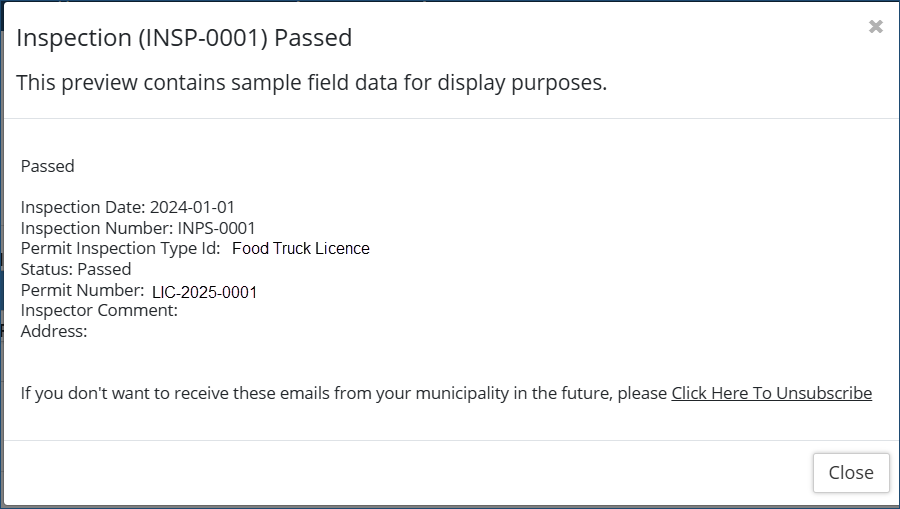
- Click the envelope icon to preview the email notification
- Click Save at the top right corner to save all changes


