Planning Reports

Nov 10, 2025
Citywide Permitting offers several Planning reports meeting a variety of reporting requirements. Each report type includes parameters, filters and display settings to change if desired. All Citywide reports can also be exported to Excel as required. 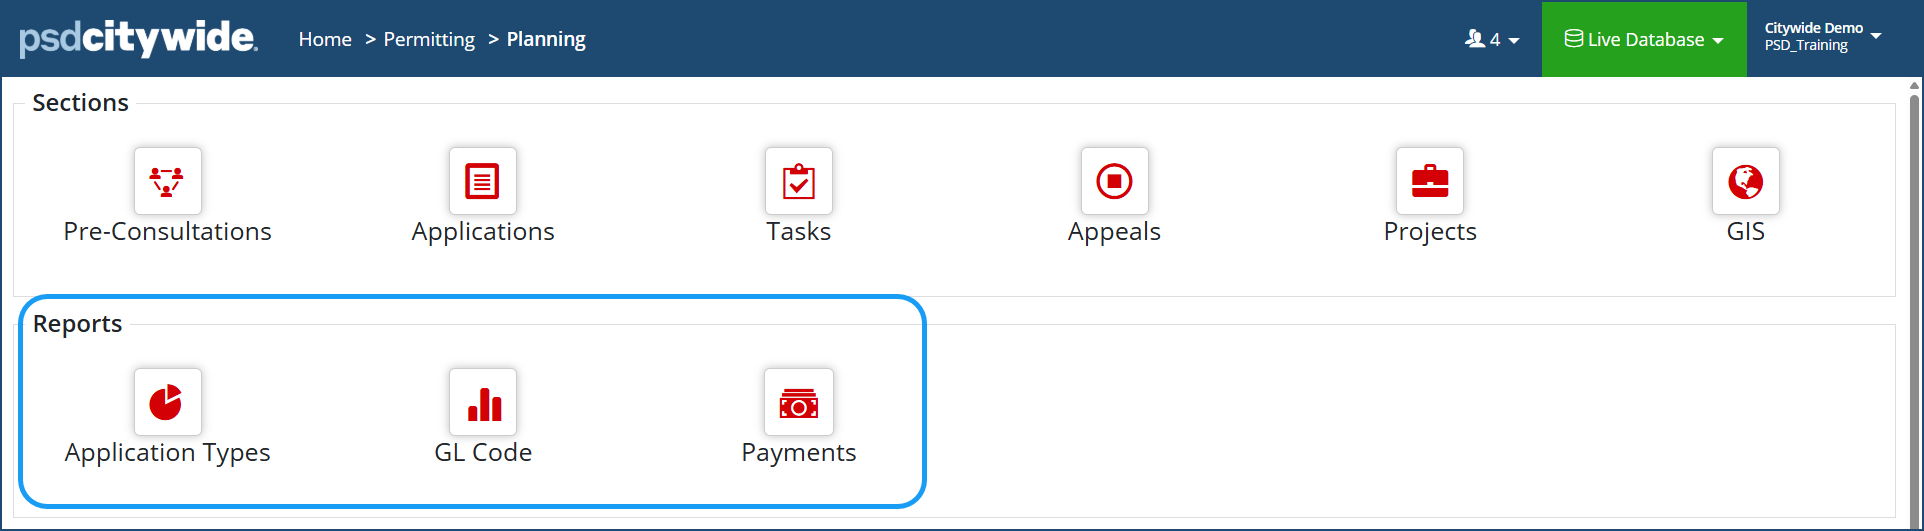
| Report | Description |
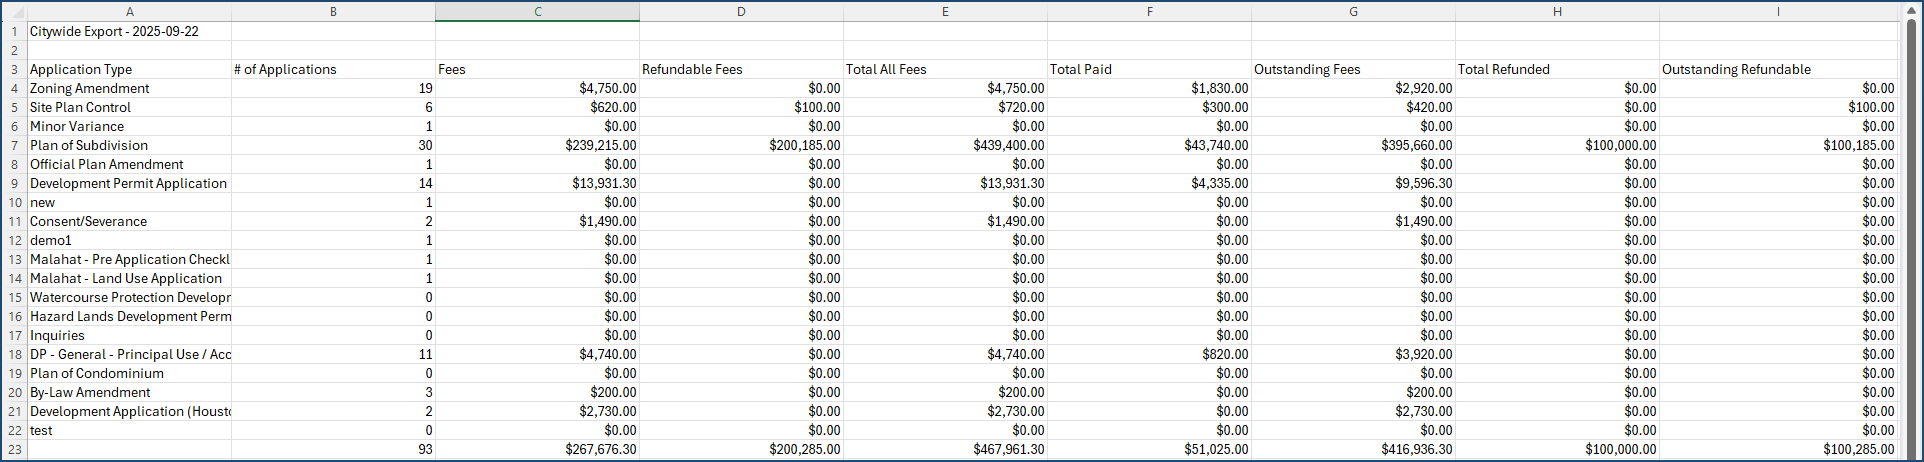
| Application Types | This report shows the number of planning applications based on application type as specified by the report options selected (ie. status or dates). |
| GL Codes | This report shows the total fees of all planning applications based on General Ledger (GL) Codes (Note: GL codes must be configured in the database first. Click here to view how to set up GL codes) |
| Payments | This report shows the payment details from all planning applications as specified by the filters selected (ie. group by application type or payment date). |
- Select the desired report you want to run.
- Click the 'Modify Settings' icon
 to specify a start/end date range & status
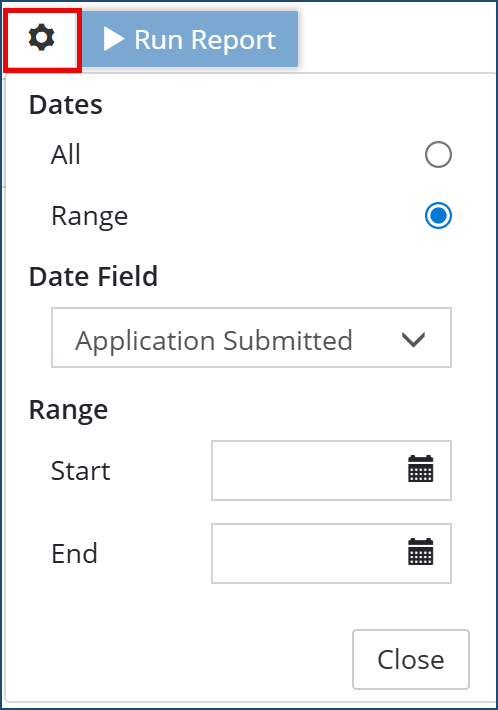
- Then click Run Report
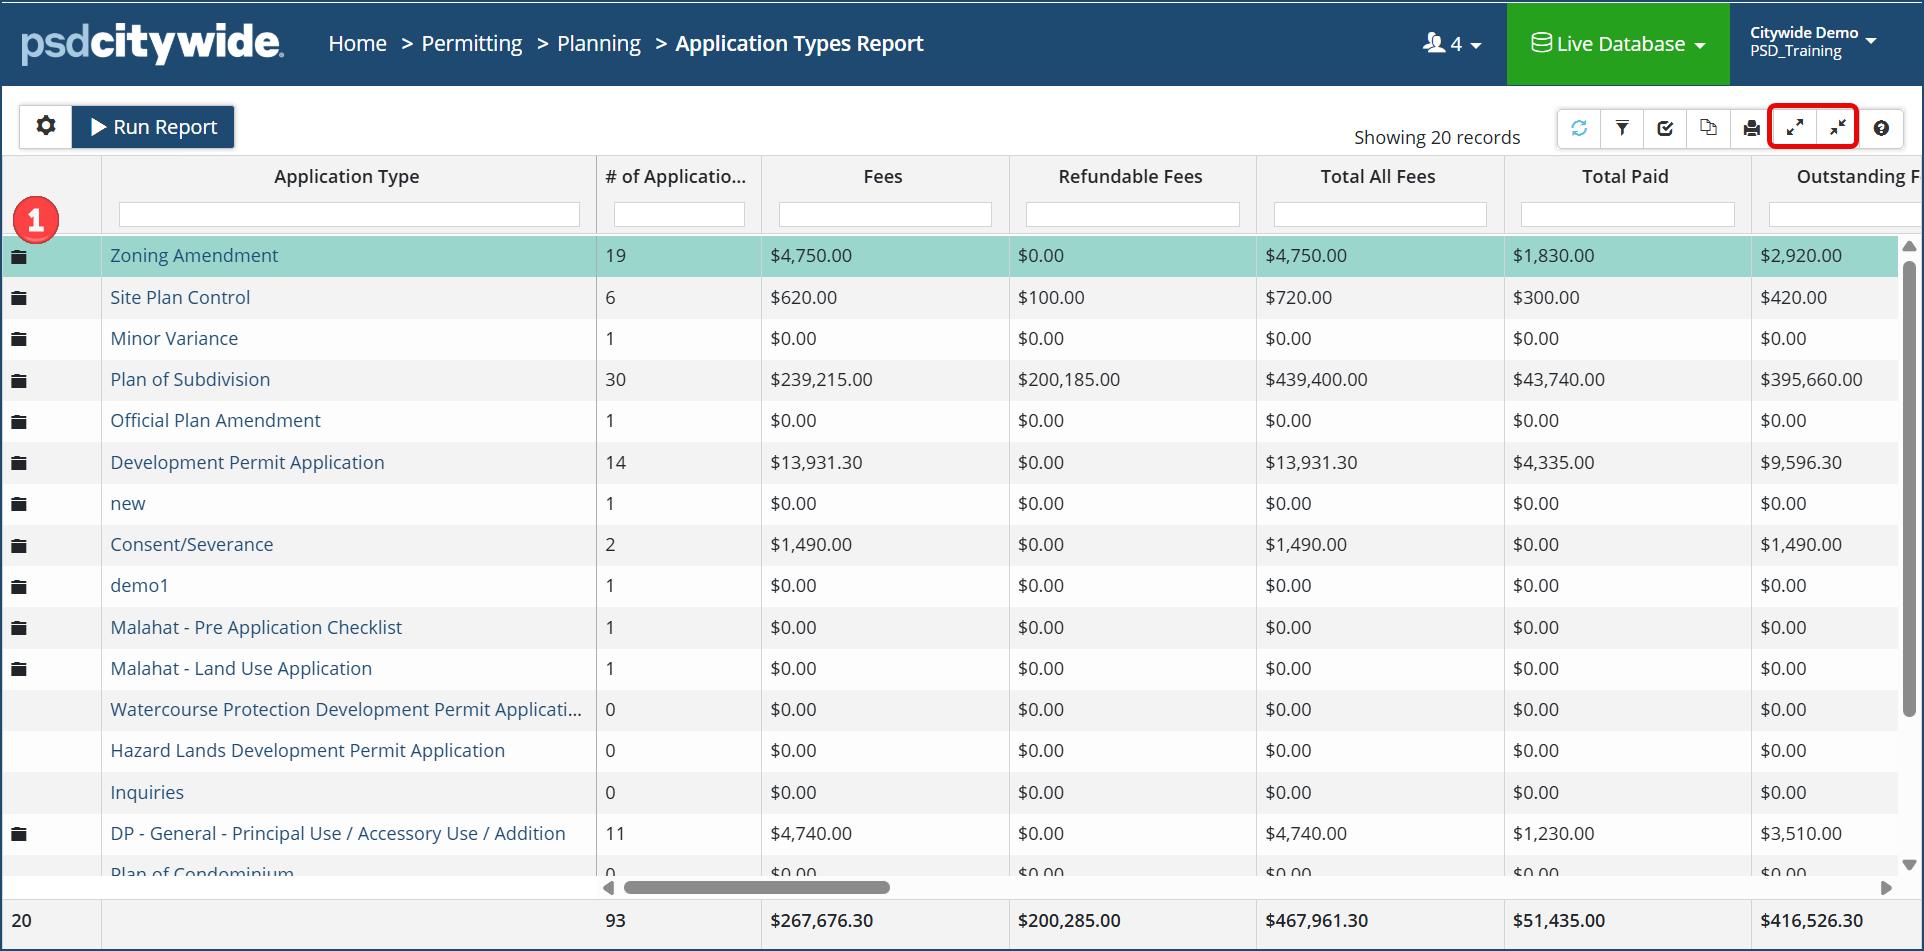
- If the report rows have 'folders' ❶, this indicates that you can 'expand' the data on that row. Further details can be accessed by clicking the folder and expanding the data.
- Alternatively, you can 'expand all' or 'collapse all' folders at once with the icons at the top right of the grid.
After the report is generated, the columns can be customized as needed.
Click the 'Customize columns'  icon at the top right of the grid and enable/disable the columns as needed (For further reference on customizing grid columns, click here).
To Export a Planning Report to Excel
- Once your report is generated, click the Export Data
 icon.
icon.
- The report will export to your computer's downloads folder. Open the file as needed.