This article provides guidance on modifying Trees.
Modifying Tree Levels
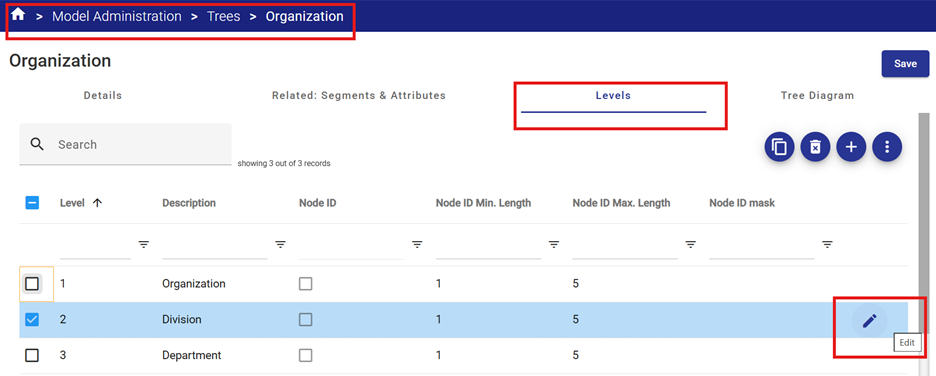
A user may modify Tree Levels as required to reflect the organization’s specific names for each level in the organizational hierarchy.
The default settings are:
- Organization
- Division
- Department
These can be changed, deleted or expanded as required.
To add a new reporting Level to the Tree, click the Add button![]() on the Action Menu and create the new level.
on the Action Menu and create the new level.

To modify an existing Level, select the appropriate Level checkbox, and use the Edit button on the far right to display the level properties.
To delete a level, select the Level checkbox and click the Delete button ![]() on the Action Menu.
on the Action Menu.
Modify Nodes
To add a new child node;
- Select the parent node to which you wish to add a child node from the tree diagram in the left pane.
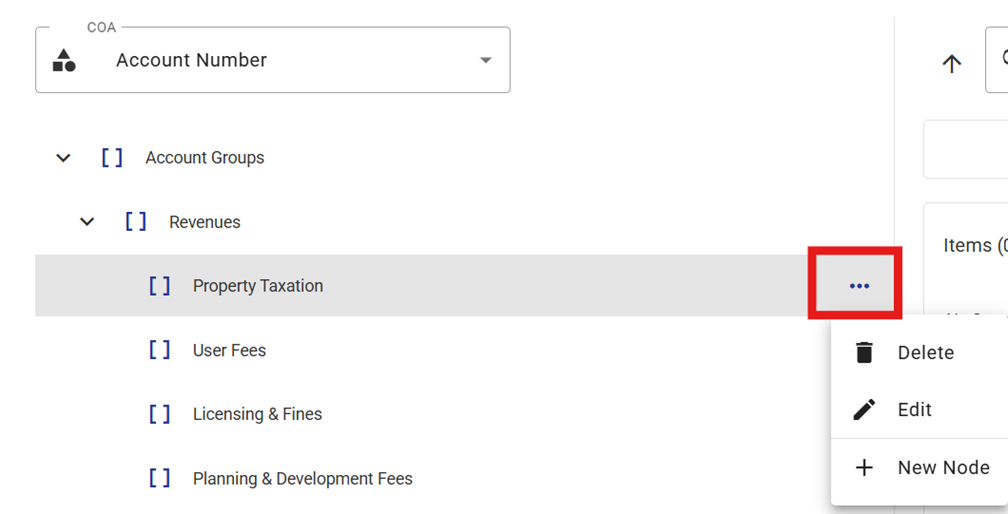
- Click the ellipsis next to the selected parent Node to reveal the Modify Menu.
- Select + New Node from the menu.
- Alternatively, click the Add button
 available in the right-hand "Children" Tree Diagram pane.
 - Enter the properties of the new node.
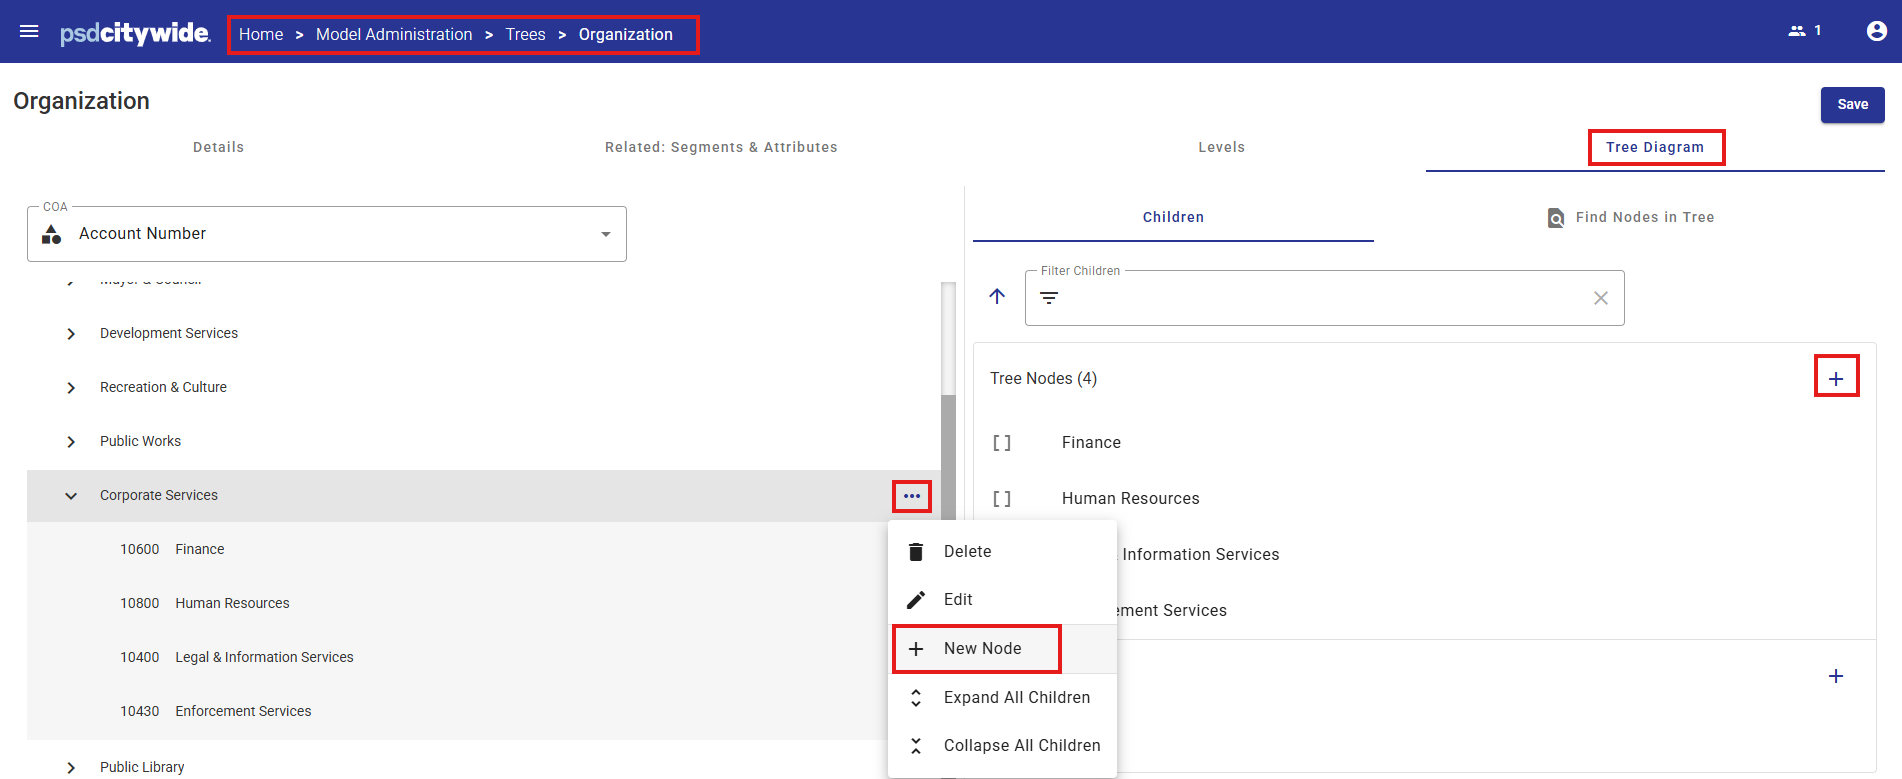
- Click Save.
Existing nodes can also be deleted or renamed using the Delete and Edit tools in the Modify Menu.
Reordering Nodes
When a new node is created, the node is initially added to the end of the list.
However, for reporting or other data display purposes it might be required to re-sequence a node or it’s child nodes.
To move a node up or down in relation to its siblings:
- Select the node from the left-hand pane.
- Drag the node to the desired sequence.
Note that Segment Items cannot be re-sequenced. They are sorted in natural alpha-numeric order by default.
Allocating Segment Items to Tree Nodes
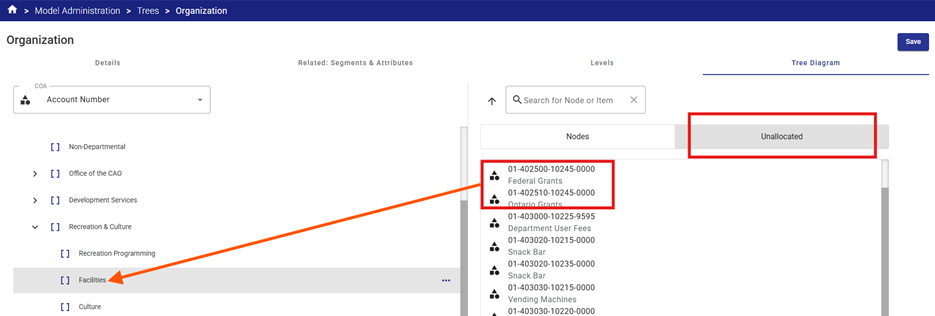
Option 1 - Allocate an Unallocated Segment Item from the Unallocated Items list to a Tree Node:
- Select the Unallocated node from the bottom of the left-hand pane of the Tree Diagram area.
- Unallocated "children" (Segment Items) will be displayed in the right-hand pane.
- Drag the Item(s) drop them onto the Node or Child Node to which you wish to allocate the segment item.
- Use the search bar to search for items by name or ID number.
- To drag multiple Items at once, select the required Items in the right-hand pane by holding down the SHIFT or CTRL key while clicking the Items to be reassigned. Drag the selected items and drop them onto the target node.
- Click Save.
Option 2 - Allocated an Unallocated Segment Item from within the Tree Node:
- Select a Tree Node (Parent or Child Node)
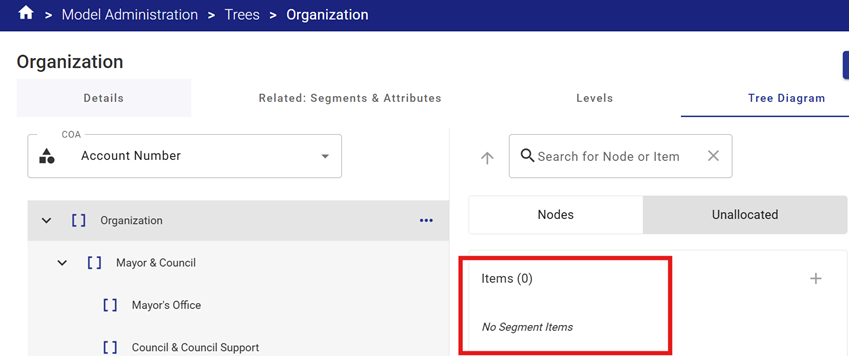
- Click the Add button on the far right of the Items list heading in the right-hand "Children" Tree Diagram pane.

- A list of unallocated items will be displayed.
- Select the checkbox next to the item(s) to be allocated to the selected Node.
- Click Add to add the items to the Node list.
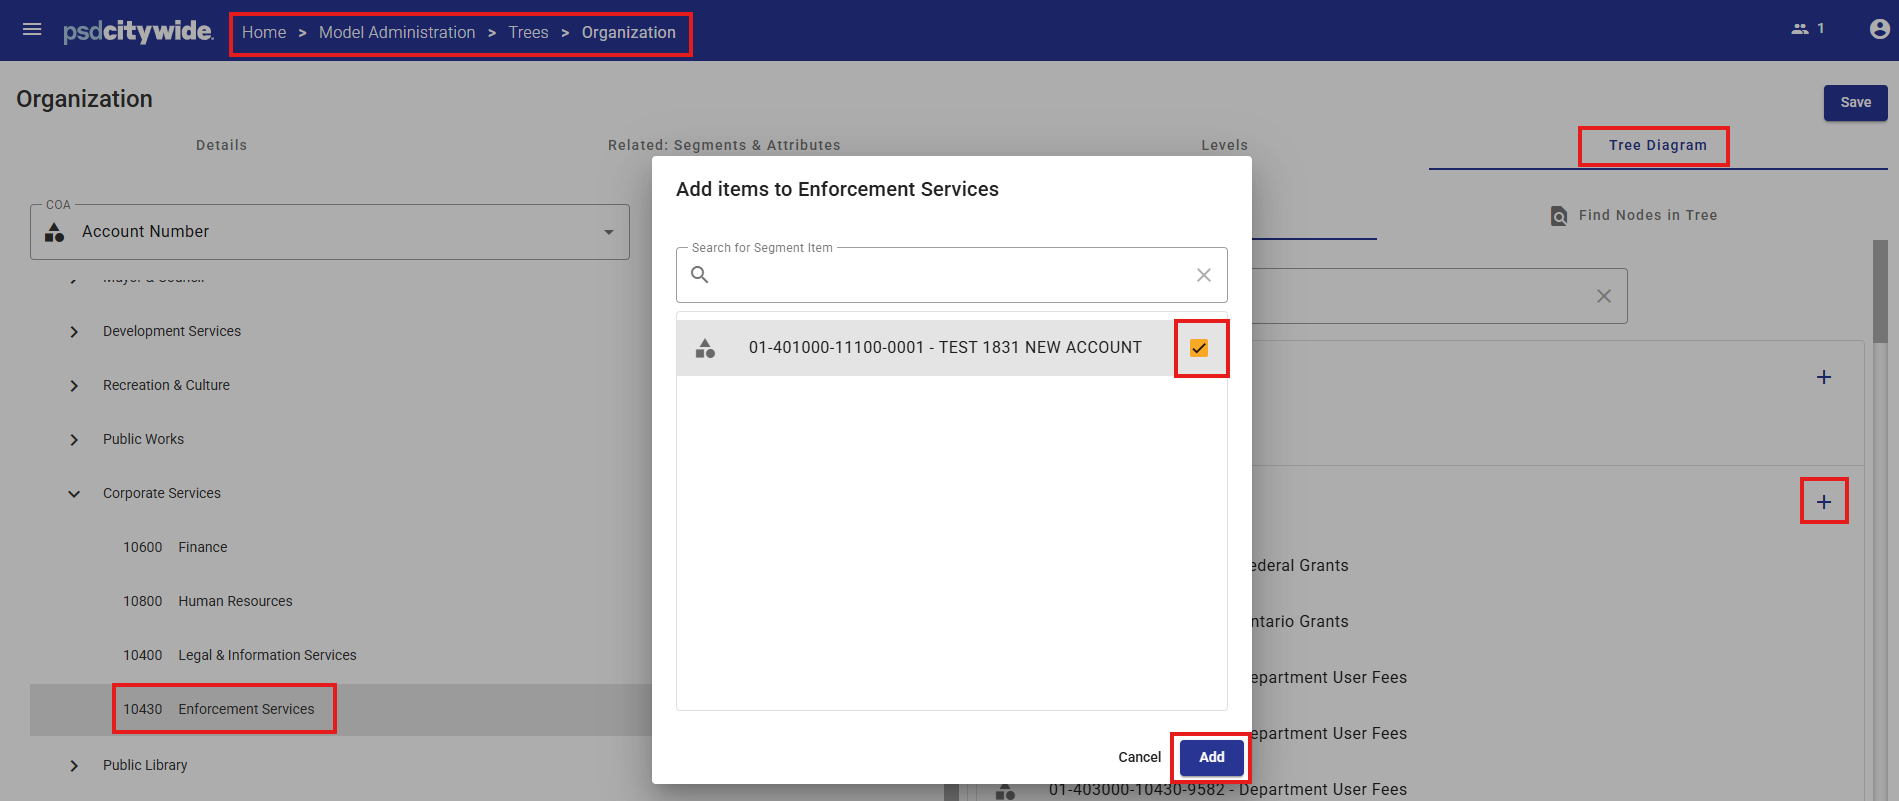
- Click Save.
Checking the Tree
Typically, all items should be allocated to a node in the Tree to ensure complete reporting.
To check for unallocated items, use the Unallocated tab displayed on the bottom of the Tree.
All unallocated items are displayed in the Unallocated node.
Drag unallocated items to the correct Node until all items are allocated.
Use the various system reports in Operating Plan and Capital Plan to check accuracy of the Tree design.