The Budget Roll-Up Tree is used to support budget reporting in the system.
This Tree defines how various budget-related Class Columns (such as Base Budget, One-Time, Incremental, etc.) are combined and rolled up in Views and Reports.
By configuring these relationships in the Tree, the system can automatically calculate budget totals without requiring users to manually add multiple columns or create calculated fields.
As a result, users can view summarized budget information—such as requested, approved, or post-approval budget totals—as a single rolled-up value at the desired reporting level.

The Budget Rollup Tree default settings are:
| Class Column |
Base Budget Node |
One-Time Items Node |
Incremental Changes Node |
Amendments Node |
|---|---|---|---|---|
| Base Budget | ✅ | |||
| One-Time Reversals | ✅ | |||
| One-Time <Current Year> | ✅ | |||
| Incremental 1 | ✅ | |||
| Incremental 2 | ✅ | |||
| Incremental 3 | ✅ | |||
| Incremental 4 | ✅ | |||
| Incremental 5 | ✅ | |||
| Incremental 6 | ✅ | |||
| Budget Neutral | ✅ | |||
| Salary Impacts | ✅ | |||
| Capital Impacts | ✅ | |||
| Decision Items | ✅ | |||
| Post Budget Changes | ✅ |
Note: Class Column names and Tree Node allocations are user-configurable. The settings may be different in your organization's database depending on your reporting needs..
Changing Rollup Behaviour
Rollup behaviour can be modified in two ways:
-
Changing the structure of the Budget Rollup Tree iteself
-
Changing which Class Columns are assigned to specific Tree Nodes
Changing the Budget Rollup Tree
In some cases, a user may need to modify the budget roll-up levels to achieve a desired reporting format (i.e. to create a new subgroup to summarize the base budget and one-time changes).
This may require adding, editing, or removing Tree Nodes.
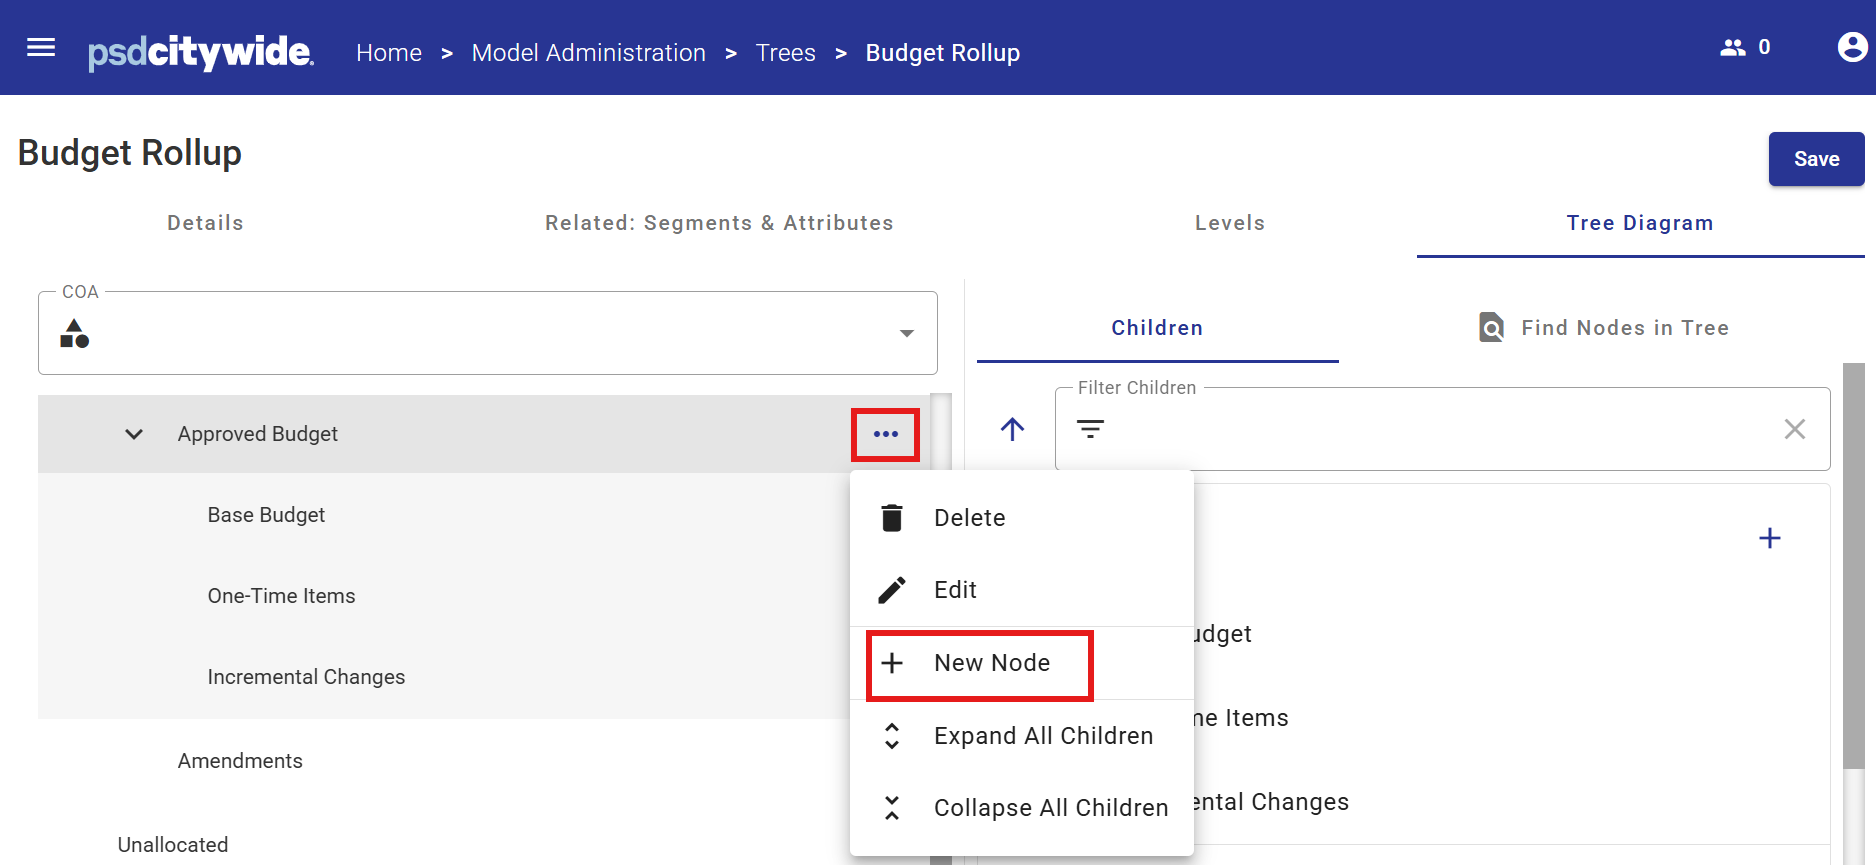
Adding a Node
-
Select the parent Node in the Tree.
-
Open the Node menu
 .
. -
Select New Node + from the menu.
-
Enter a Node description when prompted.
Editing a Node
-
Select the Node
-
Open the Node menu
-
Select Edit
 from the menu.
 -
Update the Node description as required
Deleting a Node
-
Select the Node .
-
Open the Node menu
-
Select Delete
 from the menu.
Changing Class Column Allocations
Roll-up behaviour may also be changed by changing the default Tree Node assigned to the Class Column.
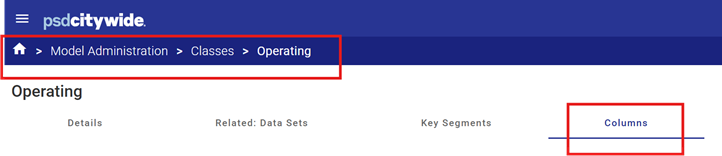
- Navigate to: Model Administration → Classes → Operating → Columns
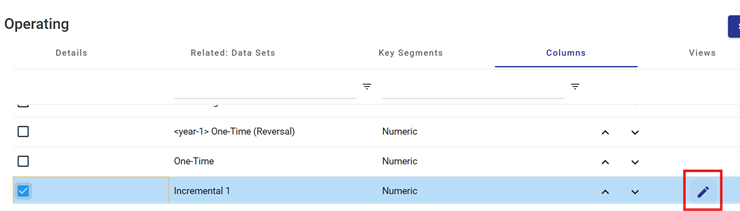
2. Select the Class Column to be modified
3. Click the Edit ![]() button to open the column properties for the selected Class Column.
button to open the column properties for the selected Class Column.
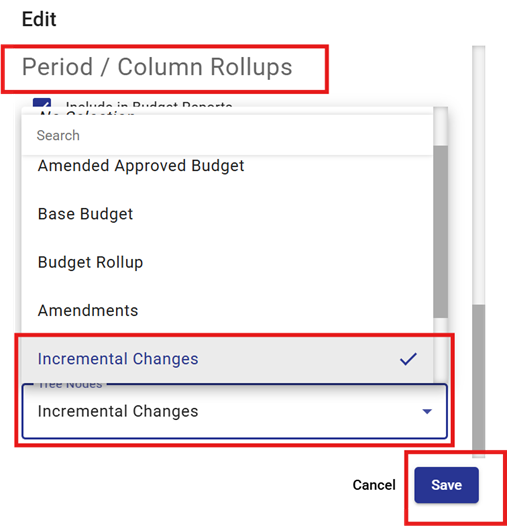
4. Scroll to the Period / Column Rollups section.
5. Locate the Trees and Tree Nodes fields.
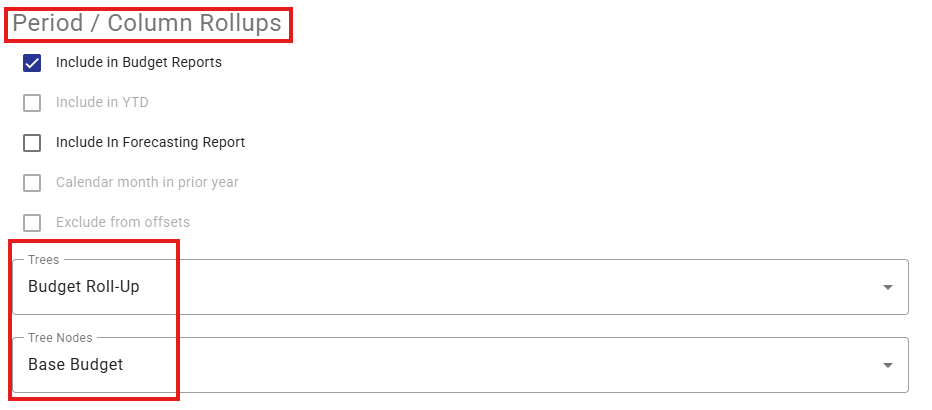
6. In the Trees drop-down list, select the Budget Rollup Tree. (The Trees drop-down list indicates which Rollup Tree the column will be included in.)
7. In the Tree Nodes drop-down list, select the Node where the column should roll up.
8. Save your work.