
The COA Class Key and Attributes are the fundamental components of the CWBC data model.
These perform a similar role to account segments found in most accounting systems.
For example, in a typical expense and revenue ERP applications for a public sector organization we might expect to see segments defined such as:
- Fund
- Cost Centre (alternative names for this segment could be Department, Business Unit, Category)
- Object (alternative names for this segment could be Account, Account Type or Cost Element)
- Activity (alternative names for this segment could be Sub-Department, Program, Job,
Throughout the user guide Fund, Cost Centre, Object and Activity will be used to represent these types of general ledger segments.
For a job costing or capital planning application we might expect elements such as Job or Project, Phase and Category.
In CWBC there is a single COA Class Key for each Class (Operating or Capital) but there is no limit to the number of Attributes that can be created.
Each Class Key or Attribute contains a list of items (for example the Class Key element contains all the full general ledger account items) which can either be maintained manually or be imported from an Excel workbook.
Importing Items from Excel
Items must be imported from an Excel file with the following format:

Import templates will be provided by your PSD Advisor.
Data Requirements:
-
The worksheet must not contain blank rows.
-
All data must be located on a single worksheet tab.
Header Row:
-
The header row must be included.
-
Column A must contain the Segment Item ID.
Columns:
Columns A–D contain the data imported into the Items table.
| Column | Description |
|---|---|
| A | Segment Item ID (without masking) |
| B | Description |
| C |
Disabled indicator "True" ( = Yes) or "False" ( = No) |
| D | Notes related to the Segment Item |
Item Import Instructions
1. Go to Model Administration > COA > Account Number (or Capital Account Number, depending on the items to be imported).
To import Attribute Items Go to Model Administration>Attributes and select the Attribute for which the Items will be imported.
2. Click the kebab button on the Action Menu.
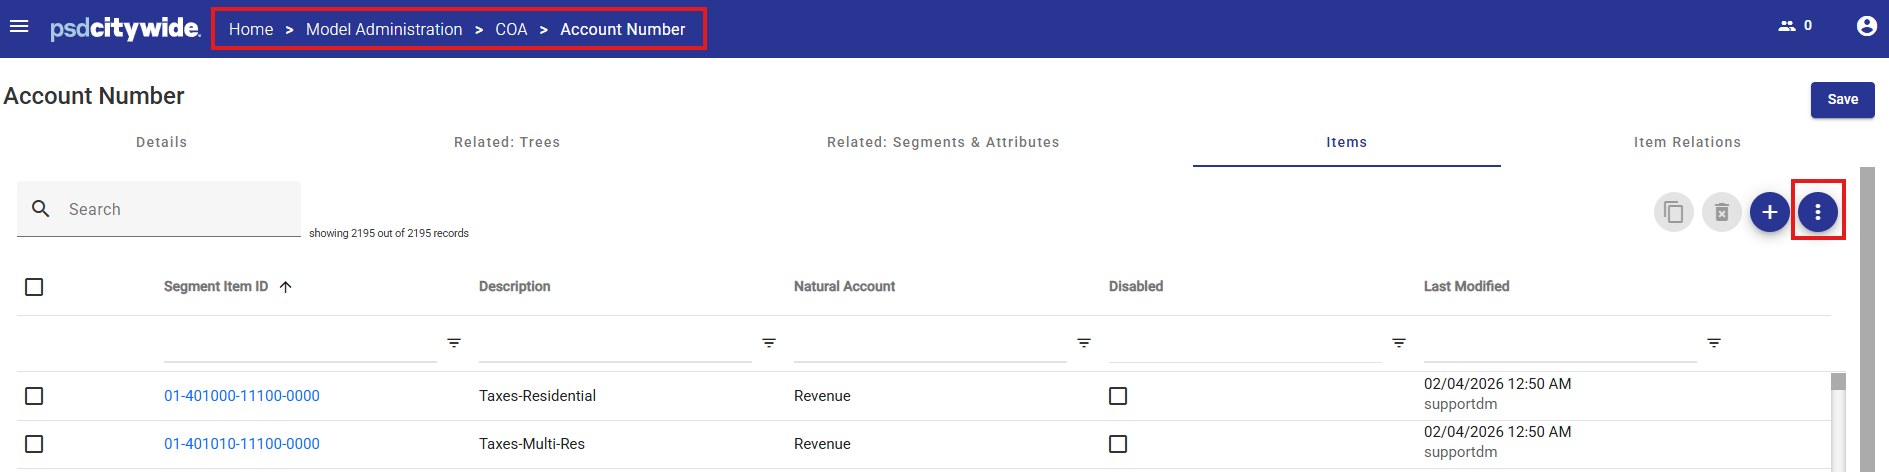
3. Select Import from the list of menu items.

4. Click Browse Files and locate the file to be imported.
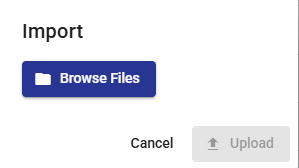
5. Click Upload
Updating Existing Items
The spreadsheet may include both new and existing Items.
If an imported item already exists, its attributes will be updated to match the values provided in the spreadsheet.
Item Relations
Each COA Class Key Item or Attribute Item can be related to one or more Attribute Items.
These relationships allow the system to maintain connections between related data elements and support data selection and reporting.
Example 1: COA Class Key Relationships
The COA Class Key contains a list of Items, usually accounts representing the full General Ledger account string, to be used in the Operating Plan module.
Each Item is formed by combining several account segments into a complete account string.
To support this structure, separate segments, called Key Segments, are created for each account component:
-
Fund
-
Object
-
Cost Centre
-
Activity
Each Key Segment contains a list of valid values for that segment. For example:
-
The Fund Segment contains all Fund IDs
-
The Object Segment contains all Object accounts
-
The Cost Centre Segment contains all Cost Centre values
-
The Activity Segment contains all Activity values
For example: Fund.Object.Cost Centre.Activity
This structure may produce a COA Class Key Item such as: 01.501020.10100.4595
These Key Segments are then related to the COA Class Key, allowing the system to retrieve the individual account components associated with each COA Item when generating Views and Reports.
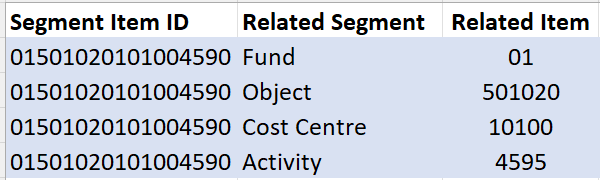
Item Relations:
COA Class Key sequence: Fund.Object.Cost Centre.Activity
COA Class Key Item: 01.501020.10100.4595
|
Related Segment |
Related Segment Item ID |
Related Segment Description |
|---|---|---|
| Fund | 01 | General Fund |
| Object | 501020 | Materials |
| Cost Centre | 10100 | Finance |
| Activity | 4595 | Tax Collections |
Example 2: Attribute Relationships
An Attribute may be defined called Capital Project, which contains a list of Capital Project Items used in the Capital Plan module.
For each capital project, users may want to store additional information, such as the Project Manager responsible for the project, and the Project Type (for example, building or equipment).
To support this, two additional Attributes would be created:
-
Project Manager – containing a list of all project managers
-
Project Type – containing a list of project types
Each Attribute contains a list of Attribute Items, representing the list of individual Items associated with that Attribute.
These Attributes can then be related to the Capital Project Attribute, allowing each Capital Project Item to be associated with a specific Project Manager and Project Type.
These relationships can then be used for reporting, filtering, and data selection.
Item Relations:
Capital Project Item: 1245
|
Related Segment |
Related Segment Item ID |
Related Segment Description |
|---|---|---|
| Capital Project | 1245 | New Snow Plow |
| Project Manager | 52 | J. Singh |
| Project Type | 03 | Growth |
Importing Related Items from Excel
COA Class Key Segments and Related Attribute Items may be imported from an Excel workbook.
Excel File Format
Header Row:
-
A header row must be included.
-
Column A must contain the Segment Item ID.
Data Requirements:
-
The worksheet must not contain blank rows.
-
All data must be located on a single worksheet tab.
Columns:
Columns A–C contain the data imported into the Item Relations table.
| Column | Description |
|---|---|
| A | Segment Item ID (without masking) |
| B | Related Segment Name |
| C | Related Segment Item |
Example 1 Import File
Example 2 Import File

Import Items from Excel
1. Go to Model Administration > COA > Account Number or Capital Account Number (depending on the items to be imported).
This procedures also applies to importing Attributes from the Model Administration > Attributes area.
2. Click the kebab button from the Action Menu.
3. Select Import from the list of menu items.
4. Click Browse Files and locate the file to be imported.
5. Click Upload
Updating Existing Items
The spreadsheet may include both new and existing Items.
If an imported item already exists, its attributes will be updated to match the values provided in the spreadsheet.


