


Notifications (Spaces)

Aug 18, 2026
Overview
In Citywide Spaces, email notifications can be set up for when work orders or service requests are created that apply to a space. Navigate to Home > Assets > Spaces > Notifications
- Click + Add Notification.
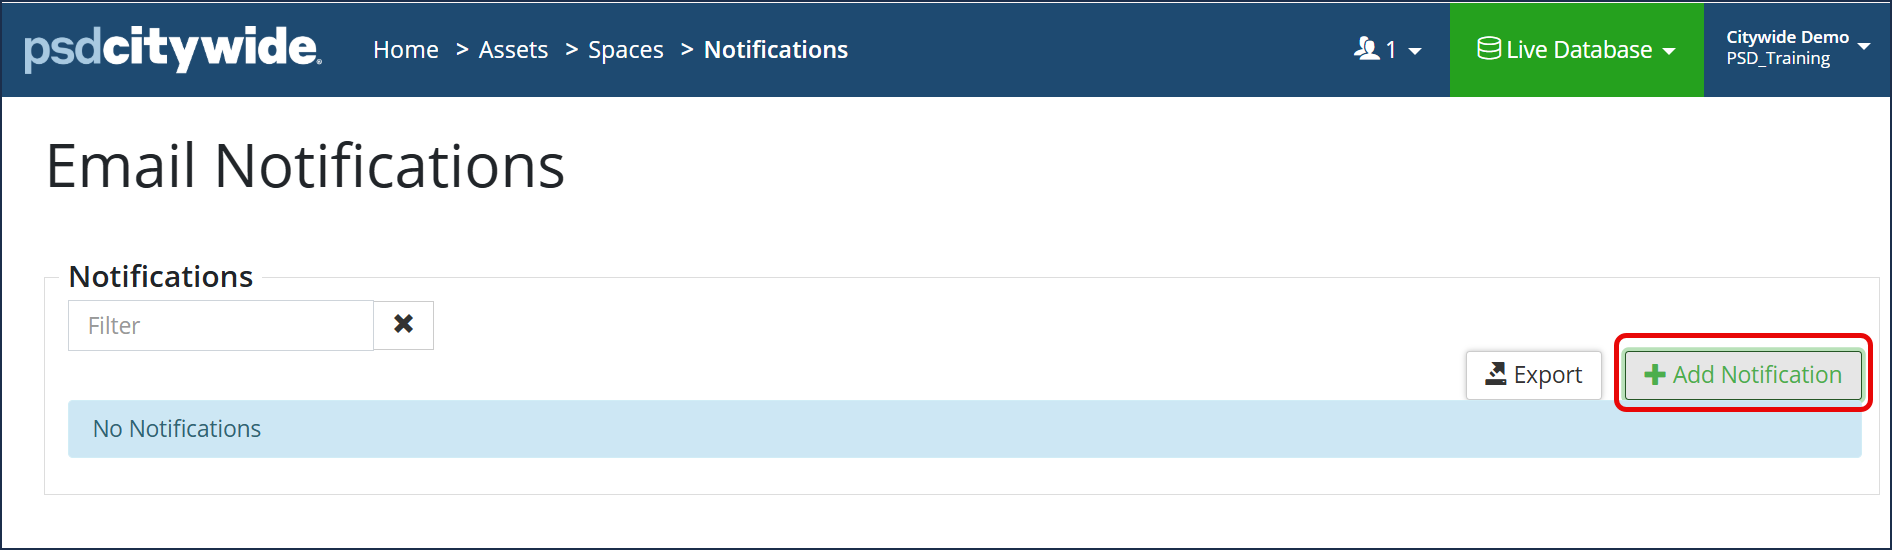
The New Notification dialog box appears: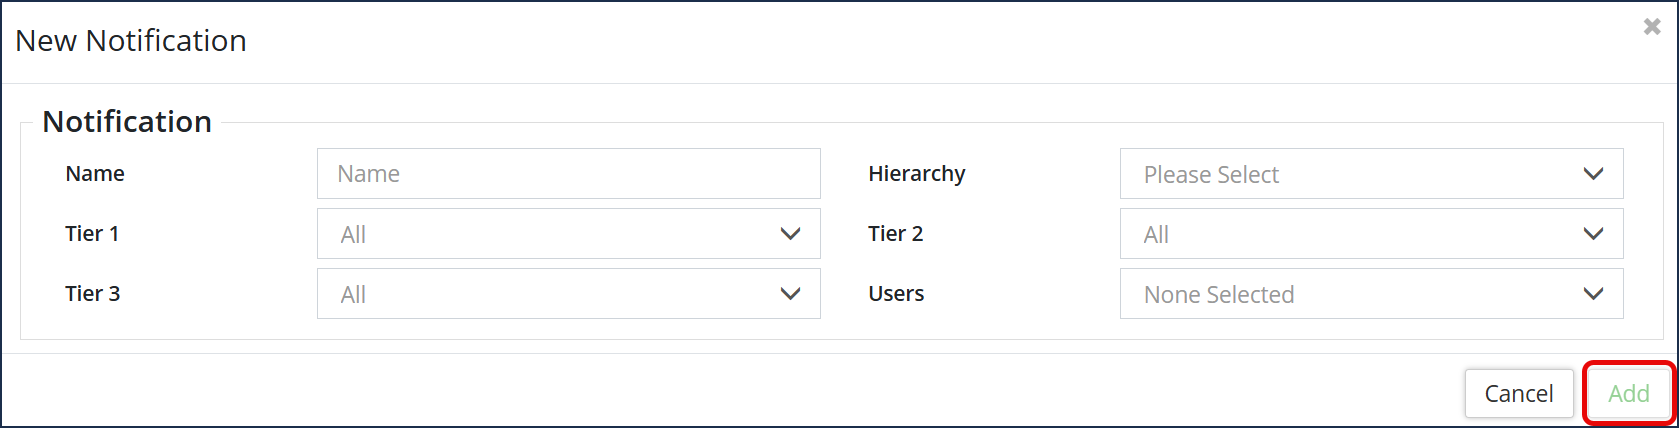
- Enter a descriptive Name for the notification.
- From the dropdown, select the applicable Hierarchy. Subsequently, this will auto-populate the associated Tier names to the selected Hierarchy below.
- From the dropdown of each Tier's name, select the item(s) that require a notification for. (Hold down the Ctrl key to select more than one. Selected options will have a blue background.)
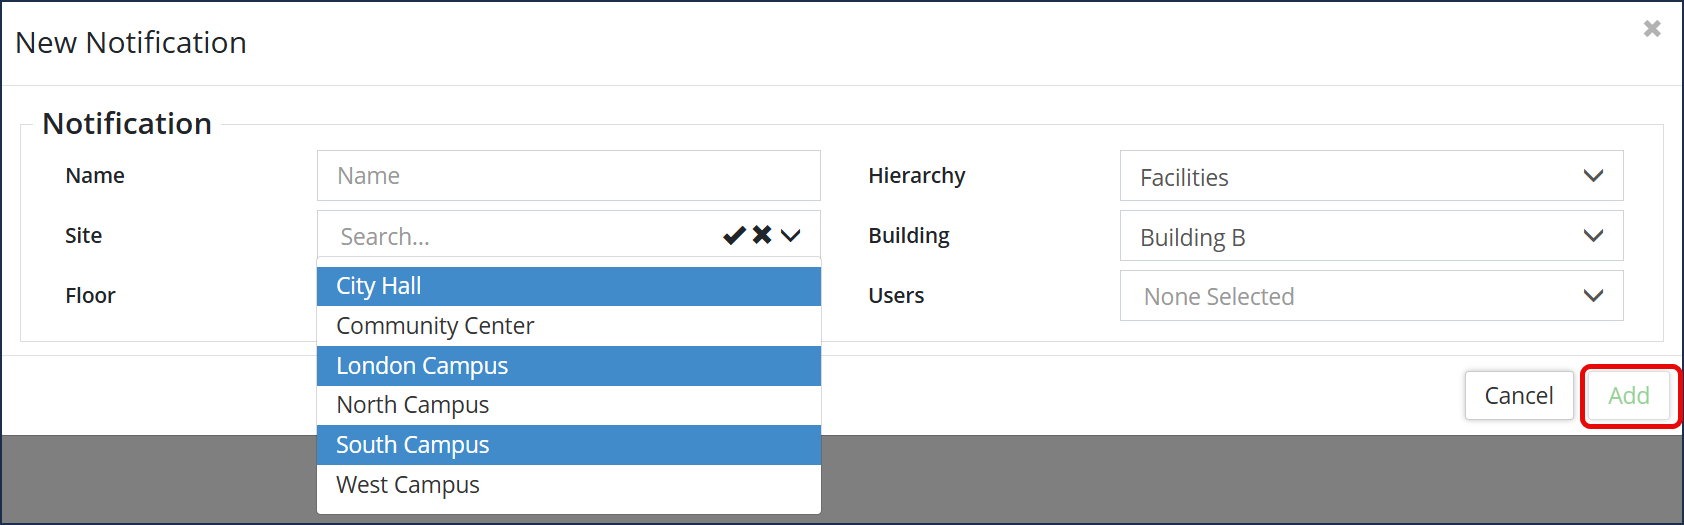
- Select the User(s) that is going to receive the notification. (Hold down the Ctrl key to select more than one user.)
- Click Add.
View/Edit/Delete Notification(s)
To view the notification details: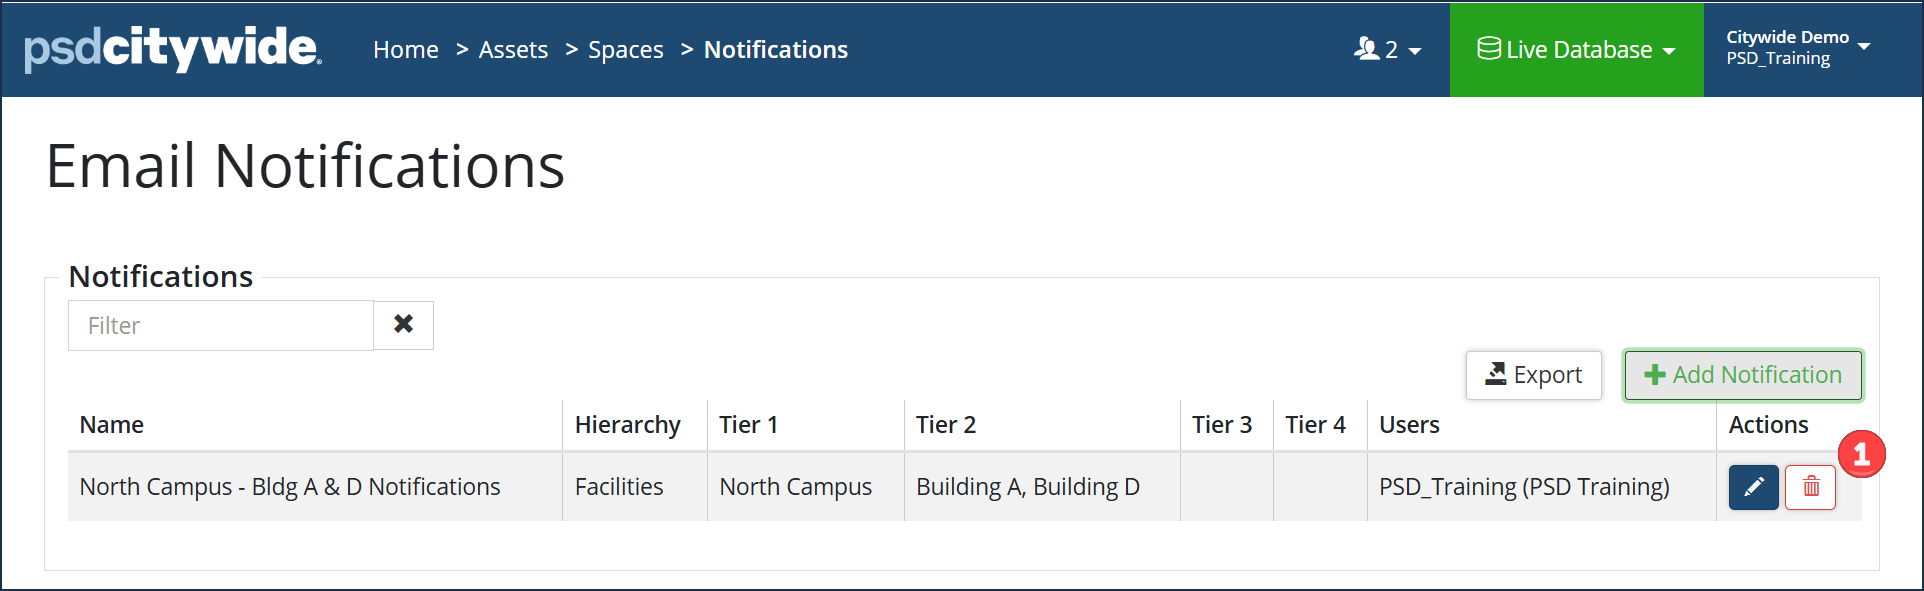
- Click the Edit icon ❶ in the Actions column. The Edit Notification dialog box appears, showing the Notification Name and the various Tier(s):
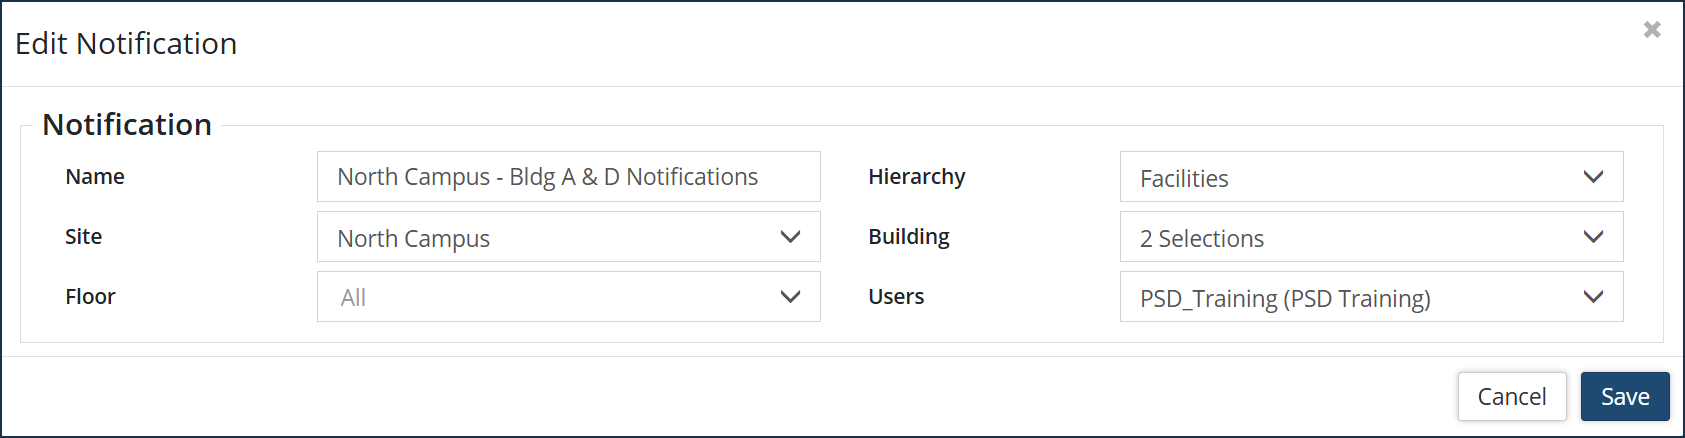
- Edit the Name as desired, then proceed to click the applicable dropdowns to show and edit the selected item(s) in the Hierarchy and/or Tier names.
- To add or remove an item from a Tier:
- Click the dropdown associated with it.
- Hold down the Ctrl key and click on a blue-shaded item to unselect it or click on an unshaded item to select it.
- Repeat steps as required.
- Click Save.
To remove a notification
- Click the remove icon ❶ in the Actions column.
- The Remove Notification box appears.
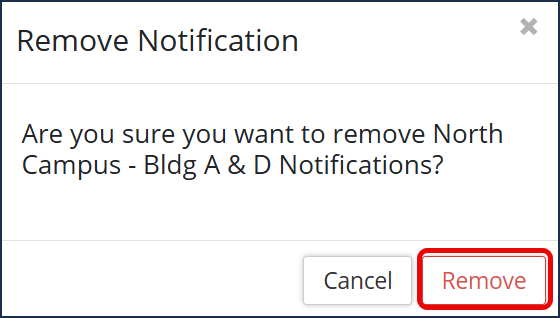
- Click Remove.


