
Overview
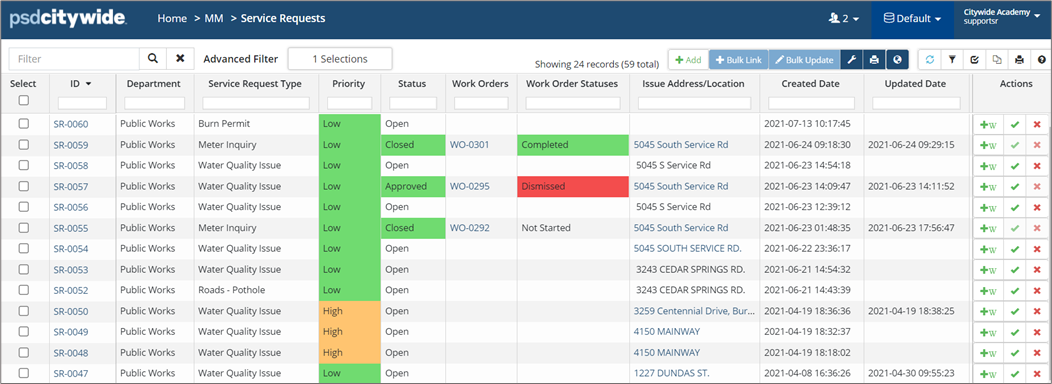
When a customer calls to request service or report an issue, a Service Request is entered to follow the request through its investigation, planning, and resolution. When creating service requests, automatic notifications can be configured and sent to the applicable contact to review and if necessary, approve the service request into an actionable work order. Service requests that do not require further action can be dismissed or closed. Records of all calls are retained within the system and are available for information retrieval and reporting. To view all service requests:
- Click Home 🢡 Maintenance 🢡 Service Requests.
- Users with appropriate Permissions can:
- Search, view, export, and print the list of service requests
- Add new service requests
- Bulk link multiple service requests to a single work order
- Bulk update multiple service requests at once
Add a New Service Request
To add a new service request from the Service Requests grid:
- Click +Add on the service grid toolbar. The New Service Request wizard opens.
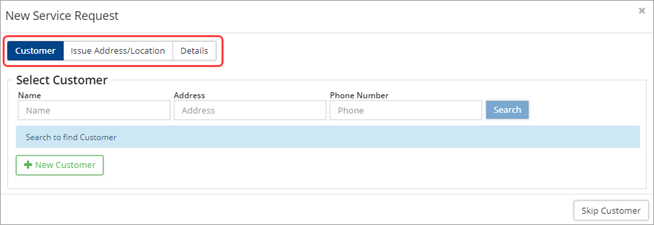
- Add Customer: Customers can be external, that is a member of the community at large; or internal, a staff member within the municipality or town. Three options are available when completing the Customer section of the wizard:
- Select an existing customer ❶: Enter a name, address and/or phone number then click Search. Select the appropriate contact from the resulting list of matches.
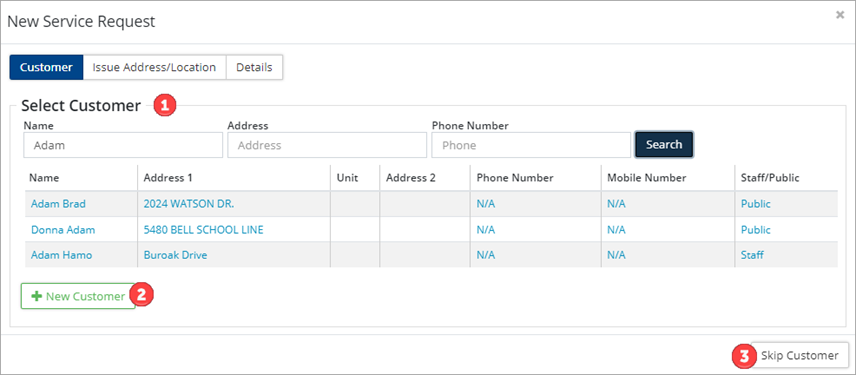
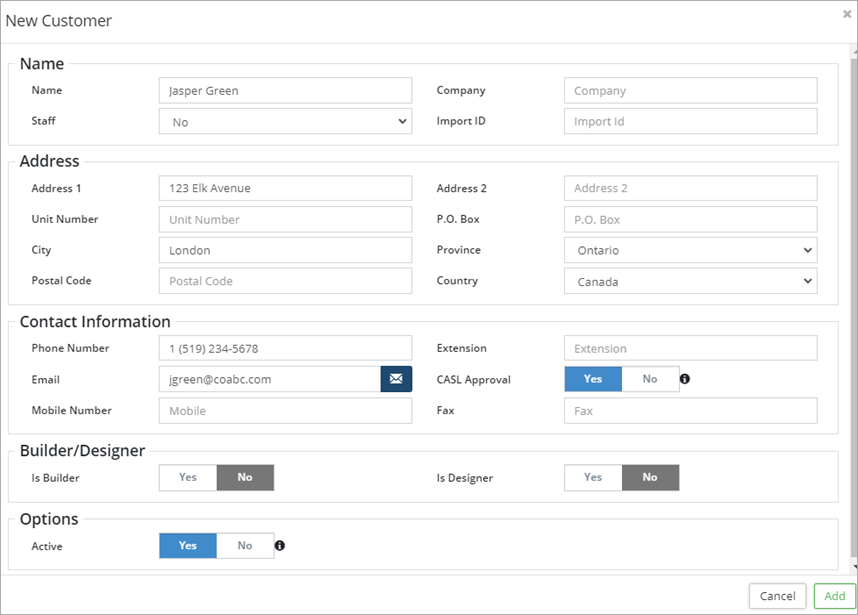
- Add a new customer ❷: Click + New Customer to open the New Customer window. Enter contact information for the new customer.
- Skip Customer ❸: If customer information is not needed, click Skip Customer in the lower right corner.
- Select an existing customer ❶: Enter a name, address and/or phone number then click Search. Select the appropriate contact from the resulting list of matches.
- Enter and/or review customer details. Use the Change Customer button in the lower left corner of the window to update information with a different customer.
- If follow-up is required, click the Request Customer Follow Up dropdown at the bottom of the wizard and select the appropriate option from the drop-down list.

In accordance with Canada’s Anti-Spam Legislation (CASL), any customer that is set to receive system generated emails via the built-in feature SR follow up messages, must have the CASL Approval toggle set to Yes for that Customer.
- Click Next.
- Enter the Issue Address/Location (i.e., the location where service is required). Options include:
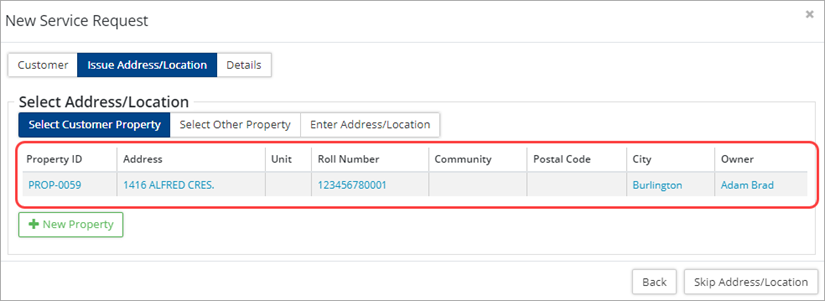
- Select Customer Property: Use this option when the issue address is the customer’s owned/rented property. Click the linked property information displayed in the table.
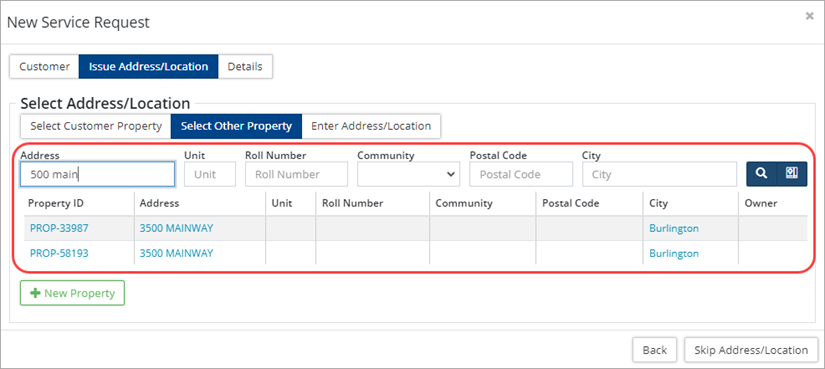
- Select Other Property: Use this option when the issue address is different from the Customer’s address. Search by Address, Unit, Postal Code, Roll Number or City.
Use Map Search to select the issue address using a linked parcel layer in GIS.
If the property does not exist in the database, click + New Property and enter new property information. Click Add when done.
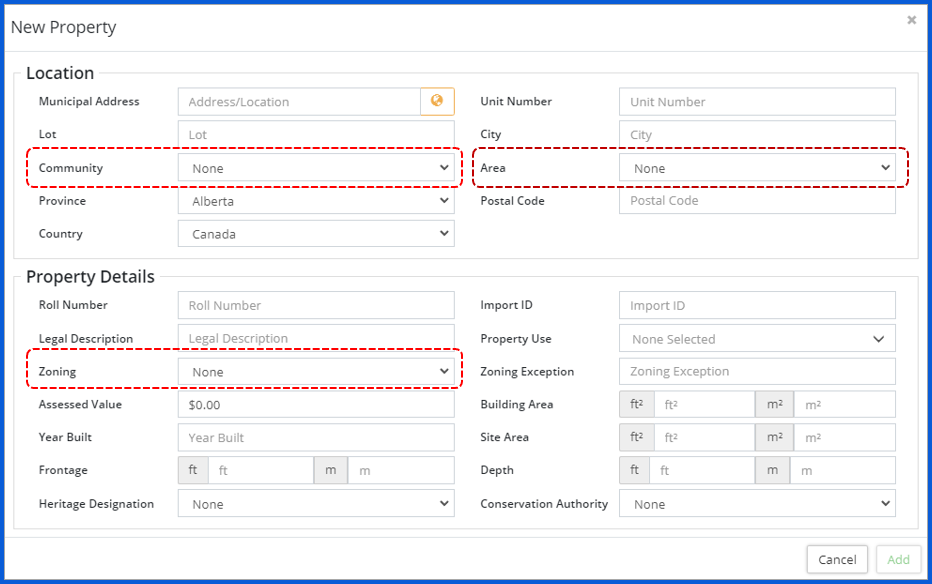
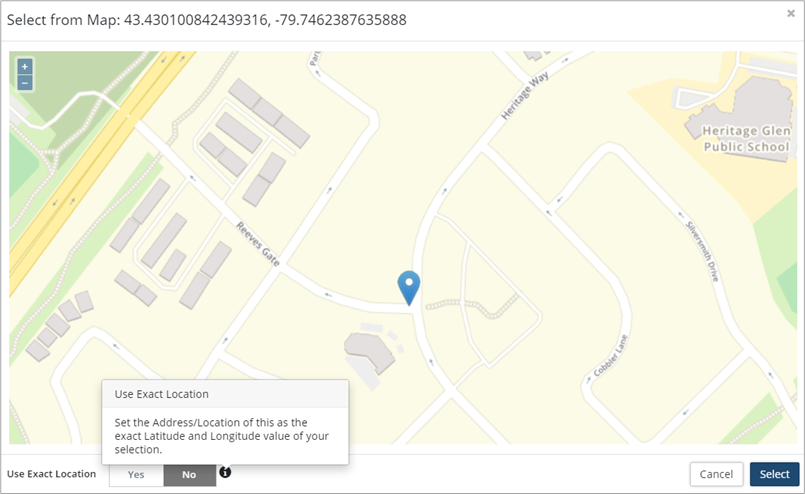
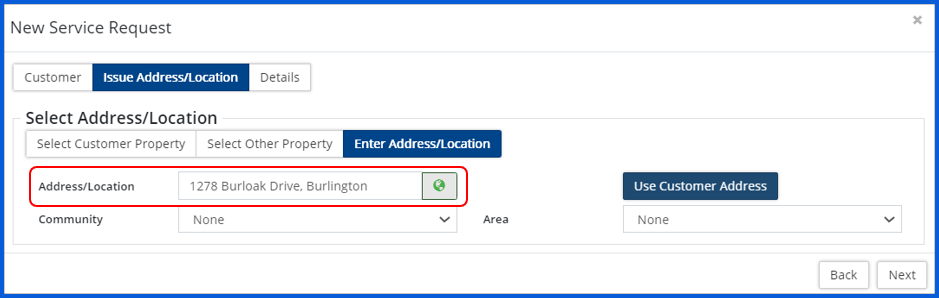
Some setup is required for the Community, Area, and Zoning fields. Navigate to Home 🢡 Maintenance 🢡 (Manage) Resources to add and manage options for these fields. - Enter Address/Location: Use this option to manually enter the issue address. Enter an address in the Address/Location field and then click to select a location on the map.
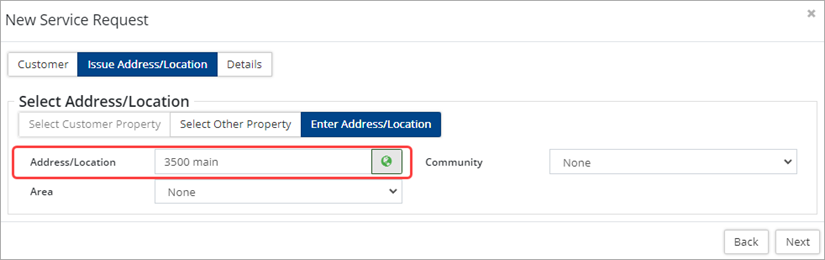
Click on the desired location in the map view. A marker is placed on the closest property address (not the Property itself) as the SR issue location. Click Select to be taken back to the New Service Request wizard. The Address/Location field will populate with the address as selected in the map view. To populate the Address/Location field with the exact coordinates of the marker then toggle Use Exact Location to Yes.
Address/location with Address
Address/Location using Coordinates
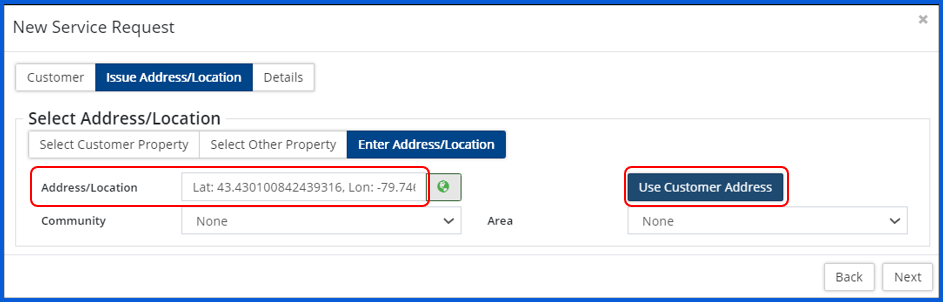
- To use the Customer’s address as the location (not the Property itself) or to select a location close to the Customer’s address on the map, click Use Customer Address.
-
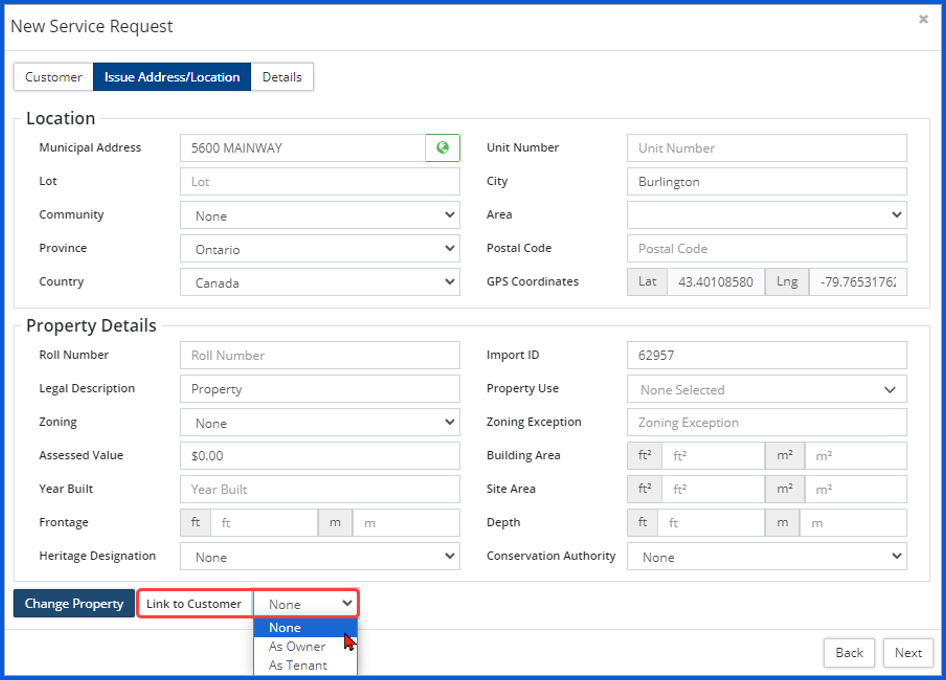
When a new property or a property other than the Customer’s own property is selected, it can be linked to the Customer, using the Link to Customer dropdown field. The property can be linked to the customer As Owner or As Tenant.
- Use the Change Property button in the lower left corner to switch out the selected property information.
- Select Customer Property: Use this option when the issue address is the customer’s owned/rented property. Click the linked property information displayed in the table.
- Click Next.
- Enter Details.
- Click the Select button and choose from a searchable list of SRTs. Or select a Department and Service Request Type. When using the latter method, select a department first so that the Service Request Type field filters accordingly.
- Select a Source for the SR and set a Priority.
- Designate the owner of the SR by selecting from the Responsible dropdown list.
-
Service Request Type details are used to categorize service requests and email notifications, when setup, are triggered based on this information.
- Fill-in Attribute information as needed. Attributes are specific to the selected SR type and are setup at the Service Request Type Attributes can be setup as toggles, dropdown lists, numbers, time, text fields, etc.
-
Attributes at the SR level can be restricted by toggling on the Lock Attributes flag at the SRT level. Mandatory fields will display with a red clipboard icon.
- Add applicable Notes. Refer to the Knowledge Base, set up at the SRT level, for additional information.
- If the SR was resolved on first contact (i.e., on the phone), check þ Resolved on First Contact and it will be entered into the system with a Closed.
- Once Customer, Issue Address/Location, and Details have been entered click Add. The SR is added to the database and a SR # is automatically assigned. The service request opens and is displayed on screen.
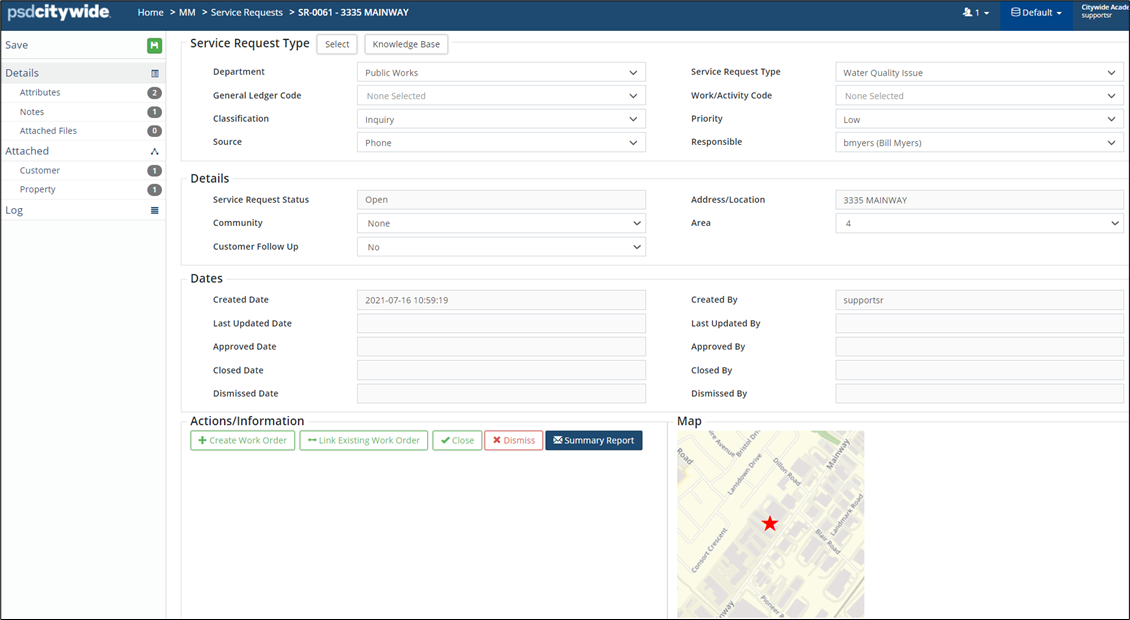
Service Request Details
Once a newly created SR has been added, the system assigns a SR# and opens the service request on screen. Users can review and manage service request information, and attach files and notes, as needed.
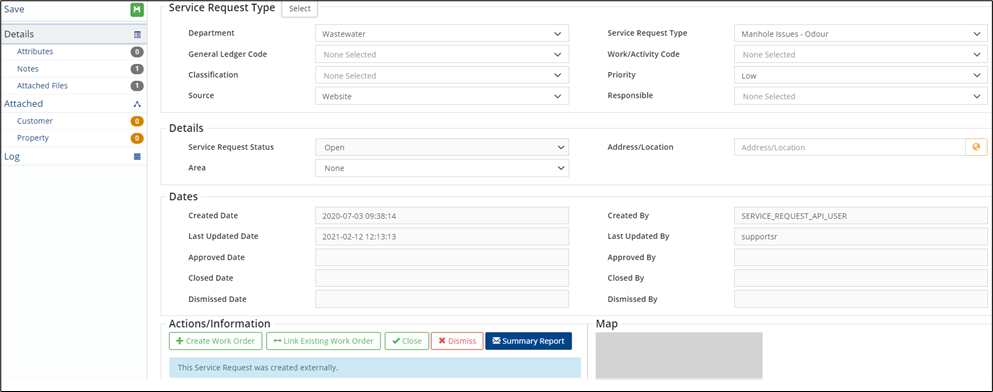
Details
The Details page displays general information related to a service request, such as Service Request Type, Details and Dates. Users with the appropriate permission levels can view and edit fields as needed. Action buttons along the bottom, allow users to Create a new Linked Work Order, Link Existing Work Order, Close, Dismiss or print a Summary Report of the current service request.
To modify information:
- Click the field to be updated, and type/make your new selection(s).
- Click Save in the top left to submit your change(s).
Attributes
Additional information is captured in this section. Users with the applicable permission levels can also add or remove attributes from this screen. Consider locking attributes at the SRT level.
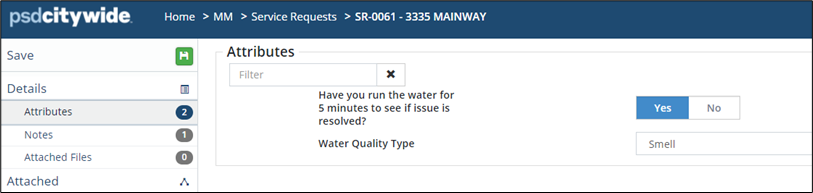
- To update an Attribute, make your new selection(s) or fill in the new corresponding details.
- To remove an Attribute, click on the Remove/x icon to the right of the field.
- To add an existing Attribute to the Work Order, select from the list of Attributes then click the Select Attribute button . This list will be limited to those that are set to show up in All and/or Maintenance under Home 🢡 Attributes.
- If the Attribute does not currently exist in the list, click Add New Attribute , complete the form and click the Add
- Click Save to submit your change(s).
-
If attributes are locked at the Service Request Type level, then users cannot add or create additional attributes.
Notes
The Notes screen is used to add notes/comments, documenting the history of action taken for the service request. Users with the applicable permissions can edit or delete notes.

- To add a new note, click + New Note in the top right corner of the Notes screen.
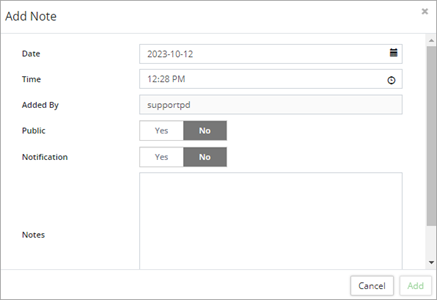
- The Date, Time and Added By fields auto-populate. Use the calendar or clock icon to adjust the date or time. The Added By field cannot be modified.
- Enter comments and details into the Notes
- Toggle the Public flag to Yes when the note should be made available for anyone to view.
- Set the Notification flag to Yes and the system will send out an email notification each time a note is added to the SR.
- Click Add.
To manage notes:
- Click Edit
 to modify or make the note Public. Click Save when done.
 - To remove a note, click Delete
 .
.
Attached Files
Attachments associated with the service request are managed on the Attached Files screen. Users can download, preview, edit and delete attached files. Files can be uploaded from the web or mobile application.
- To add an attachment, click + New File in the top right of the Attached Files screen.
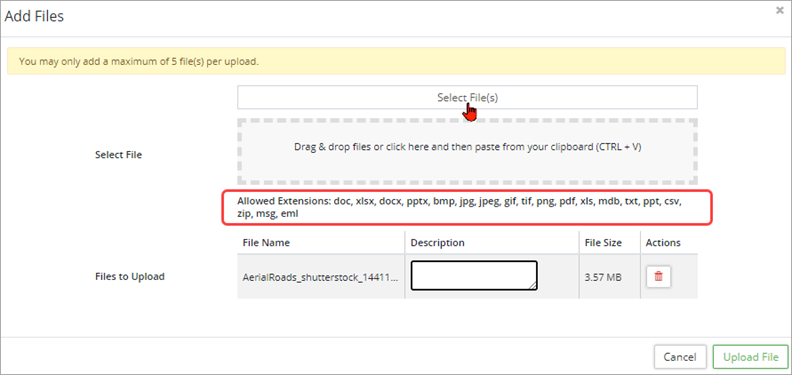
- Click Select File(s) and navigate to the file(s) you would like to upload or simply Drag & Drop files onto the Add Files
-
A list of file extensions is shown in the Add Files window. If your file type is not listed, please contact PSD Citywide staff.
- Once a file has been added, enter a Description for the file.
- Click Upload File.
Attached
The Attached section provides access to general information related to attached Assets, Customer, Property, and linked Work Orders.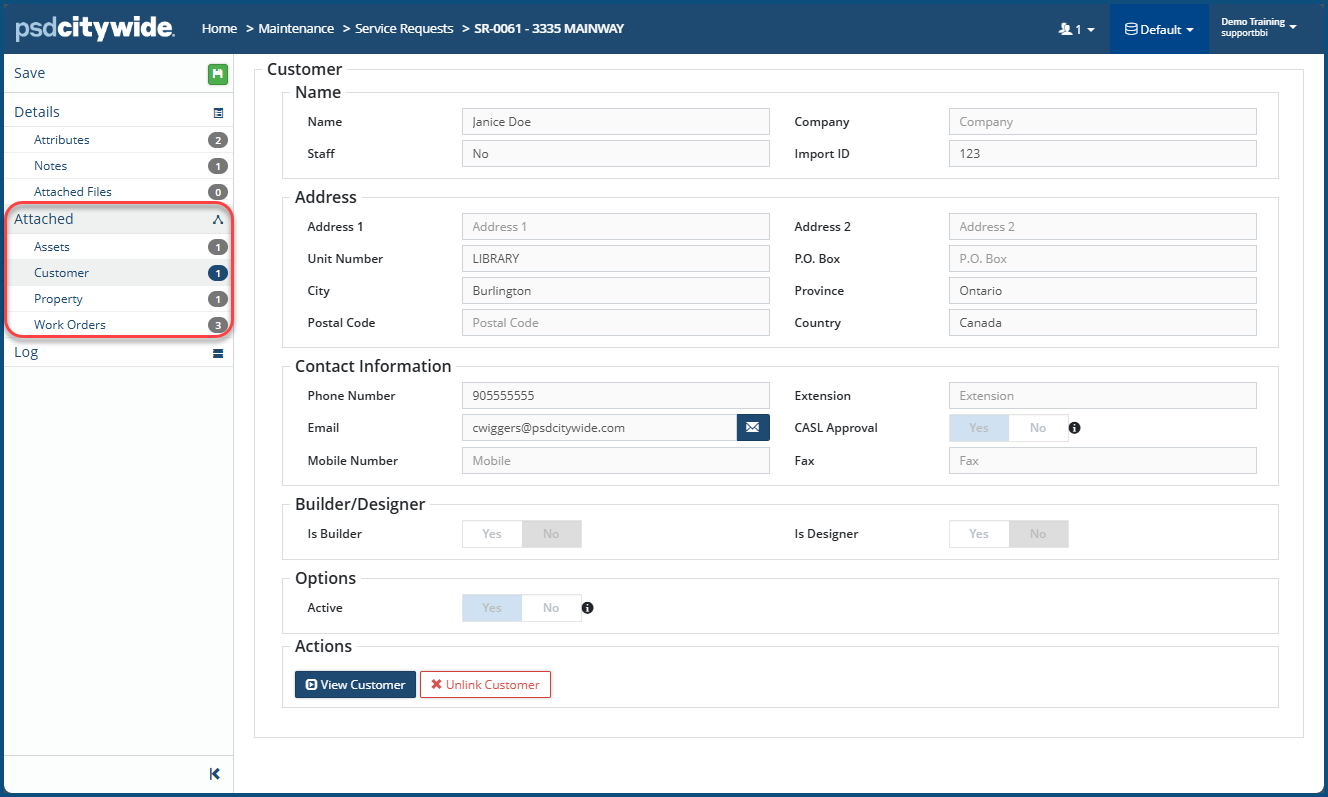
Assets
Assets can be views on the Assets screen. Users can navigate to the Assets screen to add or remove assets associated with the service request, or render them out of service.
Clicking on the Asset ID on the Assets page will open up the asset where all the details pertaining to it can be seen.
Customer
Customer details can be viewed on the Customer screen. Users can navigate into the customer profile and/or unlink the customer from the service request.
To navigate into the current customer profile (dependent on permission settings)
- Click View Customer at the bottom of the Customer
To remove and/or select a new customer:
- Click X Unlink Customer at the bottom of the Customer
- A prompt confirming the unlinking action displays. Click Unlink. Customer information is removed.
- Select a new customer:
- Search for an existing Customer by Name, Address and/or Phone Number.
- Add a new customer using the + New Customer
- Skip Customer by leaving the screen blank.
- Click Save to submit your change(s).
Property
Attached property information can be viewed on the Property screen. Users can navigate into the property details screen and/or unlink the property from the service request.
To navigate into the current property details screen (dependent on permission levels):
- Click View Property at the bottom of the Property
To select a new property:
- Click X Unlink Property at the bottom of the Property
- Select a new property:
- Search for an existing property by Address, Unit, Postal Code and/or City.
- Add a new property using the + New Property button.
- Skip Property by leaving the screen blank.
- Click Save to submit your change(s).
- When viewing Property Details, the External Documents (link) field can be utilized by including a URL link for (eg.) a document management system to access historical data/files. A bulk upload of External Document (link) can be done using the Upload Center template for Properties.

Route
Route Patrols that are linked to the service request, are listed, and can be viewed on the Route screen.
Work Orders
Work Orders that are linked to the service request are listed, and can be viewed on the Work Orders screen. At a glance, users can see the priority, status, and completion date of each linked work order. Click the Work Order # to navigate into the work order and view all details.
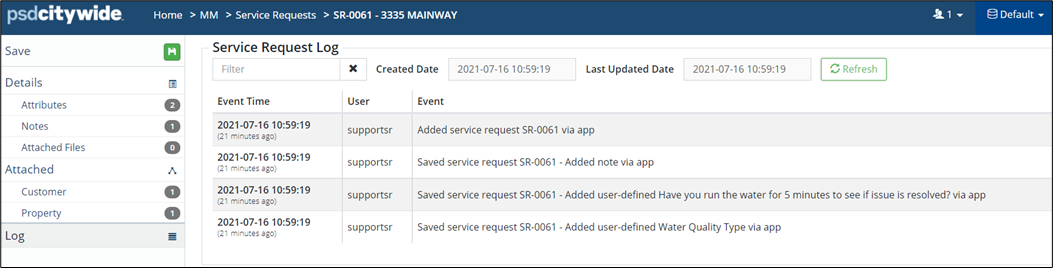
Log
Citywide automatically logs every change made to the database. This section contains all the event data related to the service request (i.e., event time, user, and specific event).
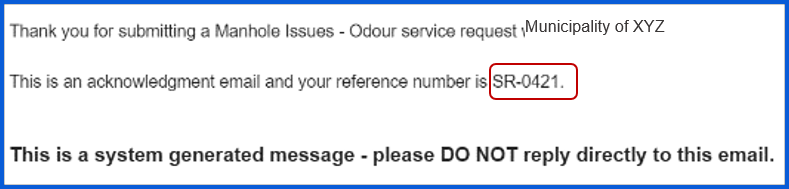
Service Request from the Citizen Request Portal
When a customer submits a request on the Citizen Request Portal (CRP), an acknowledgment email is automatically sent to the customer and includes the Service Request ID as a reference number.
To view CRP generated service requests:
- Navigate to Home 🢡 Maintenance 🢡 Service Requests.

- Filter the grid to show only service requests coming in from the CRP by entering Service_Request_API_User in the Created By
Validate the Service Request
- Locate the service request to be validated. Click the SR# to view all details.
- Click Notes to see the information collected from the CRP portal. A description of the issue as submitted by the citizen is located under Details.
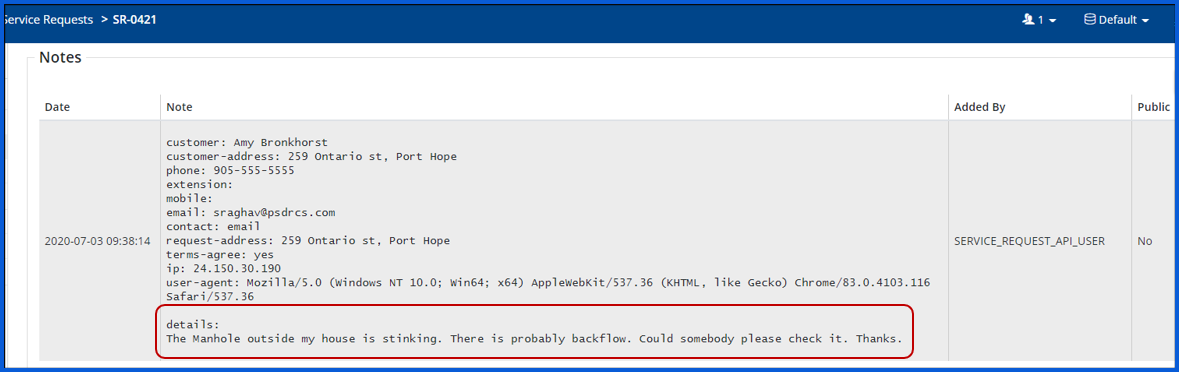
- Click Attached Files to view any images submitted by the citizen.
- Customer and Property will have an orange badge in the navigation pane along the left which indicates that items are pending.
Attach Customer
To view and validate Customer information submitted through the CRP:
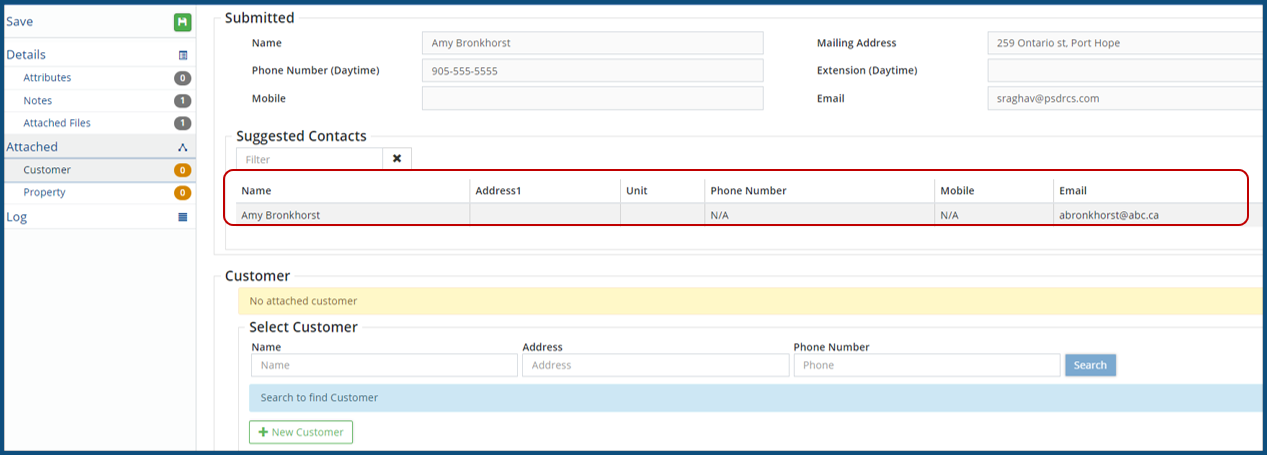
- Click Customer in the navigation pane. Information submitted by the citizen is shown in the Submitted
- The Suggested Contacts section displays any matching records from the Customer listing stored in the database. Select the correct name(s) from the suggested list.
- If the suggested options are incorrect, use the search tool in the Customer section to locate the appropriate contact information. Or click +New Customer and add a new record using the personal details submitted by the citizen.
- If the suggested options are incorrect, use the search tool in the Customer section to locate the appropriate contact information. Or click +New Customer and add a new record using the personal details submitted by the citizen.
Attach Issue/Request location
The Issue/Request location could be a property address or a location like a road intersection. Once the property is validated and linked to the SR, the orange indicator will turn off.
Property address
To view and validate Property information submitted through the CRP:
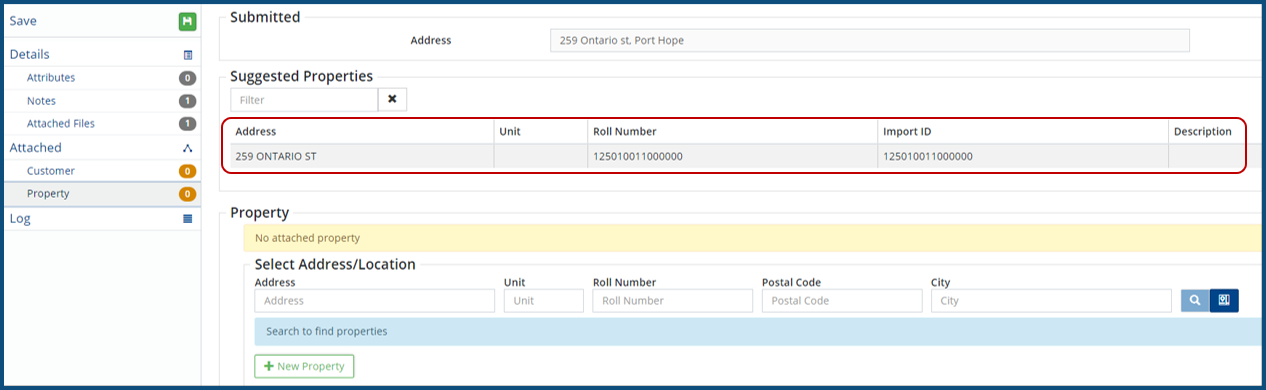
- Click Property in the navigation pane. Property address submitted by the citizen as the issue location is shown in the Submitted
- The Suggested Properties section displays any matching records from the Property data in the database. Select the correct property from the suggested list.
- If the suggested options are incorrect, use the search tool to text search the address or roll number in the Property Or add a new property by clicking +New Property.
- If the suggested options are incorrect, use the search tool to text search the address or roll number in the Property Or add a new property by clicking +New Property.
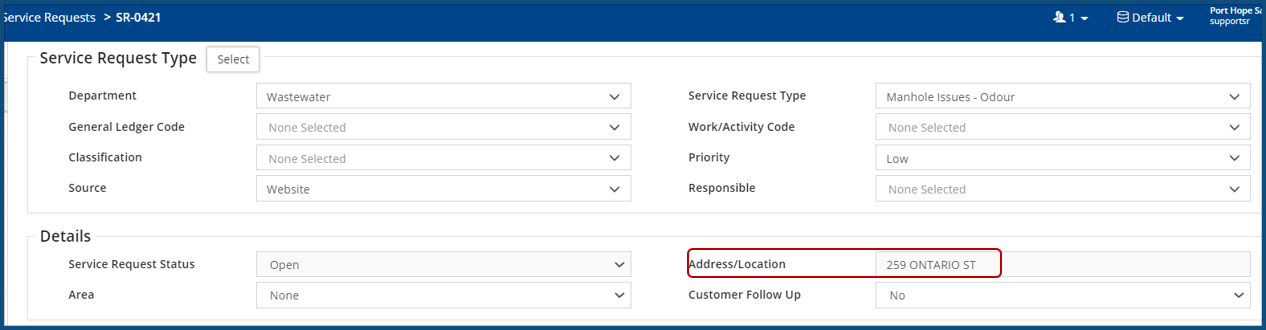
- Once Customer and Property has been validated and the appropriate information linked to the SR, the orange badge in the navigation pane will change to grey.
- Click Details in the navigation pane to see the service request Address/Location field updated with the selected property address.
Address/Location
When a citizen provides a street location rather than a property address, (i.e., the intersection of Hope and William), search one of the street names in the GIS map.
- Enter a street name in the Address/Location field found on the Details screen.
- Click the Globe icon.
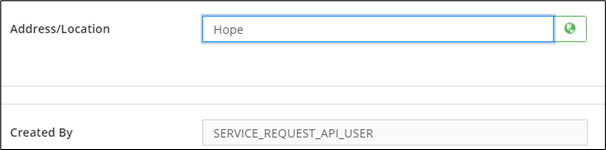
- Select the exact issue location from the map. Click to position the marker and then click Select.
- Save the service request.
Additional Tools on the Service Request Grid
Bulk Update
Citywide Maintenance Admins or any user with the appropriate permission level can bulk update SRs. To bulk update SRs:
- Use the Select column to check each þ SR to be updated. Or filter the grid and click the Select All checkbox in the column header.
- Click
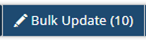 in the top right. The button displays the total number of records selected in brackets (e., (10)).
 - Several Service Request Type fields as well as any Request Details fields can be updated. Make all necessary updates and click Apply.
- Click Apply when prompted to confirm the changes.
Bulk Link
The Bulk Link button is used to quickly link multiple service requests to one existing work order (WO). To bulk link:
- Use the Select column to check each þ SR to be linked. Or filter the grid and click the Select All checkbox in the column header.
- Click
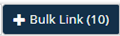 in the top right corner. The button displays the total number of records selected in brackets (i.e., (10)).

- Search for the WO to be linked to the selected SRs using a work order #, department, etc. All work orders returned in the search will be listed.
-
Use the +New Work Order button in the lower right of the Bulk Link window to link the selected SRs to a new work order.
- Click on the appropriate WO. All selected SRs will be linked to the work order.
Default Attributes
The Default Attributes option is used to assign an attribute value to multiple SRs at once. Defaults are applied to the attributes of SRs currently showing in the grid.
To apply a default attribute value in bulk:
- Filter the grid (or select the appropriate SRs) to show only those SRs to be updated with the new attribute information.
- Click Default Attributes
 .
.
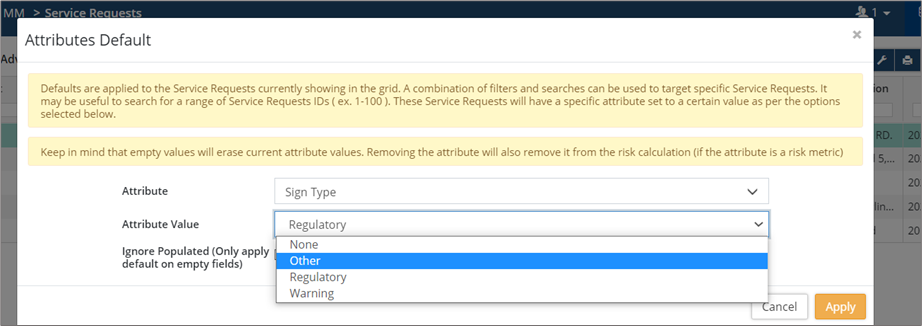
- Select an attribute from the Attribute dropdown list.
- Enter an Attribute Value (dependent on the attribute type).
- SRs with existing attribute values may be ignored by checking Only apply default on empty fields.
- Click Apply to update.


